How to PDF of Photos: Create a Photo PDF
Learn to turn photos into a single PDF using built-in tools, offline editors, or online services. This expert guide from PDF File Guide covers steps, tips, and best practices for high-quality photo PDFs.

Learn how to convert photos into a single, organized PDF. This guide covers straight-forward methods, including batch conversion, using built-in OS tools, and reputable PDF editors. By the end, you’ll have a clean, professional photo PDF file suitable for sharing or printing. Whether you’re compiling travel shots, event galleries, or portfolio images, the steps remain the same. This quick approach adapts to beginners and power users alike.
What is a photo PDF and why it matters
A photo PDF is a document that compiles multiple image files into a single, paginated file. For professionals and hobbyists, it simplifies sharing, archiving, and printing collections of images without needing separate image files on every page. According to PDF File Guide, photo PDFs preserve the visual integrity of photos while providing a universally accessible container that works across devices and operating systems. This makes it ideal for client proofing, event galleries, portfolios, or travel albums. When you create a photo PDF, you gain predictable page sizes, consistent borders, and a cohesive reading flow—elements that help you present your imagery with professionalism and clarity. A well-assembled photo PDF also reduces the risk of lost files and makes distribution easier for teammates or clients.
In practical terms, think of a photo PDF as an organized photo book you can email, upload, or print. It’s particularly useful when the goal is to showcase a sequence, compare different shots, or share a project with reviewers who don’t own specific image-viewing software. The PDF format supports embedded images with various color profiles, and most viewers preserve the original image quality when pages are sized correctly. Your success hinges on planning order, choosing a sensible page size, and using reliable tools to create the document.
Choosing the right method: built-in tools vs. editors
Creating a photo PDF can be as simple as using built-in tools on your computer, or as feature-rich as using a dedicated PDF editor. Built-in options are convenient and fast for small batches: on macOS, Preview can export a selection of images as a PDF; on Windows, the Print to PDF feature in Photos or File Explorer can do the job; mobile devices can often export from the stock photo apps as a PDF as well. If your project demands more control—consistent compression, advanced image handling, metadata, or security options—a dedicated PDF editor or trusted offline tool is worth the investment. In professional environments, using a robust editor provides better control over color management, page dimensions, and final output quality. Regardless of method, maintain consistent page sizes (A4 or Letter) and a uniform orientation to ensure a tidy, print-ready document. The PDF File Guide analysis shows that starting with a clear plan and using the right tool reduces rework and yields predictable results.
- Built-in tools: Quick, no-install options for small projects. Great for rough proofs and quick shares.
- PDF editors: More control, better color and compression settings, and improved accessibility options.
- Online converters: Convenient for occasional use but assess privacy and data security before uploading sensitive photos.
Key takeaway: pick a method that matches your batch size, required quality, and whether you need added features like password protection or searchable text in the final document.
Step-by-step overview: general workflow
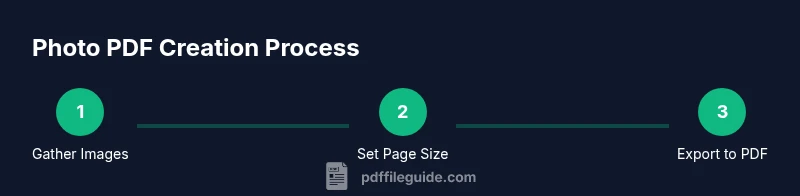
While there are multiple ways to create a photo PDF, the general workflow remains the same: gather images in your preferred order, select your page size and orientation, import the images into a tool, arrange the sequence, tweak image and page settings, export or print to PDF, and finally verify the result. This workflow is adaptable to macOS, Windows, iOS, Android, and web-based options. Keeping a consistent theme—same page size, similar aspect ratios, and uniform margins—ensures a polished final product. PDF File Guide recommends testing a small sample batch first to confirm the workflow and to adjust settings before committing to the full collection. When you standardize these steps, you’ll consistently produce professional photo PDFs across devices.
Best practices for image order, size, and DPI
Order matters: arrange photos to tell a story or present a logical sequence. If you’re unsure about the order, lay out a rough storyboard on paper or in a note before you start. For page size, choose a standard like A4 or Letter to ensure compatibility with printers and viewers. DPI matters: 150–300 DPI is typically sufficient for screen viewing and print; higher DPI increases file size, which may be unnecessary for simple slideshows. If your images are a mix of portrait and landscape, consider using a consistent orientation per section to reduce visual disruption. Finally, maintain color consistency by applying similar color profiles (sRGB is a common, broadly supported choice). The right settings keep your PDF high quality while staying reasonably sized for sharing.
Accessibility and sharing considerations
Accessible PDFs help a wider audience, including people using screen readers. If your photo PDF is primarily image-based, add descriptive alt text for images or include a separate accessibility description on the first or last page. Attach metadata like title, subject, and keywords to improve searchability. When sharing, consider your audience and privacy: avoid online conversion tools for sensitive images unless you trust the provider, and always review the final file for any embedded data you don’t want to expose. PDF File Guide notes that thoughtful accessibility and privacy practices enhance professional credibility and ensure your visuals are discoverable and usable by all.
Common pitfalls and how to avoid them
Avoid mixing very different image sizes without adjusting margins or scaling; inconsistent padding can look unprofessional. Don’t forget to verify that all photos appear in the export—missing pages are a frequent issue when users forget to select all images or when ordering is incorrect. Be cautious with online converters for sensitive material; if you must use them, remove all data afterward and use reputable services with clear privacy policies. Finally, test your final PDF on multiple devices and readers to catch rendering discrepancies, ensuring your photos appear as intended in both digital and print environments.
Tools & Materials
- Photos (image files in JPEG/PNG/WebP, etc.)(Collect and order the images you want included in the PDF.)
- Computer or mobile device with export/print-to-PDF capability(macOS, Windows, iOS, or Android devices all work with the right tool.)
- Page size setting (A4 or Letter)(Choose a standard size for easy printing and sharing.)
- PDF-capable software or service(Built-in tools count; dedicated editors offer more control.)
- Optional image editor (crop/adjust if needed)(Helps standardize image edges and color before compiling.)
- Internet connection (for online tools, optional)(Only if you plan to use a web-based converter.)
Steps
Estimated time: 20-40 minutes
- 1
Gather and sort photos
Collect the images you want in the PDF and arrange them in the desired final order. If helpful, rename files to reflect the sequence. This reduces drag-and-drop errors during import.
Tip: Pro tip: create a temporary folder named with the project title and a date to keep assets organized. - 2
Set page size and orientation
Decide on a standard page size (A4 or Letter) and whether pages should be portrait or landscape. Consistency here makes the PDF look professional and printing predictable.
Tip: Pro tip: use landscape for wide panoramas and portrait for tall images to preserve aspect integrity. - 3
Open your chosen tool and start a new PDF project
Launch the tool you selected (macOS Preview, Windows Print to PDF, or an editor) and create a new, empty PDF or project. If using an online tool, start with a blank document and prepare to import.
Tip: Pro tip: set the default font and margins to zero or a small value for edge-to-edge photos when the tool allows. - 4
Import or add photos
Import the photos in the same order you planned. Some tools support drag-and-drop; others require a menu option to add files. Ensure all intended images are loaded before proceeding.
Tip: Pro tip: keep a thumbnail view open to verify order at a glance. - 5
Adjust image settings and margins
If available, adjust DPI (150–300 for print-friendly results), color handling, and margins. Tight margins maximize photo area, but check print bleed if you plan to print.
Tip: Pro tip: choose a single DPI for all images to avoid inconsistent sharpness. - 6
Export or Print to PDF
Use the tool’s export or print-to-PDF feature to generate the final document. Name the file clearly and select a high-quality setting if prompted.
Tip: Pro tip: test with a small subset of images before processing the entire batch. - 7
Verify and save a copy
Open the resulting PDF to confirm all pages are present and correctly ordered. Save a backup copy with a versioned filename in case you need to revert changes.
Tip: Pro tip: check both on-screen and in print preview to catch layout issues early.
Questions & Answers
What image formats can be included in a photo PDF?
Photo PDFs typically embed images like JPEG, PNG, or TIFF. The PDF stores each image as a page, so ensure the source images are high enough quality for your intended print size.
Photo PDFs usually include common image formats such as JPEG or PNG. Each image becomes a page in the PDF, so make sure your sources are high enough quality for printing.
Can I compress the PDF after creation?
Yes. Many tools offer compression settings to reduce file size. Balance compression with image fidelity, especially for large photo collections intended for print.
Yes, you can compress PDFs after creation. Just balance size and image quality to keep photos clear.
Is it possible to edit a photo after the PDF is created?
Direct editing inside a photo PDF is limited. To adjust photos, edit the original images, then recreate or re-export the PDF.
You typically can’t edit photos inside a PDF easily. Edit the originals and re-export the PDF.
What page size should I use for printing photos?
Use standard sizes like A4 or Letter for broad printer compatibility. For large prints, consider a larger PDF with embedded photos on single pages.
For printing, A4 or Letter is usually best because most printers handle those sizes easily.
Do I need accessibility features in a photo PDF?
If the document is image-heavy, add descriptive alt text for images or include a text description page. Metadata can improve searchability, but it won't replace the image content for screen readers on its own.
If there are many images, add descriptions or alt text so assistive tech can interpret the content.
Watch Video
Key Takeaways
- Plan image order before exporting
- Choose a standard page size for consistency
- Use DPI settings that balance quality and file size
- Verify the final PDF across devices before sharing
- Prioritize privacy when using online tools