How to Make a PDF Fillable
Learn how to create fillable PDFs by adding interactive form fields, testing for cross-reader compatibility, and distributing securely. A complete guide for professionals who edit, convert, and optimize PDF forms.

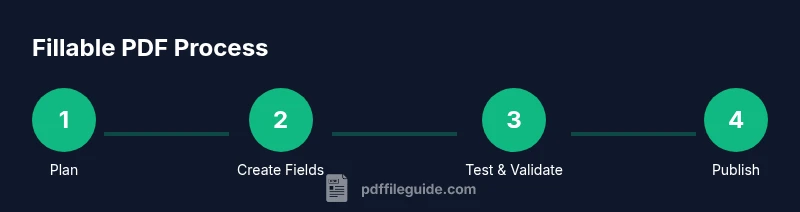
Fillable PDFs can be created by adding interactive form fields with a PDF editor. Start by enabling the form tool, then place text fields, checkboxes, radio buttons, and a signature field, and finally test the fields across readers. This approach works with popular editors and emphasizes accessibility.
Why Make a PDF Fillable
According to PDF File Guide, making PDFs fillable streamlines data collection, reduces manual entry errors, and enhances professional workflows. Fillable forms are especially valuable in operations, HR, legal, and education where consistent data capture matters. When you create a form with clearly labeled fields, tooltips, and accessible structure, you empower readers to enter information accurately on any device. This guidance covers both desktop editors and mobile-friendly workflows, ensuring that your fillable PDFs render correctly in popular readers like Adobe Acrobat Reader, browser-based viewers, and mobile apps. By starting with a clear form plan and testing with real users, you minimize revision cycles and improve data quality across the organization.
Key Advantages of Fillable Forms
Fillable PDFs offer several tangible benefits for individuals and teams. They speed up data collection by letting respondents type directly into fields, which reduces transcription errors. They provide a consistent layout that preserves your original formatting, even when filled out on different platforms. You can enforce input types (numbers, dates, email formats) to maintain data integrity. In short, fillable PDFs turn static documents into dynamic tools that help collect, validate, and route information efficiently. For teams that manage client intake, surveys, or standardized forms, the payoff is measurable in time saved and fewer follow-up questions.
Planning Your Fillable Form
Effective fillable PDFs start with thoughtful planning. Decide which fields are needed, their types (text, checkbox, radio, dropdown, or signature), and how they relate to each other. Create a field naming convention that reflects the data you’ll collect (e.g.,
Step-by-Step Overview (Field Types and Naming)
Understanding field types and naming conventions is essential. Text fields capture free-form data, numeric fields restrict input to digits, checkboxes collect boolean responses, and radio groups allow a single choice among options. Dropdowns constrain input to predefined values. For each field, assign a clear, unique name and provide defaults where appropriate. Establish a logical grouping and set validation rules where supported by your editor to ensure consistency when data is exported to spreadsheets or databases.
Testing, Accessibility, and Compatibility
After building your fillable PDF, test it across devices and readers to verify rendering consistency. Check font availability, field alignment, and tab order to ensure a smooth user experience. Use built-in accessibility tools to verify that labels are attached to controls and that screen readers can interpret the form structure. Compatibility testing should include desktop, web, and mobile viewers, because variations in rendering can affect how form data is captured. Fix issues promptly to avoid QA delays.
Distribution, Signatures, and Security
Distributing a fillable form often involves sharing via email, a website, or a document management system. If you include digital signature fields, ensure the certificate handling aligns with your organization's security policy. Consider restricting editing rights to preserve original layout and prevent accidental changes to non-fillable portions. For sensitive data, enable password protection or encryption where appropriate, and always provide a clear privacy notice about how responses will be stored and used.
Common Pitfalls and How to Avoid Them
Avoid overloading the form with too many fields or inconsistent styles that confuse users. Mismatched fonts, improper tab order, and missing labels are frequent culprits that degrade usability. Always validate that export/import of form data works as expected in your data pipeline and test with real-world scenarios. Finally, keep accessibility in mind by ensuring all controls have visible labels and that the structure remains navigable with assistive technology.
Advanced Features: Calculations, JavaScript, and Signatures
Modern PDF editors support basic calculations, dynamic field visibility, and embedded scripts. Use calculations to auto-fill totals or enforce business rules, and implement conditional visibility to simplify complex forms. However, avoid overly complex scripts that may not run consistently across readers. When using digital signatures, ensure the signature field is properly positioned and includes instructions for signers. Document settings and validation steps for future audits and revisions.
Tools & Materials
- PDF editor with form tools (e.g., Adobe Acrobat Pro or an equivalent)(Ensure the editor supports interactive form creation and field properties.)
- Original non-fillable PDF or a blank canvas(This is the starting point for adding fillable fields.)
- A computer with reliable internet access(Needed to download tools, test, and save changes.)
- Fonts with broad support (optional but recommended)(Use common fonts to prevent rendering differences across viewers.)
- Accessibility checker or built-in tools(Helps verify labels, alt text, and reading order.)
Steps
Estimated time: 45-90 minutes
- 1
Open the PDF in a form-enabled editor
Launch your editor and open the target PDF. Confirm that the document is suitable for forms (i.e., non-scanned or properly OCR’d). This sets the stage for adding interactive fields.
Tip: Save a working copy before editing to preserve the original. - 2
Enable form editing mode
Activate the form tools so you can insert fields. This usually involves choosing a 'Prepare Form' or 'Form Edit' option and selecting a target page.
Tip: Double-check that you’re not accidentally creating layers or annotations instead of fields. - 3
Add text fields with clear labels
Place text fields for name, address, and other free-form data. Provide field names, tooltips, and visible labels to improve clarity.
Tip: Use consistent font sizing and alignment for readability. - 4
Insert checkboxes and radio groups
Create checkboxes for boolean responses and radio groups for single-choice options. Group related fields logically and name them meaningfully.
Tip: Keep a consistent order to facilitate keyboard navigation. - 5
Add dropdowns and date fields
Use dropdown menus for predefined values and date fields with proper formatting. This reduces free-text errors.
Tip: Define formats (e.g., MM/DD/YYYY) and set input masks if available. - 6
Place a digital signature field
Add a signature field in a secure, clearly labeled area. Configure signing options as required by your workflow.
Tip: Prefer signature fields near the end of the form for natural flow. - 7
Set tab order and accessibility attributes
Arrange the tab order to follow a logical reading flow. Attach labels to controls and provide tooltips and alt text where helpful.
Tip: Test with keyboard navigation to ensure a smooth experience. - 8
Adjust appearance and validation
Tune borders, fill colors, and alignment. Add basic validation (required fields, numeric formats) where the editor supports it.
Tip: Avoid overly bright colors that hinder readability. - 9
Test editing and data export
Fill the form as a user would; export the data to CSV or XML if your editor supports it. Confirm exported data matches filled values.
Tip: Run a test with multiple sample responses. - 10
Check accessibility and tags
Run accessibility checks and verify that form controls are tagged for assistive tech. Fix any issues reported by the checker.
Tip: Ensure all labels are visible and unambiguous. - 11
Finalize and save a new template
Save the filled template as a reusable PDF form. Maintain a version history for tracking changes.
Tip: Keep a clean base template separate from filled samples. - 12
Prepare for distribution
Choose how you’ll distribute the form (email, website, or DAM). Include instructions for signers and data handling.
Tip: Provide a short preview or sample filled form to set expectations.
Questions & Answers
What is a fillable PDF?
A fillable PDF contains interactive form fields that users can complete within a PDF reader or editor. It preserves the document layout while collecting data efficiently.
A fillable PDF has interactive fields for users to complete, keeping the layout intact while collecting data.
Do I need expensive software to make a PDF fillable?
Not always. Some editors offer free trials or basic form tools that cover essential fields. For advanced features like calculations or signatures, a paid editor may be required.
You can start with free tools, but advanced features may require a paid editor.
Can fillable PDFs work on mobile devices?
Yes, if fields are designed with standard types and accessible labeling. Test on popular mobile PDF viewers to confirm behavior.
Yes, most fillable forms work on mobile if designed with standard fields and labels.
How do I test accessibility in a fillable PDF?
Use built-in accessibility checkers to verify labels, reading order, and tagging. Ensure screen readers can interpret the form structure.
Run accessibility checks and ensure proper labeling and tagging for screen readers.
What about securing data in a fillable form?
Consider password protection or encryption for sensitive forms and clearly state how responses will be stored and used.
Use encryption where appropriate and explain data handling to users.
Can I add calculations to fields?
Yes. Many editors support basic calculations to auto-fill totals or enforce rules, but test across viewers since behavior can vary.
Yes, with basic calculations; test across viewers for consistent results.
How should I name fields for data extraction?
Use clear, consistent names like customerName or dueDate to simplify exporting data to spreadsheets or databases.
Name fields clearly and consistently to ease data export.
Watch Video
Key Takeaways
- Define field types and names early to reduce rework.
- Test across devices and readers for consistent results.
- Prioritize accessibility with labels, tooltips, and proper tagging.
- Plan distribution, security, and data handling from the start.