How to Make Photos into PDF: A Complete How-To for 2026
Learn a comprehensive, user-friendly workflow to convert photos into a single PDF. From desktop to mobile, discover tools, tips, and best practices to preserve quality while keeping file sizes manageable.

Learn how to make photos into a PDF with a simple, repeatable workflow. You’ll need a device (computer or smartphone), your photos in common formats (JPG/PNG), and a PDF-capable tool (built-in options or free software). This guide covers gathering images, arranging order, export options, and saving a clean, shareable PDF ready for sending or archiving.
What you can accomplish by turning photos into a PDF
If you're asking how to make photos into pdf, the result is a portable, universally viewable document that preserves layout and color across devices. A single PDF can replace a folder full of image files for sharing with colleagues, clients, or family. It also makes archival storage easier, since a well-structured PDF maintains order, keeps captions together, and reduces the risk of image files getting lost. According to PDF File Guide, building a photo PDF is not just about stacking images; it's about crafting a readable narrative. The team emphasizes planning before exporting: decide the order of photos, the orientation, and whether you want captions, bookmarks, or a simple cover page. From that foundation, you can tailor the export settings to balance quality and file size. In professional contexts, photo PDFs serve as proofs, portfolios, or project deliverables. In personal scenarios, they become photo albums you can share via email or cloud links. This initial framing helps you choose the right tools and workflow for your device and environment, whether you're on a desktop, laptop, tablet, or phone.
Understanding image quality and compression in PDFs
When you convert photos to PDF, you control several quality levers: resolution (DPI), color space, compression, and the final file size. Most screens render at 72-96 DPI, but print or high-end display needs 150-300 DPI for crisp detail. JPEG compression balances image fidelity and size; choosing a higher quality setting preserves details but increases the PDF size. In general, keep RGB color space for on-screen viewing and convert to CMYK only if you plan professional printing. Some tools offer options like lossless ZIP compression or aggressive JPEG compression—use these judiciously depending on your goal. Also consider embedded metadata and color profiles; these can affect archiving fidelity and color accuracy across devices. If accessibility or searchability matters, you’ll want to preserve alt text for images and ensure your PDF is text-searchable where possible. By understanding these trade-offs, you can produce a PDF that looks right on a screen, prints well when needed, and remains easy to share online. The guidance here avoids hard numbers unless necessary, focusing on practical outcomes.
Planning your photo set: order, orientation, and spacing
A well-planned photo set prevents post-export chaos. Start by grouping images by the story or topic you want to convey, then decide on the viewing order—chronological, thematic, or by project stage. Orientation consistency matters: mixing landscapes with portraits can look jarring unless you group similar orientations or margin the pages to accommodate rotation. Consider margins and white space; a little breathing room around photos improves readability, especially on small screens. If captions add value, decide their placement early—below the image or in a caption strip at the bottom of each page. For archival work, you may also want to include a title page, a short description, or a table of contents. Finally, check for duplicates, blurry shots, or unneeded frames; removing low-quality images reduces file size and keeps the flow smooth. A thoughtful plan reduces rework during export and yields a more polished PDF.
Getting the right tool: built-in options vs third-party apps
Your platform largely determines the default workflow. Desktop ecosystems often include built-in options to export or print to PDF, which are convenient for quick jobs. If you’re on Windows, the Print to PDF option provides an accessible path without additional downloads.
Desktop workflow: general steps for Windows and
Mobile workflows:
Accessibility, metadata, and searchability in photo PDFs
Accessibility matters for wider reach and long-term usability. When possible, ensure each image has alt text describing its content, and use OCR where appropriate to make text in captions searchable. If your PDF supports bookmarks, add a clear hierarchy so readers can jump to sections quickly. Metadata—such as author, title, and keywords—helps future-proof the file for organization and discovery. Some tools allow you to set language, subject, and keywords during export; populating these fields improves search results in document management systems. If your audience includes screen-reader users, verify that image descriptions are helpful and that the document follows a logical reading order. While not every photo needs metadata, adding it to a photo PDF can improve accessibility and discoverability in a crowded digital workspace.
Common pitfalls and how to avoid them
Even experienced users encounter a few recurring issues. One common pitfall is exporting at too high a resolution, which bloats the file size without delivering noticeable benefits on screen view. Conversely, too low a resolution degrades image clarity, especially on larger displays or printed pages. Another mistake is mixing portrait and landscape photos without a consistent layout plan; this can create an uneven reading experience. Failing to align captions or captions that are too small can reduce legibility. If you’re compressing aggressively to shrink the file, you may notice color shifts or banding. To avoid these issues, preview the PDF at multiple sizes, test on different devices, and keep backups of the original photo set. Finally, skipping accessibility steps may limit who can use the final document; consider alt texts and bookmarks as part of the export workflow.
Sharing, archiving, and future-proofing your photo PDFs
After you finalize the PDF, consider a few best practices for sharing and long-term access. Use a consistent naming convention and store the file in a clearly organized folder structure, with a separate archive copy if necessary. If sensitive content is involved, apply appropriate protection and sharing permissions. For best long-term readability, choose a widely supported PDF version and avoid proprietary features that may not be accessible in older readers. Regularly backup the PDF and test it on multiple devices and apps to ensure it remains usable as software evolves. By following these steps, you’ll sustain the usefulness of your photo PDFs for years to come.
Tools & Materials
- Image set(Photos in JPG or PNG format; high-resolution preferred)
- Device(Computer or smartphone with a PDF-capable app)
- PDF tool(Built-in print-to-PDF or export-to-PDF option, or a lightweight third-party app)
- Optional: captions or metadata plan(Prepare captions or a short description if needed)
Steps
Estimated time: 20-40 minutes
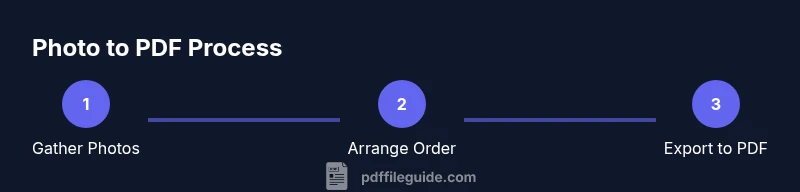
- 1
Gather photos and check quality
Collect the images you want to include and review them for clarity, exposure, and framing. Remove duplicates or badly blurred shots to keep the final PDF concise.
Tip: Create a temporary folder to keep your selected images organized before starting the export process. - 2
Decide order and orientation
Place images in the sequence that best tells your story or the order required by your use case. Decide if you’ll maintain portrait or landscape orientation throughout or mix with a consistent layout.
Tip: Preview the order on screen to ensure the visual flow reads smoothly. - 3
Choose export settings
Open your PDF tool and choose export-to-PDF or print-to-PDF. Set the resolution (DPI) appropriate for the intended use, consider color space, and decide whether to include a cover page or captions.
Tip: A middle-ground DPI (around 150-300) balances quality and file size well for most uses. - 4
Add captions, bookmarks, or metadata
If your tool supports it, add captions under each image, bookmarks for quick navigation, and basic metadata like title and keywords.
Tip: Keep captions short and consistent to maximize readability. - 5
Export and save
Export the file as PDF, naming it descriptively and saving a backup copy. Check the exported file for visual fidelity and page order.
Tip: Open the PDF on another device to confirm the export preserved details. - 6
Review and adjust if needed
If you notice anything off (blurry images, misordered pages, or missing captions), re-open the project, adjust, and re-export.
Tip: Don’t hesitate to iterate once you’ve seen the result in practice.
Questions & Answers
What is the best method to convert photos to PDF on Windows?
Windows users can use the built-in Print to PDF feature, which requires no extra software. You can arrange images in your photo viewer or editor, then choose Print and select Microsoft Print to PDF as the printer. Adjust settings like orientation and size before saving.
On Windows, use Print to PDF to create a document from your photos without extra software.
Can I combine photos from different devices into one PDF?
Yes. Move all photos to a single folder on one device, or use a cloud-based tool that imports from multiple sources. Ensure consistent resolution and orientation for best results, and then export as a single PDF.
You can combine images from multiple devices by gathering them in one place before exporting.
How can I optimize PDF size after conversion?
Choose a moderate DPI, use standard compression, and remove unnecessary metadata. Some tools also offer ' Optimize for web' options which reduce file size while preserving on-screen quality.
To shrink the PDF, lower the resolution and enable sensible compression.
Is there a risk of losing image quality when converting to PDF?
Quality loss can occur if you choose aggressive compression or too low a DPI. Start with mid-range DPI (150-300) and test views on different devices to ensure acceptable clarity.
Yes, excessive compression can reduce clarity; test your result first.
Do I need special software to create PDFs from photos?
No. Many devices include built-in options to export or print to PDF. Third-party apps offer extra features, but basic needs can be met with free, built-in tools.
Often, built-in tools are enough to convert photos to PDF.
How can I add captions or annotations to a photo PDF?
Use the export tool’s caption feature if available, or insert captions as a text layer below each image. Bookmarks can also help navigation for longer PDFs.
Captions and bookmarks improve readability and navigation.
Watch Video
Key Takeaways
- Plan order and orientation before exporting
- Balance image quality and file size with DPI choices
- Use captions and bookmarks to improve accessibility
- Preview on multiple devices to ensure fidelity
- Back up the final PDF and original images