How to Change Image to PDF: A Complete Guide
Learn practical steps to convert images into PDFs on Windows, macOS, and mobile. Compare methods, preserve quality, and verify results with offline and online options. PDF File Guide provides a clear path for professionals.

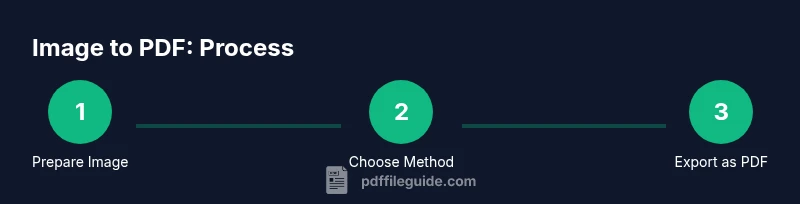
Learn how to change an image to a PDF using built-in tools, free online converters, or desktop software. This guide covers selecting the right method, preserving quality, and verifying the result. By the end you’ll convert a single image or batches quickly, safely, and with predictable output. If you’re asking how to change image to pdf, this page shows a practical path. According to PDF File Guide, mastering image-to-PDF conversion saves time in daily workflows.
Why changing image to PDF matters
If you’re asking how to change image to pdf, converting your image to PDF preserves layout, fonts, and color so it can be reliably shared, printed, or archived. PDFs are universally viewable, maintain integrity across devices, and support compression options to control file size. According to PDF File Guide, understanding the right workflow reduces errors and saves time in daily document tasks. In this guide we explore practical methods for Windows, macOS, and mobile so you can choose a path that fits your hardware, privacy needs, and whether you work with single images or batches.
Choosing the right method: offline vs online
There are three broad approaches: offline desktop software, built-in OS features, and online converters. Offline methods tend to offer better privacy and batch processing, while online tools can be faster for a one-off task on a device without PDF software. When selecting a method, consider file sensitivity, internet access, batch size, and whether you need additional features like image compression or password protection. The right choice balances convenience, security, and output quality.
Built-in options: Windows, macOS, and mobile
Windows users can convert images to PDF using the Print dialog with a PDF printer like Microsoft Print to PDF or a third-party driver. On macOS, Preview provides a straightforward path: open the image, choose File > Export as PDF, and customize the name and location. Mobile devices add convenience through share/export options and dedicated apps; many phones offer a print-to-PDF feature or the ability to save as PDF directly from the photo gallery. These built-in features often require no extra installations and work offline.
Dedicated apps and offline tools
If you need more control—such as batch processing, merging multiple images into one PDF, or adjusting compression—consider offline software like Adobe Acrobat, Foxit, or the free Preview app on macOS. These tools provide advanced options for page size, margins, orientation, and color management. When privacy matters, offline apps reduce exposure of your images to cloud services and keep sensitive content on your device.
Quality, page size, and color settings
Before you convert, decide on your target page size (A4, Letter, etc.), orientation (portrait or landscape), and color mode (RGB for screen viewing, CMYK for printing). If you’ll print the PDF, ensure you select a suitable DPI for image clarity, typically around 300 DPI for photographs and higher for sharp text. If the source image is already high-resolution, your PDF will maintain quality after compression; if not, consider upscaling options cautiously to avoid noticeable artifacts.
Accessibility and security considerations
For accessibility, include meaningful document structure, alt text for images embedded in PDFs, and tagged PDFs when possible. For security, password-protect PDFs containing sensitive content, and review permissions to restrict copying or printing as needed. If you anticipate sharing widely, keep a balance between security and usability to avoid frustrating recipients.
Troubleshooting common issues
If a PDF seems blurry, try lowering compression or increasing the DPI during export. If pages don’t align, check page size and margins before exporting. For large image batches, consider processing offline to avoid upload limits or timeouts on online converters. When a PDF won’t open, update your PDF viewer or try a different program to verify file integrity.
Tools & Materials
- Source image file (JPEG, PNG, TIFF, etc.)(High-resolution preferred (300–600 ppi) for print-ready PDFs)
- Device (Windows, macOS, or mobile) with an image viewer(Ensure the device can access a PDF-capable tool)
- PDF output method (Print to PDF or dedicated software)(Use built-in OS feature like 'Print to PDF' or apps such as Preview, Acrobat, or an offline converter)
- Online conversion option (optional)(Use cautiously for non-sensitive content; review privacy terms)
- PDF viewer to verify output(Adobe Reader, Preview, or any modern browser)
- Optional: PDF editor for optimization or metadata(Useful for adding bookmarks, metadata, or compression)
Steps
Estimated time: 15-25 minutes
- 1
Collect your image file
Gather the image you want to convert and ensure it’s the correct version. If you have multiple images, decide whether you want a single PDF with all pages or separate PDFs per image. Rename files if needed to keep your workflow organized.
Tip: Tip: Work with the highest-quality version you have to minimize quality loss later. - 2
Choose your conversion method
Decide between offline tools (recommended for privacy or batch tasks) and online converters (fast for a single image). If you’re using a shared or public computer, offline methods are generally safer for sensitive content.
Tip: Tip: Prefer offline methods for confidential documents to avoid uploading your images to the cloud. - 3
Set output preferences
Before exporting, set page size, orientation, and color mode. If you’ll print, select a print-ready profile and ensure the DPI is appropriate for the target medium. For mobile apps, check that the export includes all pages in the intended order.
Tip: Pro tip: Use consistent page size across all images to avoid reordering later. - 4
Export or print to PDF
Use the export function in your app or the Print dialog and select 'Save as PDF' or a PDF printer. Name the file clearly and choose a destination folder you’ll remember. Wait for the process to complete without interrupting the operation.
Tip: Pro tip: If the app offers compression options, start with moderate compression to balance quality and file size. - 5
Verify the PDF output
Open the resulting PDF in a viewer and skim through every page. Check for text legibility, image clarity, and correct page order. If something looks off, re-export with adjusted settings or try a different method.
Tip: Pro tip: Enable two-page view to confirm alignment across spreads. - 6
Secure and optimize
If needed, password-protect the PDF and apply basic optimization to reduce file size. Save a copy of the original image in case you need to re-export with different settings later.
Tip: Warning: Passwords should be stored securely; never reuse default passwords on sensitive documents.
Questions & Answers
What is the easiest way to convert an image to PDF?
For many users, the simplest method is to use the built-in Print to PDF feature on Windows or macOS, or a single tap export on mobile. These options require no extra software and work offline. If you need more control, dedicated apps provide additional settings.
The easiest way is the built-in print-to-PDF on your device. If you want more control, use a dedicated app.
Can I merge multiple images into a single PDF?
Yes. Most tools allow you to add multiple images as successive pages. Arrange them in the desired order before exporting or printing to PDF. This is ideal for creating reports or image galleries in one file.
You can merge multiple images into one PDF by adding them in order before exporting.
Do I need internet access to convert an image to PDF?
Offline methods (Print to PDF or desktop software) do not require internet. Online converters do require connectivity, so reserve them for non-sensitive tasks or when you don’t have desktop tools available.
No internet is needed if you use offline tools. Use online converters only when privacy isn’t a concern.
Which image formats are supported for conversion?
Most common formats like JPEG, PNG, and TIFF are broadly supported by both built-in tools and third-party apps. Some tools also accept BMP or GIF, but check the specific program’s documentation for limitations.
JPEG, PNG, and TIFF are broadly supported; other formats depend on the tool you use.
How can I ensure the resulting PDF is accessible?
To improve accessibility, use properly tagged PDFs, add alt text to images where possible, and provide clear document structure. Some tools offer accessibility features that can generate tagged PDFs automatically.
Make sure the PDF is tagged and images have alt text where possible.
What should I do if the PDF is blurry after compression?
Try exporting with higher DPI or lower compression. Some tools let you preview compression settings before finalizing. If quality remains poor, revert to a less aggressive compression profile.
Increase DPI or reduce compression; preview settings before exporting.
Watch Video
Key Takeaways
- Choose offline methods for privacy and batch tasks.
- Verify output quality and readability before sharing.
- Batch convert multiple images for efficiency.
- Maintain consistent page size and orientation.