Save Photo as PDF on iPhone: A Practical Guide
Learn how to save a photo as a PDF on iPhone using built-in tools. This educational guide walks you through single and multi-photo PDFs, automation with Shortcuts, and best practices for organizing your PDFs.

You can save a photo as a PDF on iPhone using built-in tools without third-party apps. Open Photos, select one or more images, tap Share, choose Print, and pinch out on the preview to create a PDF. From there, share or save the PDF to Files or Books for easy access.
Understanding why you save a photo as PDF on iPhone
According to PDF File Guide, saving photos as PDFs on iPhone provides a stable, universally readable format that preserves layout and quality when sharing with colleagues, clients, or family. PDFs are widely supported across devices and platforms, so converting a photo to PDF can prevent viewing issues that sometimes occur with image formats. This section explains the core reasons to choose PDF for photos: reliable viewing, compact yet high-quality preservation, and straightforward sharing without needing extra software. Understanding these benefits helps you decide when a PDF is the best fit for your workflow.
Quick pathways to save photos as PDF on iPhone
There are a couple of built-in paths that avoid third-party apps. The most common method uses the Photos app and the iOS share sheet via the Print option. A second, less obvious path is to leverage the Files app after exporting the photo as a PDF. Both workflows leverage the same underlying export process, but one emphasizes immediate storage in Files while the other focuses on quick sharing via Messages or Email. Knowing both routes gives you flexibility depending on whether you value archiving or fast distribution.
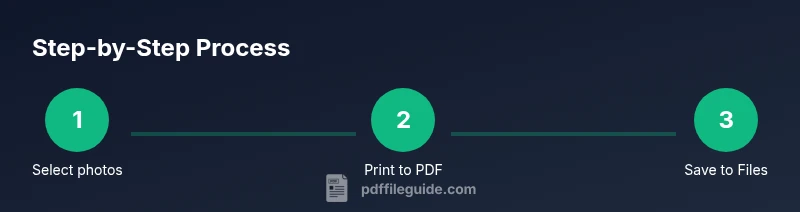
How to save a single photo as a PDF on iPhone (step-by-step)
When you want a single photo as a PDF, start in the Photos app, tap the photo, then tap the Share icon. From the share sheet, select Print to access the printer options. On the Printer Options screen, perform a two-finger pinch-out gesture on the photo thumbnail to reveal a PDF preview. Tap the Share icon on the PDF preview and choose where to save or share the file. This method preserves the original image resolution and creates a one-page PDF.
How to save multiple photos as a single PDF (batch export)
To create a multi-page PDF from several photos, first go to Photos and tap Select, then choose multiple photos. Tap the Share icon and then Print. Use the pinch-out gesture on the first photo to open the PDF preview. Each subsequent page corresponds to the order of your selected images. Tap Share again to save to Files or Books. This approach is ideal for compiling a portfolio, a small catalog, or a travel album.
Advanced path: using Shortcuts to automate PDF creation
If you regularly convert images to PDF, Shortcuts can automate the process. Create or run a shortcut that collects selected images, exports them to a single PDF, and saves the file to a chosen folder. This method reduces repetitive tapping and ensures consistent output naming. While Shortcuts is optional, it’s a powerful way to streamline routine conversions for professionals who handle many images.
Best practices for naming, organizing, and finding your PDFs
A clear naming convention helps you locate PDFs quickly. Include the source date, subject, and version when applicable (for example, IMG-2026-03-17-ProjectProposal.pdf). Organize PDFs in a consistent folder structure within the Files app, using a central folder for export locations and subfolders for projects or clients. Tagging PDFs with descriptive keywords can improve searchability in iCloud Drive and on-device storage.
Privacy, permissions, and data handling when exporting PDFs
Exporting photos as PDFs can involve sensitive images. Be mindful of where you store PDFs and who has access to them. Use strong device passcodes, enable Face ID/Touch ID, and consider storing sensitive PDFs in protected locations or on trusted cloud services with restricted sharing. Always review app permissions and avoid exporting private material to shared devices or public folders.
Troubleshooting common issues and quick fixes
If a PDF export seems to fail, verify that you have enough storage space and that the photo is not corrupted. Restart the Photos app or the iPhone if needed, and retry the export. If the pinch-out PDF preview does not appear, ensure you are using a recent iOS version and that the Photos app has access to the Files app. Updating iOS often resolves subtle export glitches.
Quality and file size: optimizing PDFs for sharing
PDFs made from high-resolution photos can be large. If you need smaller files, consider exporting at a slightly lower resolution or using built-in compression settings when saving to Files. For professional sharing, balance image fidelity with file size. Remember that a PDF with many large images may take longer to upload or email.
Cross-device sharing and accessibility considerations
PDFs are widely viewable on different devices, including Windows, macOS, Android, and web browsers. If you share PDFs with colleagues who rely on screen readers, ensure that the PDF content remains accessible; include descriptive file names and, when possible, add alt text to images embedded in the PDF. Accessibility helps everyone access the content without friction.
Final checklist: quick reference before exporting
- Confirm you’re using a recent iOS version for the most reliable export features.
- Select one or more photos in Photos, then use Share -> Print to create a PDF.
- Save to Files or Books and organize carefully in your chosen folders.
- Consider Shortcuts for batch exports if you perform this task often.
- Verify the PDF appears with the expected pages and resolution before sending.
Tools & Materials
- iPhone with Photos app(Ensure iOS is updated for best export features)
- Files app(Destination for saved PDFs; ensure you have access permissions)
- Internet connection(Needed for cloud storage or cloud-based sharing options)
- Shortcuts app (optional)(Use for automating multi-image PDFs)
Steps
Estimated time: 8-12 minutes
- 1
Open Photos and select one or more photos
Open the Photos app and tap Select. Tap the photos you want to convert, up to all pages you plan for your PDF. This forms the pages of your final document.
Tip: Use 2-finger zoom to quickly select many images at once. - 2
Open the share menu
With your photos selected, tap the Share icon at the bottom left. The share sheet opens with a variety of options.
Tip: If you don’t see the Share icon, swipe up from the bottom edge to reveal more options. - 3
Choose Print to access PDF creator
From the share sheet, scroll to options and tap Print. You’ll land in the printer options screen.
Tip: You don’t need a connected printer; this path is for converting to PDF. - 4
Create the PDF via pinch-out
On the printer preview, perform a two-finger pinch-out gesture on the photo thumbnail to reveal a PDF preview with your pages.
Tip: If you don’t see a PDF preview, ensure you have selected at least one image and try again. - 5
Open the PDF preview and share
Tap the Share icon in the PDF preview to choose where to save or send the PDF (Files, Books, Mail, etc.).
Tip: If you want a multi-page document, confirm that all desired images were included before sharing. - 6
Save to Files or Books
Choose a destination in Files (or Books) and save the PDF with a descriptive name.
Tip: Organize into a project folder to simplify retrieval later. - 7
Name and organize your file
Provide a concise, descriptive filename (e.g., ProjectProposal_March2026.pdf) and verify the folder location.
Tip: Consider including the project name and date for easy future reference. - 8
Optional: automate with Shortcuts
If you frequently export photos, use Shortcuts to collect selected images, generate a single PDF, and save to a standard folder.
Tip: Name the shortcut clearly and assign a keyboard-like trigger for speed. - 9
Verify output and share as needed
Open the saved PDF to confirm pages and quality. Share via email, messaging, or a cloud link as required.
Tip: If the PDF looks blurry, try exporting with fewer images per page or lower resolution during export.
Questions & Answers
Can I save a single photo as a PDF on iPhone?
Yes. Select one photo in Photos, use Share > Print, then pinch out on the preview to create a one-page PDF. Save or share from the PDF preview.
Yes. You can create a one-page PDF by selecting one photo, using Print, and pinching out on the preview, then saving or sharing.
Can I convert multiple photos into one PDF?
Yes. Select multiple photos, use Share > Print, and pinch out on the first page to generate a multi-page PDF. The order follows your selection.
Absolutely. Pick several photos, print, pinch to preview, and the resulting PDF will have multiple pages in that order.
Where will the PDF be saved by default?
The PDF can be saved to Files or Books depending on your sharing choice. Choose a destination during the final Share step.
It saves to Files or Books depending on where you share it; pick the location at the end.
What if the PDF export fails or is blurry?
Check storage space, retry from the selected photos, and ensure you’re on a recent iOS version. Adjust export resolution if necessary.
If export fails or the image looks blurry, free space, retry, and consider lowering resolution slightly.
Is Shortcuts the only automation option?
Shortcuts is optional but powerful for batch exports. It can combine images into a single PDF and save it automatically.
Shortcuts isn’t required, but it helps automate batch exports and saves time.
Can I protect exported PDFs with a password?
The built-in iPhone export flow does not password-protect PDFs by default. For password protection, you may need a dedicated app or a desktop workflow.
The built-in path doesn’t password-protect PDFs by default; you’d need another tool for that.
Watch Video
Key Takeaways
- Select photos and use Print to create a PDF on iPhone.
- Save PDFs to Files or Books for organized access.
- Use Shortcuts to automate multi-image PDFs.
- Name files clearly and maintain a consistent folder structure.
- Check accessibility and privacy when sharing PDFs.