How to Add Image to PDF: Step-by-Step Guide
Learn practical methods for adding images to PDFs across desktop and online tools. This comprehensive guide covers embedding vs attaching, image preparation, quality preservation, accessibility, and troubleshooting for professional results.

Learn how to add an image to a PDF across desktop, online, and offline workflows. This quick guide covers embedding or attaching an image, resizing and positioning accurately, and preserving image quality during save/export. It outlines step-by-step approaches for common tools and practical tips to avoid blur or distortion. Whether you use Adobe Acrobat, a web app, or a free editor, you'll finish with a ready-to-share PDF.
Why adding images to PDFs matters
Images in PDFs boost comprehension and retention. When you learn how to add image to pdf, you can illustrate data, diagrams, and logos without leaving the document. According to PDF File Guide, well-placed images can clarify instructions and improve accessibility when paired with descriptive alt text. The PDF File Guide team found that professional documents with relevant visuals are more persuasive and easier to review. In practice, an image can show a workflow, highlight a metric, or reinforce branding. But there is a balance: too many images or overly large files can hurt load times and searchability. This section outlines why images matter, when to use them, and how to plan your approach so your PDFs remain clean, accessible, and printer-friendly. You’ll learn how to choose the right image type, how to prepare it, and how to insert it across common tools. The goal is a document that communicates clearly, looks professional, and scales from screen to print.
Understanding image roles in PDFs and choosing the right approach
Images serve multiple roles in PDFs—from illustrating a concept to branding a document. The right approach depends on whether the image supports content, acts as a decorative element, or serves as a visual index. PDF File Guide emphasizes balancing visual impact with readability. This means reserving high-contrast images for charts, using vector-based logos when possible for sharpness, and avoiding full-bleed images that disrupt margins. Plan placement with the page grid in mind, ensuring consistent margins and alignment. Remember that accessibility matters: if a diagram conveys key information, provide alt text so screen readers can describe it to visually impaired readers.
Choosing between embedding, attaching, or resizing for impact
Embedding an image makes it inseparable from the document content, ideal for final PDFs that must travel unchanged. Attaching places an image inside the PDF as a separate object readers can extract; use this for supplementary graphics without impacting page layout. Resizing controls page balance and can prevent layout shifts. The choice hinges on audience needs, distribution method, and file size constraints. In professional settings, you often embed for print fidelity and attach as a supplemental resource for reviewers. This section helps you decide which method to use in different scenarios, with practical criteria and examples.
Image quality: resolution, compression, and color profiles
A crisp image preserves clarity when printed or viewed on high-resolution screens. Aim for images at 300–600 dpi for print-grade PDFs and 150–300 dpi for on-screen viewing. Be mindful of color profiles; sRGB is widely supported and reduces color shifts across devices. As you insert, verify that compression settings strike a balance between quality and file size. The right approach reduces bandwidth without sacrificing legibility, especially for charts and photographs. This section explains how to optimize for different output channels and maintains fidelity across readers.
Desktop workflows: common editors and precise controls
Desktop editors like Adobe Acrobat Pro DC, Foxit, and Nitro Pro offer precise image insertion features. You’ll typically find Add Image or Insert Picture options, then drag to place and resize while maintaining aspect ratio. Use alignment guides and snap-to-grid features to ensure consistent margins. Keyboard shortcuts speed up tasks: many editors support Ctrl/Cmd + C/V for quick duplication, and Shift while resizing locks aspect ratio. This block provides practical, tool-agnostic guidance to achieve consistent results across editors.
Online tools and browser editors: fast, accessible options
Online editors like Smallpdf, Sejda, and PDFescape provide quick image insertion without installing software. They’re convenient for lightweight edits or on-the-go changes. When using online tools, upload your PDF, choose Insert Image, then position and resize. Always review privacy policies and ensure sensitive documents aren’t uploaded to questionable services. This section highlights when online tools are advantageous and how to mitigate risks through offline backups when dealing with confidential data.
Attaching vs embedding: a quick decision guide
Embedding binds the image to the PDF content, ideal for long-term preservation and reliable printing. Attaching preserves the document’s primary layout but allows extraction of the image by readers. If you need readers to access supplementary graphics without altering the page design, attach; if you require the image to travel with the document, embed. For accessibility, consider alt text in embedded images, and ensure any attachments are clearly labeled. This decision guide helps you pick the right approach for each page.
Accessibility and searchability: making images work for everyone
Alt text is essential for accessibility. When you add images, always supply descriptive alt text that conveys the image’s purpose and content. If the PDF is scanned or contains diagrams, provide a short, meaningful description that complements the surrounding text. For searchability, ensure the PDF’s text remains selectable and that images don’t obstruct the reading order. This block emphasizes inclusive design so your PDFs reach a wider audience without sacrificing visual quality.
Troubleshooting common problems and edge cases
If an image doesn’t appear in some viewers, it could be due to transparency, color profile, or incompatible formats. Check that the image is embedded rather than linked, confirm layer visibility, and ensure your PDF readers are up to date. When dealing with large files, consider re-encoding images to optimize size without noticeable quality loss. If adding to a protected PDF, confirm permissions or obtain the necessary rights to modify the document. This section covers practical steps to diagnose and fix common issues.
Best practices: consistency, standards, and final checks
Establish a standard image protocol for your organization—image size, DPI targets, color profiles, and placement rules. Maintain consistency across chapters or sections to preserve a professional look. Before finalizing, run a quick QA pass on different devices and readers, checking that images render correctly and the document remains printable. This final block consolidates the habits that ensure durable, polished PDFs with images that support your message.
Tools & Materials
- PDF editor software(e.g., Adobe Acrobat Pro, Foxit PhantomPDF, Nitro Pro)
- Original image file (PNG/JPG/TIFF)(Preferred at 300–600 dpi for print-ready output)
- Device with internet connection(Needed for online tools)
- Web browser(Used with online editors)
- Backup copy of the original PDF(Always keep a pristine version before editing)
- Preview or PDF viewer(Verify rendering after edits)
- Image optimization software (optional)(Tools like editors or converters to pre-encode images)
Steps
Estimated time: 30-60 minutes
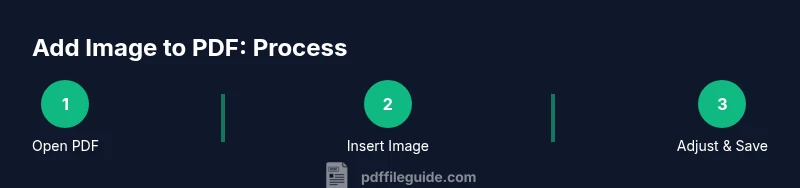
- 1
Open the PDF in your editor
Launch your PDF editor and open the document you want to modify. Use File > Open or drag-and-drop the file into the editor. Ensure you’re editing a local copy and not the original if you need to preserve an unmodified version.
Tip: Use a duplicate file before editing to safeguard the original. - 2
Prepare the image
Ensure the image is in an appropriate format and resolution. Resize or crop if necessary so it fits the target area. Rename the file to a descriptive name for easier management within the project.
Tip: Prefer PNG for graphics with transparency; JPEG for photographs to keep file size reasonable. - 3
Insert the image
Choose the Insert Image or Add Image option, then select your file. Place the image on the desired page and approximate position before fine-tuning. Some tools allow snapping to margins for precise alignment.
Tip: If you can, enable alignment guides and grid for consistent placement. - 4
Resize and align
Resize the image while maintaining aspect ratio to avoid distortion. Move the image to align with the page margins and relevant content. Check that surrounding text remains readable and that the image doesn’t cover important details.
Tip: Hold Shift while resizing in most editors to preserve aspect ratio. - 5
Add alt text and accessibility notes
If your editor supports it, add descriptive alt text or a caption that explains the image’s role. This improves accessibility for screen readers and helps with document searchability. Keep alt text concise but informative.
Tip: Alt text should describe the image's purpose in the context of the document. - 6
Save or export the document
Save the edited PDF or export as a new file to preserve a version history. If your workflow requires a specific PDF standard (e.g., PDF/A for archival), choose the appropriate save/export option.
Tip: Use Save As to keep both the original and edited versions. - 7
Review on multiple viewers
Open the final file in several PDF readers and on multiple devices to confirm rendering consistency. Check on-screen and print previews if print output is a concern. Note any discrepancies and adjust if needed.
Tip: Test on a mobile device as well; rendering can vary across apps. - 8
Handle attachments or linked images
If you chose to attach rather than embed, verify that the attachment is accessible and clearly labeled. For embedded images, confirm they travel with the document and remain visible in all viewers.
Tip: Document clearly whether images are embedded or attached to avoid confusion for readers. - 9
Back up and finalize
Create a final backup before distributing. Document any decisions about image choices and placements for future updates. Communicate any accessibility notes to stakeholders if needed.
Tip: Maintain a changelog entry for edits to facilitate audits.
Questions & Answers
Can I add multiple images
Yes. Most editors allow you to insert several images on one or multiple pages. Plan placement to maintain clean layouts and avoid crowding. You can insert, resize, and align each image individually.
You can add several images by inserting and adjusting each one on its pages.
Embed or attach?
Embed when you want the image to travel with the document and print consistently. Attach when you want readers to download the image separately without changing the page layout.
Embed keeps the image with the page; attach keeps it as a separate file.
Best image formats for PDFs?
PNG is good for graphics and logos with transparency; JPEG is suitable for photographs to keep file sizes reasonable. TIFF offers high quality but larger sizes. Choose based on content and size constraints.
Use PNG for graphics, JPEG for photos, and TIFF for maximum quality when needed.
Will images increase PDF size?
Yes, adding high-resolution images increases file size. Optimize images before insertion and consider compression settings during export to balance quality and file size.
Images can make PDFs bigger; optimize before inserting and balance quality during export.
Add images to protected PDFs?
If the PDF is password-protected or permissions-restricted, you may not be able to edit. Obtain the necessary rights or work with a copy that allows modifications.
You might need permissions or an unprotected copy to edit.
Can I add images on mobile devices?
Yes, several mobile apps support image insertion into PDFs. They can be convenient for quick edits, but may have fewer precision controls than desktop tools.
Mobile apps can insert images, though they may have fewer precision controls.
Watch Video
Key Takeaways
- Embed when you need the image to stay with content.
- Attach for supplementary graphics without altering layout.
- Preview on multiple devices to ensure consistent results.
- Provide alt text to improve accessibility.
- Back up originals before editing.