How to Use a PDF Scanner: A Comprehensive Guide
Learn how to use a PDF scanner to convert physical documents into searchable PDFs with OCR, outlining hardware vs. software options, best practices, security, accessibility, and workflow optimization for 2026.

This quick guide explains how to use pdf scanner devices and apps to convert paper documents into high‑quality, searchable PDFs. You’ll learn essential setup, file naming, OCR considerations, and tips for clean scans. According to PDF File Guide, establishing a consistent scan workflow saves time and improves accessibility for readers and search engines alike.
What a PDF scanner is and why you should use it
A PDF scanner is a device or software tool that converts physical paper into digital PDFs. It captures images of pages using an optical sensor and applies software to arrange pages, adjust light balance, and perform optical character recognition (OCR) so the resulting PDF text is searchable. For professionals and students, a reliable PDF scanner accelerates document workflows, reduces paper clutter, and makes information easier to locate. According to PDF File Guide, mastering the basics of scanning sets the foundation for accurate records, audits, and faster collaboration. When you know how to optimize settings for your documents, you’ll produce cleaner scans—less glare, clearer text, and consistent page order. The core idea is simple: capture a faithful image, convert it to a structured PDF, and make the content accessible to yourself and others.
Core features to look for in a PDF scanner app
When selecting a PDF scanner tool, prioritize features that speed up workflows and improve accuracy. Look for auto-feeder support for rapid batch scanning, duplex scanning for two-sided pages, and the ability to scan directly to PDF or TIFF. A robust OCR engine with multilingual support ensures that scanned text is searchable and indexable. Other helpful capabilities include automatic edge-detection, color depth control (color, grayscale, or black-and-white), and built-in image cleanup (deskew, despeckle, glare reduction). Ensure the software allows easy naming, tagging, and metadata insertion, because consistent organization saves time during review and archival. Finally, evaluate cloud integration and security options to protect sensitive documents during transport and storage.
Hardware vs software scanning: which path is right for you
Hardware scanning with a dedicated flatbed or sheet-fed scanner yields more consistent results, especially for large volumes and mixed-quality pages. Software scanning, often bundled in your all-in-one printer, offers convenience for occasional use. Consider your typical document mix: multi-page reports, receipts, contracts, or handwritten notes. For high-volume environments, a duplex sheet-fed scanner paired with OCR-enabled software delivers speed and accuracy. If you frequently travel or work remotely, mobile scanning apps can be an excellent supplement, letting you capture on the go and export PDFs directly to cloud storage.
Preparing documents for scanning
Before you press scan, prepare your documents to minimize retakes. Remove staples, align pages, and remove creases. For thin or delicate pages, use a glass mat to prevent knife-edge distortion. If you’re scanning mixed media (photos, receipts, text), separate by material type because different surfaces require different brightness and resolution. Clean scanner glass with a soft microfiber cloth to avoid smudges. Finally, decide whether to scan in color, grayscale, or black-and-white; color preserves detail, but larger file sizes can slow processing and sharing.
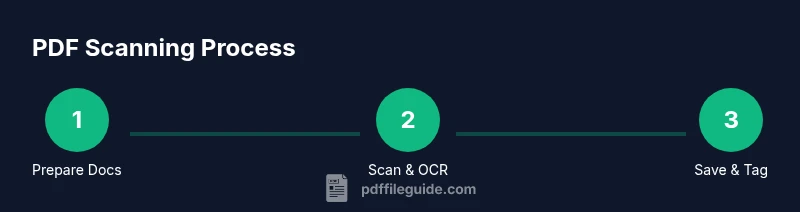
Step-by-step workflow overview
A reliable scan workflow typically follows five phases: setup, capture, processing, quality check, and export. In setup, select output format (PDF), resolution, color mode, and OCR language. In capture, feed pages one by one, adjust the alignment, and verify that all pages have been captured. In processing, apply deskew, despeckle, and perspective correction as needed. In quality check, skim through pages to catch blur, glare, or skew. In export, save to a clearly named location and, if needed, attach metadata. This overview prepares you for the more detailed steps that follow in the dedicated STEP-BY-STEP block.
Making OCR work for multiple languages
Optical character recognition becomes more accurate when you set the correct language and font expectations for your documents. In your scanner software, select the primary language, and add secondary languages as needed. If you scan bilingual pages, enable multi-language OCR or run a second pass with a different language setting. Ensure fonts and text are clean enough for recognition; heavy handwriting or unusual fonts can reduce accuracy. After scanning, run a quick spell-check or manual proofreading to catch misread characters, especially in critical sections like dates or names.
Saving, naming, and organizing scanned PDFs
A consistent naming convention makes your archives searchable and scalable. Include the document title, date, and version, for example: "Q2_Report_2026-02-07_v1.pdf." Store files in a logical folder structure by department, project, or client. Use metadata tools to tag keywords, authors, and subjects. If you use OCR, consider enabling searchable text indexing so you can locate content with search queries. Regularly back up primary scans to a secure cloud storage or external drive and keep an offline copy for disaster recovery.
Troubleshooting common scanning issues
Common issues include blurry pages, skewed text, and glare. Blurriness often results from motion during capture or dirty glass; re-scan after cleaning and stabilizing the page. Skew occurs when the page isn’t aligned; use deskew features or reinsert the page with correct alignment. Glare is caused by strong lighting or shiny surfaces; adjust lighting, enable anti-glare settings, or place a matte backing. If OCR results are poor, try reducing resolution slightly or switching to grayscale, and verify language settings. For batch scans, ensure your feeder isn’t jamming and that pages aren’t stuck together.
Professional tips for high-volume scanning
In professional settings, speed and consistency trump occasional perfection. Use a high quality sheet-fed scanner with a reliable auto-feeder and continuous feeding for large runs. Create per-project scan presets to minimize setup time. Optimize OCR by training the engine with common fonts used in your organization and by performing periodic quality checks. Implement a versioned archiving system and establish a documented workflow so new hires can ramp up quickly. Finally, consider accessibility from the start: tag PDFs for screen readers and provide meaningful document structure.
Security and privacy when scanning sensitive documents
Scanning often involves sensitive information; protect it with encrypted storage, secure transfer methods, and access controls. Disable auto-upload to public cloud if privacy is a concern, and use on-device processing whenever possible. When using shared scanners, clear job lists and credentials from devices after each session. If you must store PDFs online, choose reputable, encrypted cloud services and review their privacy policies. Finally, shred originals after digitization if required by policy or law.
Accessibility considerations for scanned PDFs
To ensure scanned PDFs are usable by people with disabilities, apply proper tagging, alt text for images, and logical reading order. Use OCR carefully to extract searchable text, and verify that the document's structure (headings, lists, tables) is preserved. Provide a readable font size, avoid overly complex layouts, and test with screen readers. Remember that accessibility improves not only compliance but also overall usability for all readers.
Best practices and future-proofing your scan workflow
Adopt a repeatable, documented workflow that can be scaled up. Regularly update scanning software to benefit from improved OCR, AI-based cleanup, and better file organization. Establish a policy for naming conventions, backup frequency, and disaster recovery. Consider integration with document management systems and automated metadata extraction. Finally, stay informed about accessibility updates and industry standards to keep your PDFs compliant and usable for years to come. This forward-looking approach ensures you stay efficient as technology evolves.
Tools & Materials
- Scanner or sheet-fed device(For best results, a duplex capable scanner handles two-sided pages in one pass.)
- Computer or mobile device(Must have USB or Wi-Fi connectivity to transfer scans.)
- OCR-enabled PDF software(Choose software that supports multiple languages and batch processing.)
- External storage or cloud storage(For backups and long-term archiving.)
- Clean, microfiber cloth and glass cleaner(To clean glass surface before scanning.)
- Naming convention guide or index plan(Helps maintain consistency across archives.)
Steps
Estimated time: Total time: 25-40 minutes
- 1
Prepare your workspace
Set up the scanner in a clean, well-lit area. Plug in power, connect to your computer or device, and ensure software is up to date. Align pages and check that the glass is clean to prevent smudges or blurry scans.
Tip: Pro tip: keep a dedicated, dust-free workspace to reduce retakes. - 2
Load documents correctly
Place documents according to your device: face up or face down, depending on the model. Align edges, avoid staples, and feed one group at a time to prevent jams. Ensure pages are flat and straight before scanning.
Tip: Pro tip: fan pages slightly before loading to prevent double feeds. - 3
Open scanning software and set defaults
Launch your scanning app and choose PDF as the output format. Set resolution (300–600 dpi), color mode (color/grayscale/black-white), and duplex if available. Save your preferred preset for frequent tasks.
Tip: Pro tip: create a preset named by document type (invoices, reports, contracts). - 4
Choose resolution and color mode
For text-heavy documents, 300 dpi is usually sufficient. For images or forms, 600 dpi preserves detail. Selecting grayscale can reduce file size while maintaining readability.
Tip: Pro tip: avoid 72–100 dpi for professional documents. - 5
Scan the pages
Start the scan and monitor progress. Check that pages are captured in order and that none are skipped or rotated during the feed. If a page jams, stop and clear the feeder before continuing.
Tip: Pro tip: enable edge-detection and deskew features if available. - 6
Apply OCR and verify text
Run OCR with the appropriate language pack. Review a sample page to verify that recognized text matches the original and correct obvious mistakes.
Tip: Pro tip: use a known word to test OCR accuracy. - 7
Save and name the file
Choose a clear, consistent name and select a logical folder path. Include date and version information to support future retrieval.
Tip: Pro tip: use YYYY-MM-DD format for easy chronological sorting. - 8
Check quality and adjust
Review scanned pages for glare, skew, or missing content. Re-scan problematic pages with adjusted lighting or alignment as needed.
Tip: Pro tip: run a quick deskew on the whole batch to normalize angles. - 9
Back up and secure
Back up the PDFs to trusted storage—local, cloud, or both. If sensitive, enable encryption and access controls.
Tip: Pro tip: set automatic weekly backups to prevent data loss. - 10
Integrate into your workflow
Embed scanning into your documents lifecycle: import to a DM system, tag content, and share with teammates. Maintain a log for auditing and compliance.
Tip: Pro tip: automate metadata extraction when possible.
Questions & Answers
What is a PDF scanner and how does it work?
A PDF scanner converts physical pages into digital PDFs by capturing images and applying OCR to produce searchable text. It can be a dedicated device or a software app. The result is a portable, easily shareable file that preserves layout.
A PDF scanner turns paper into digital PDFs using a camera or sensor and OCR to make the text searchable.
Do I need OCR for scanned PDFs?
OCR is essential if you want to search or edit the text within scanned PDFs. Without OCR, the document remains an image and is not easily searchable. Choose OCR-enabled workflows when possible.
Yes. OCR makes scanned PDFs searchable and editable.
Can I scan directly to PDF on mobile devices?
Yes. Many mobile apps can capture pages and export them as PDFs with optional OCR. This is convenient for on-the-go digitization, but for large jobs a desktop setup may be faster.
Absolutely, you can scan to PDF on mobile, but for big jobs a desktop setup might be quicker.
How can I improve OCR accuracy?
OCR accuracy improves with clean scans, correct language settings, and high enough resolution. Avoid heavy handwriting, check lighting, and verify the recognized text after scanning.
Improve OCR by ensuring clean images, selecting the right language, and proofreading the result.
What’s the best way to name scanned PDFs?
Use a consistent convention that includes the document title, date, and version to keep archives organized and searchable. For example: ProjectReport_2026-02-07_v1.pdf.
Use clear, dated names with version numbers to stay organized.
Is it safe to scan sensitive documents?
Yes, if you use encrypted storage, secure transfer methods, and access controls. Avoid uploading sensitive files to public cloud and prefer local or encrypted cloud options.
Yes—but only with encryption and proper access controls.
Watch Video
Key Takeaways
- Use a consistent scan workflow to save time
- OCR turns scans into searchable PDFs
- Name and organize files with a clear scheme
- Back up scans regularly to prevent data loss
- Tag PDFs for accessibility to improve usability