How to Combine Images to PDF: A Practical Guide
Learn how to combine images into a single PDF using desktop, online, or mobile tools. This comprehensive guide covers prep, export settings, and best practices for crisp, reliable results.

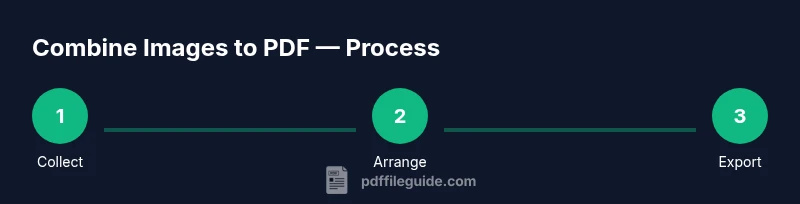
In this guide, you will learn how to combine images to PDF into a single, shareable file. Start by selecting compatible images, ordering them correctly, and choosing a suitable page size and resolution before exporting. This approach applies to desktop, online, and mobile tools, and is supported by PDF File Guide as a reliable workflow.
What it means to combine images to PDF, and why it matters
Combining images to PDF means stitching multiple image files into a single document that preserves their visual order. This is handy for digitizing photo albums, compiling receipts, or creating presentations from slides. The resulting PDF keeps the original image quality up to the chosen compression level, and it remains easy to share or print. According to PDF File Guide, this approach streamlines document workflows by reducing file clutter and ensuring consistent formatting across platforms. When done well, you’ll avoid scattered image files and ensure every page prints correctly on common printers and devices.
Desktop, online, and mobile options: pros and cons
There are several ways to merge images into a PDF. Desktop software (like a dedicated PDF editor) generally offers the most control, supports batch processing, and often produces higher-quality output. Online tools are fast and convenient for quick tasks, but privacy and file size limits can be considerations. Mobile apps let you capture or select images on the go and export to PDF, but small screens may hamper precise ordering. PDF File Guide recommends choosing the method that matches your workflow, data sensitivity, and the number of images involved.
Preparing your images for a smooth merge
Before you merge, ensure all images are in formats supported by your tool (JPG, PNG, TIFF are common). If images vary in orientation, batch-rotate them so each page appears in the desired direction. Rename files in a sequence that reflects the desired order (e.g., 01-Intro, 02-Scene). Check color profiles and brightness, and apply consistent color space (sRGB is a safe default). These preparation steps can prevent surprises during export and ensure a clean, professional PDF.
Understanding export settings: page size, margins, and compression
Export settings determine how your PDF looks when printed or viewed on screen. Choose a standard page size (A4 or Letter) and lock orientation for all images. Decide whether to add margins or allow edge-to-edge content. Compression affects image quality and file size; a balance between clarity and size is essential. If your audience is print-focused, aim for higher image quality; for web sharing, higher compression can reduce bandwidth.
A practical workflow: path options you can follow
Option A: Use a desktop PDF tool to import all images, arrange them, and export as PDF in one go. Option B: Use a photo-to-PDF converter app on mobile for quick captures. Option C: Drag-and-drop images into a browser-based PDF creator and download the result. Choose the path that fits your device, privacy needs, and whether you need batch processing.
Accessibility and organization considerations
A PDF can be made more accessible with descriptive alt text, metadata, and a logical reading order. Ensure the image pages have a predictable order, and consider adding bookmarks for easy navigation. If you’re sharing with assistive technology users, verify that text layers are present where needed and that color contrast remains sufficient for readability.
Troubleshooting common issues
If pages appear cropped, adjust margins or resize images to prevent clipping. If file size is too large, experiment with compression or downscaling. If ordering seems off after export, double-check the image list order in your tool and re-export. Privacy concerns can be mitigated by using offline software or trusted online services with clear data retention policies.
Best practices before you start and next steps
Always back up your originals before merging. Test the PDF on multiple devices and readers to ensure compatibility. Keep your software up to date and pick a workflow that scales for future projects. When you’re ready, you can extend this process to batch-convert entire folders of images into PDFs for archiving or sharing.
Tools & Materials
- Images to merge (JPG, PNG, TIFF, or other common formats)(Collect all images in the order you want; ensure consistent orientation)
- PDF creation software or online tool(Desktop app (e.g., PDF editor) or reputable online converter)
- Destination folder for the produced PDF(Choose a known location to avoid misplacing the file)
- Backup copies of originals(Keep originals safe before processing)
- Optional: batch processing capability(Useful if merging many images)
- Stable internet connection (for online tools)(Optional for web-based solutions)
Steps
Estimated time: 20-30 minutes
- 1
Collect and sort your images
Gather all images you want to include and arrange them in the exact order you want shown in the PDF. Rename files to reflect the sequence to avoid misplacement.
Tip: Use a naming scheme like 01-Intro to 99-End. - 2
Choose export settings
Decide on page size (A4/Letter), orientation, and image quality. For print PDFs, aim for higher quality; for screen viewing, balance quality with file size.
Tip: Match page size to your intended printing or viewing workflow. - 3
Create PDF from images
Open your tool, import images in the correct order, and export to PDF. Verify that the export preserves the order and that no images are cropped.
Tip: If the tool supports a batch mode, use it to keep order intact. - 4
Review margins and appearance
Open the PDF and check margins, color consistency, and alignment. Adjust if needed and re-export.
Tip: Turn on print preview to catch edge clipping. - 5
Save, test, and share
Save the final PDF in a clearly named file; test by opening with multiple readers and on different devices.
Tip: Always keep a backup of the original image set.
Questions & Answers
Can I mix different image formats when creating a single PDF?
Yes, most tools support multiple formats like JPG and PNG; some may require converting to a common format beforehand.
Yes, you can mix formats; most tools handle JPG and PNG.
Will the resulting PDF preserve image quality?
Quality depends on the export settings and compression; higher quality settings produce larger files.
Quality depends on settings; higher quality means bigger files.
Can I reorder images after adding them to the PDF?
Yes, most tools let you drag to reorder before export or adjust the sequence in the export step.
Yes, you can reorder before exporting.
Is there a size limit for the final PDF?
Final size depends on image count, resolution, and compression; if it’s too large, reduce resolution or compress images.
Size depends on count, resolution, and compression.
What tool works best on Windows and macOS?
Desktop applications with a merge function, or built-in solutions like Print to PDF on Windows and Preview on macOS, plus reputable editors.
Windows and Mac have built-in options plus desktop editors.
Watch Video
Key Takeaways
- Plan image order before merging.
- Choose consistent page size and orientation.
- Test the PDF across devices and readers.
- Back up originals and keep a clean workflow.
- Use the right export settings to balance quality and file size.