How to iphone convert photo to pdf: A step-by-step guide
Learn how to iphone convert photo to pdf on iPhone using built-in tools and simple workflows. This guide covers single and multi-image conversions, quality control, and sharing options.

You can iphone convert photo to pdf in seconds using your iPhone’s built-in tools. This guide covers fast methods to convert a single image or a batch of photos into a clean PDF, with tips to preserve image quality and easy sharing options.
Why converting photos to PDF matters for iPhone users
In the modern mobile workflow, turning a photo into a PDF is a simple, reliable way to share, archive, and print images with consistent formatting. For many professionals and students, a PDF is easier to annotate, password-protect, and send via email or cloud links than a raw image file. According to PDF File Guide, mastering this small skill can save time across projects and reduce confusion when coordinating with teammates. The iPhone offers built-in options that work offline, so you can convert on the go without installing extra software. This article explains why a PDF is often a better fit than a raw photo and what to expect from native tools versus third-party apps. You will learn when to choose a single-page PDF, a multi-page batch, and how to maintain image fidelity throughout the process.
Methods at a glance: built-in iPhone options
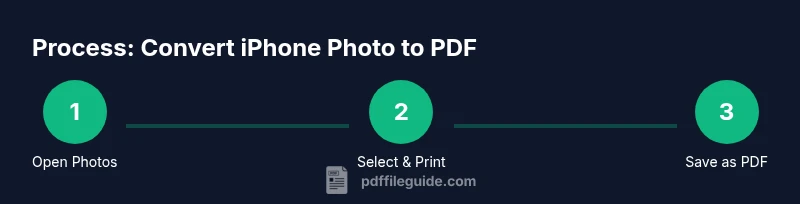
Apple’s ecosystem provides two reliable, no-extra-software routes: (1) Photos → Share → Print → Save as PDF or (2) Files → Create PDF from selected images. Both methods work offline and preserve the original image resolution when you avoid unnecessary compression. Third-party apps can offer extra features like password protection or OCR, but for most users the built-in workflows are fast, simple, and free. This section breaks down when to use each option, how to sequence images for multi-page PDFs, and how to choose the best export location. The goal is a smooth, repeatable process you can rely on in daily tasks.
Method A: Using the Photos app to export a single image as PDF
Open the Photos app and tap the image you want to convert. Tap the Share icon in the bottom toolbar, then choose Print. In the printer preview, perform a two-finger pinch-out gesture to reveal a PDF preview. Tap the Share icon again, then select Save to Files or another app to store or share the PDF. This single-image method is quick and keeps the image fidelity high if you start with a high-resolution photo. Pro tip: rename the file in the Save dialog to keep your library organized.
Method B: Using the Photos app to export multiple images as a single PDF
In Photos, tap Select, choose multiple photos in the desired order, then tap Share and Print. In the PDF preview, reorder items via long-press and drag if needed, then pinch out to reveal the multi-page PDF. Use the Share button to save to Files or export to a cloud service. This approach creates a cohesive document perfect for receipts, portfolios, or client deliverables. Pro tip: arrange files by date or topic before converting to ensure logical page flow.
Method C: Using the Files app to save as PDF from Photos
Open the Files app and navigate to a folder where you want the PDF. Tap the three-dot menu and choose New Folder if needed, then use the Share sheet from Photos to select Save to Files directly. If you have multiple images selected, you may see a Create PDF option in the Share sheet; choose it to generate a single multi-page PDF. This route often offers quicker access for organized document libraries. Pro tip: create a consistent naming convention and folder structure for easy retrieval.
Batch conversion and naming conventions for consistency
When preparing large batches, decide on a naming scheme before starting (for example, DATE_subject_sequence). Batch conversion is best done with the multi-select approach in Photos so the order remains intentional. If you routinely create PDFs from a specific project, consider a dedicated “PDF” folder in Files to keep everything in one place. Pro tip: check file size after conversion to avoid oversized documents that may fail to upload or share.
Quality considerations: resolution, compression, and color profiles
PDF quality depends on the source image and the export method. Native iPhone methods typically preserve high resolution, but downstream apps may apply compression. If color fidelity matters, review the on-screen preview in the PDF before saving. For black-and-white or monochrome documents, a low-contrast setting can reduce file size without compromising readability. Pro tip: if you plan to print, err on the side of higher resolution and avoid extra compression.
Interoperability across devices: iPhone, iPad, and Mac
Converting on iPhone is convenient, but you can seamlessly move the resulting PDFs to iPad or Mac via iCloud Drive, AirDrop, or email. On macOS, you can open the PDF with Preview or Adobe Acrobat for further editing, annotations, or password protection. This cross-device workflow helps maintain consistency in projects that require collaboration across Apple devices. Pro tip: keep the same folder structure in iCloud Drive to simplify retrieval on any device.
Accessibility and searchability: adding OCR options and alt text
PDFs can benefit from OCR (optical character recognition) if you need searchable text. Some apps offer built-in OCR as part of the export or in post-processing. If your PDFs will be read visually or with screen readers, consider adding alt text or tags to improve accessibility. Pro tip: test the final PDF in a screen-reader environment to confirm that text extraction and navigation work as intended.
Practical use cases: receipts, reports, and portfolios
Receipts and invoices combine well into a single PDF for expense reporting. Portfolios or project galleries benefit from a tidy, multi-page format that stays readable on mobile devices. For students and researchers, turning field photos into PDFs keeps data organized and easy to share with instructors. Each use case benefits from a consistent file-naming scheme and a predictable export workflow. Pro tip: create sample PDFs from different photo sets to lock in your preferred settings.
Troubleshooting common issues
If the PDF export fails, check that you have enough storage space and that the selected photos are accessible (not from external apps that restrict sharing). If page order seems off, reselect photos in the desired sequence before exporting. If image quality looks degraded, compare the original image resolution against the PDF's page size and adjust exports accordingly. When in doubt, restart the Photos or Files app and try again.
Security and privacy when sharing PDFs from iPhone
Be mindful of metadata like location data embedded in photos. Before sharing sensitive PDFs, strip EXIF data if needed and avoid uploading to untrusted services. Password protection and encryption are not always available in built-in workflows; consider a dedicated PDF app if strong security is required. This practice helps protect confidential information while maintaining convenient access for authorized recipients.
Next steps: choosing a method and quick checklist
Pick a method based on your workflow: single-image needs favor Photos → Print → Save as PDF; multi-image or frequent sharing benefits from the Files route and consistent naming. Maintain a folder system, verify the PDF visually, and test a sample file in your typical sharing channel (email, cloud, or messaging) to ensure compatibility. Use the included quick checklist to stay efficient on future conversions.
Tools & Materials
- iPhone with iOS 13 or later(Ensure Photos app is up to date)
- Photos app(Built-in image source for most users)
- Files app(Destination for Save to Files or Create PDF)
- Stable Wi-Fi or charging option(Helpful for large batches)
- AirDrop or iCloud Drive access(Optional for sharing)
- Printer or PDF viewer(For experimentation with print-to-PDF workflows)
Steps
Estimated time: 15-25 minutes
- 1
Open Photos and select image(s)
Open the Photos app and tap the image you want to convert. If you’re converting multiple images, tap Select and choose all items in the desired order. This initial step sets the scope of your PDF and ensures you’re working with the correct visuals.
Tip: For batch conversions, plan the page order before exporting to keep a logical flow. - 2
Access the Print action
Tap the Share icon and scroll to the Print option. The Print action is the gateway to the PDF output on iPhone. If you don’t see Print, verify you selected at least one image. This step activates the PDF preview without requiring any external apps.
Tip: If you’re using a larger batch, confirm all items are included before proceeding. - 3
Open the PDF preview
In the printer preview, use a two-finger pinch-out gesture to reveal the PDF. This is a hidden shortcut built into iOS for quick PDF creation. You’ll see a high-resolution page layout that mirrors your image order.
Tip: Touch the pinch gently to avoid navigating away from the preview. - 4
Save or share the PDF
Tap the Share icon again in the PDF preview. Choose Save to Files to store locally or select another app to export. Rename the file in the save dialog to keep your library organized.
Tip: Use descriptive filenames like YYYY-MM-DD_ProjectName_PageOrder. - 5
Batch conversion in Photos
To convert many images into one PDF, select several photos, then repeat the Print-to-PDF flow. Ensure the order reflects the intended sequence, as pages will follow that arrangement.
Tip: If you need to reorder pages, redo the selection and adjust before printing. - 6
Alternative: create PDF from Files
In the Files app, select images and look for a Create PDF option in the Share sheet. This path often produces a straightforward multi-page document with less friction for organized folders.
Tip: Organize your images in a dedicated folder before starting to simplify retrieval. - 7
Rename and organize the PDF
After saving, rename the PDF to a clear, consistent title and save it in a project folder or cloud location. Consistency reduces time spent searching for documents later.
Tip: Adopt a naming convention such as PROJECT_DATE_Version or PROJECT_TOPIC_001. - 8
Verify quality and metadata
Open the resulting PDF in a viewer to check image fidelity, alignment, and any compression artifacts. If you plan to share, ensure no sensitive metadata is exposed.
Tip: Zoom in on text and small details to confirm legibility before sending. - 9
Security and sharing considerations
Before distributing, consider privacy implications. Built-in tools rarely offer password protection; use a dedicated app if encryption is required. Share responsibly and verify recipients.
Tip: If sensitive, avoid cloud links without access controls. - 10
Final check and documentation
Document your chosen method and keep a short note on preferred settings for future conversions. This makes repeatability faster and reduces mistakes.
Tip: Keep a template workflow for recurring projects.
Questions & Answers
Can I convert multiple photos to a single PDF on iPhone?
Yes. You can select multiple photos and use the Print-to-PDF flow to create a single multi-page PDF.
Yes—select multiple photos and print to PDF to make one file.
Is the PDF quality preserved when converting from iPhone photos?
Generally yes for high-resolution images; avoid extreme compression options and check the PDF after creation.
Usually, it preserves quality if you use the default print method and high-res images.
Do I need an internet connection to convert photos to PDF on iPhone?
No. All conversions via Photos/Files work offline.
No internet needed; it's all offline.
Can I password-protect the generated PDF on iPhone?
iOS native PDF creation doesn't support password protection; third-party apps offer encryption.
Password protection isn't built into the built-in tools; use a third-party app if you need encryption.
What if I only have one photo? Will it still be a PDF?
Yes, a single image becomes a one-page PDF; adjust page size in the print preview.
Even one photo becomes a PDF; you can adjust the page size in the preview.
Are there any privacy concerns when sharing PDFs from iPhone?
Be mindful of metadata like location data; strip metadata if needed before sharing.
Be mindful of location or EXIF data; remove metadata if sharing sensitive content.
Watch Video
Key Takeaways
- Choose single-image or batch methods based on need
- Print-to-PDF via Photos is the simplest built-in path
- Batch order matters; arrange photos first
- Always verify PDF quality after export
- Use Files for easier management and sharing