How to Make PDF from Photos: A Complete Guide
Learn to turn your photo collection into a polished PDF using desktop, mobile, or online tools. This comprehensive guide covers planning, layout, export options, accessibility, and safe sharing for professional results.

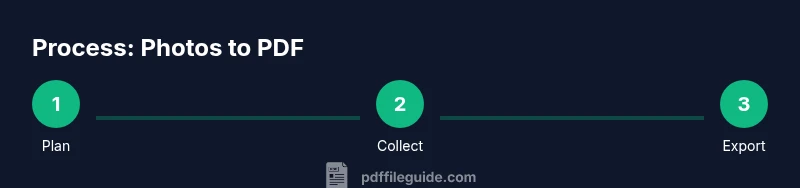
You can turn a batch of photos into a single PDF using built-in export options on your computer or a mobile app. Start by planning the order, selecting a consistent page size, and choosing a reliable export method. The result is a portable, shareable document ideal for portfolios, slides, or archives.
Overview: turning photos into a PDF workbook
Turning photos into a single, well-organized PDF offers a compact, portable way to share memories, build portfolios, or present image-heavy reports. This guide explores practical workflows across desktop and mobile environments, with emphasis on reliability and accessibility. According to PDF File Guide, starting with a clear plan helps you avoid common pitfalls like inconsistent page sizes or awkward image order. You’ll learn how to choose the right page size, arrange images for impact, and export with quality that matches your needs—whether for printing, emailing, or cloud sharing. The steps below are designed for editors, designers, and professionals who edit, convert, and optimize PDF files, with tips tailored to keep files manageable and readable.
Planning your photo selection and order
Before you export, collect all candidate images and decide how they should flow on the pages. Group similar shots, remove duplicates, and rename files to reflect their intended sequence. A consistent aspect ratio and color treatment help the final PDF look cohesive. If you’re preparing a formal presentation or portfolio, sketch a rough layout: opening image, section dividers, and a concluding shot. PDF File Guide’s workflow recommends creating a single source folder to prevent accidental omissions during export. This upfront planning minimizes back-and-forth adjustments and speeds up the final export process.
Desktop workflows: Windows/macOS export options
On most desktops, you can create a PDF directly from the image viewer or photo editor, or use the system printing dialog to Save as PDF. Start by opening your chosen photos in the order you want them to appear, then select Print or Export to PDF. Page size and margins should be consistent across all slides; avoid small inner margins that cut off edge content. Depending on your OS, you might see a dedicated Save as PDF option or a Print to PDF driver. The key is choosing a method that preserves image fidelity while producing a compact file size. PDF File Guide notes that testing the resulting PDF on multiple devices (computer screen, tablet, and phone) helps catch issues early.
Mobile workflows: iOS and Android apps
Mobile devices offer streamlined paths to PDFs when you’re on the go. Many gallery or photo apps provide a built-in export to PDF, or you can use a third‑party app that supports batch export. When using mobile tools, align image order carefully, choose a single page size, and ensure that the layout remains readable on smaller screens. If you plan to share via email or cloud storage, verify that the exported PDF retains image resolution and color accuracy. The PDF File Guide approach emphasizes testing across devices to guarantee a professional appearance in every context.
Quality control: color, compression, and readability
Quality control is often the difference between a nice memory book and a professional document. Start by selecting a high-contrast page layout and a standard color profile that remains faithful to the originals. Avoid excessive compression that introduces artifacts; balance file size with legibility, especially for photos with fine detail. If some images look washed out or too dark, adjust brightness and contrast before exporting. Always review the final PDF at actual size on both a computer monitor and a mobile screen to ensure that every detail remains visible and correctly framed.
Accessibility and navigation in PDFs
Accessible PDFs help a wider audience, including people using screen readers. When possible, add alt text to each image, and use document structure that supports tagging and bookmarks. If your tool permits, insert a simple table of contents or section headings so readers can jump to a specific image group. For professional workflows, enabling basic accessibility features makes the PDF friendlier for diverse users and aligns with best practices recommended by PDF File Guide for editors and creators.
Troubleshooting common issues
If images appear blurry after export, re-check the source image resolution and the page layout settings. Ensure you’re not applying aggressive downsampling during compression. Large PDFs can be cumbersome to share; consider splitting into a multi-part PDF if it exceeds typical email or cloud limits. If a PDF fails to display correctly on certain readers, try a different export option or re-save with a neutral color profile. Keep a backup of the original files to experiment with different layouts without losing quality.
File naming, storage, and sharing strategies
A clear naming convention helps you locate the PDF later and prevents version confusion. Include project name, date, and a short descriptor in the file name. Store the PDF in a dedicated project folder and back it up to a cloud service or external drive. When sharing, consider the recipient’s needs: a high-fidelity print PDF for production workflows, or a smaller optimized version for quick review. If the content is sensitive, apply password protection or restrict access as appropriate. The goal is to maintain organization and security while ensuring easy access for authorized viewers.
Tools & Materials
- Computer with PDF export capability (Windows/macOS)(Ensure you can print to PDF or Save as PDF in the OS or apps you use.)
- Photo folder (JPG/PNG)(Organize photos in the intended display order; keep originals intact.)
- Photo editing app (optional)(Use for cropping, color corrections, or consistency tweaks before export.)
- Clear export settings plan (page size, margins, compression)(Decide once to keep all pages uniform and predictable.)
- Mobile device with PDF app (optional)(Useful for on-the-go workflows or quick previews.)
- Password protection capability (optional)(Only if you need to limit access to sensitive photos.)
Steps
Estimated time: 60-90 minutes
- 1
Collect and organize photos
Gather all candidate images into a single folder and arrange them in the desired sequence. Rename files to reflect their order and group similar shots together. Preview the set to confirm balance between scenes or events.
Tip: Create a backup copy of originals before making any edits. - 2
Decide page size and orientation
Choose a uniform page size (for example, a standard letter or A4) and decide landscape or portrait orientation for consistency. Consider your end destination (screen viewing vs. print) when selecting margins.
Tip: Keep margins wide enough to avoid edge cropping in printers. - 3
Open export tool and set up the project
Launch the chosen tool and create a new project or open the batch of photos in the correct order. Prepare to export rather than edit for best fidelity. If your tool supports it, enable non-destructive edits and preserve the source files.
Tip: Using the OS’s native Save as PDF or Print to PDF often yields the most compatible results. - 4
Load photos in the correct order
Import or drop photos sequentially so each image lands on its own page or in the intended sequence. Double-check there are no accidental duplicates or misordered slides. Preview navigation to ensure smooth flow.
Tip: If your target is a single-page-per-photo layout, verify each image fills the page as intended. - 5
Adjust fit, margins, and alignment
Scale images to fit the page while preserving aspect ratio, and adjust margins to uniform values. Align edges consistently so the document looks polished. For mixed aspect images, consider letterboxing or cropping once for overall consistency.
Tip: Avoid stretching images; preserve original aspect ratio for best clarity. - 6
Choose export options and compression
Select a balance between image quality and file size. Use moderate compression and a standard color profile if you plan to share widely. If printing, opt for higher fidelity and more conservative compression.
Tip: Test a sample export at different quality levels to find the sweet spot. - 7
Export and perform a final check
Export the PDF and open it in multiple readers to verify image clarity, page order, and readability. Check margins and any overlays or page numbers. Adjust if needed and re-export.
Tip: View on both desktop and mobile to catch device-specific display issues. - 8
Save, name, and share securely
Rename the final file clearly (project-date-description.pdf), and store it in an organized folder system. If sharing sensitive images, apply password protection or access controls where supported.
Tip: Maintain a backup of the final PDF and the original source photos.
Questions & Answers
What is the easiest way to create a PDF from photos on Windows or macOS?
The simplest method is to use the built-in export or print-to-PDF feature on your computer. This avoids third‑party apps and keeps your workflow straightforward.
Use your computer’s built-in export or print-to-PDF option for the easiest workflow.
Can I combine photos from different devices into one PDF?
Yes. Transfer all photos to a single device or cloud folder, then export them in the desired order. Consistent layout helps when assembling material from multiple sources.
Yes, gather all images in one place and export in order.
How can I ensure the PDF is accessible?
Add descriptive alt text to images when your tool supports it and enable basic tagging or a simple bookmarks structure for navigation.
Add alt text and bookmarking where possible to aid accessibility.
What affects the PDF file size when using photos?
Resolution and compression levels influence size. Use balanced settings to keep quality while staying practical for sharing.
Size depends on resolution and compression; balance them for sharing.
Is password protection appropriate for PDFs of photos?
Yes, if you’re sharing sensitive photos, password protection adds a layer of security. Check that your chosen tool supports it.
Yes, for sensitive content you can password-protect the PDF.
Which tools can I use on mobile to create PDF from photos?
Many iOS and Android apps support batch export to PDF. Look for apps with good layout options and reliable export quality.
Use mobile apps that offer batch export to PDF for convenience.
Watch Video
Key Takeaways
- Plan photo order before exporting.
- Choose a consistent page size and margins.
- Review the final PDF on screen and in print, if possible.
- Use password protection only when necessary.
- Name and store the PDF clearly for easy retrieval.