Convert PDF to Edit: A Practical How-To Guide for Editors
Learn how to convert a PDF to edit by selecting the right tools, using OCR when needed, and exporting to Word or Excel. This guide preserves layout and accuracy for professional edits.

You will learn how to convert pdf to edit by selecting the right method for your document, whether exporting to Word, Excel, or an editable PDF form. This guide covers choosing tools, applying OCR for scanned pages, preserving layout, and validating fonts and images. By the end, you’ll have clean, editable content ready for revision.
What does it mean to convert pdf to edit?
In practical terms, converting a PDF to edit means turning a fixed, often final document into content you can modify in another program. The process depends on the document type and your target format, such as Word, Excel, or an editable PDF form. For professionals needing accurate reproduction of layout, fonts, and graphics, choosing the right approach matters: export capabilities, OCR for scans, and careful post-conversion cleanup. According to PDF File Guide, the most reliable results come from clarifying your end goal before converting and from validating the outcome against the original. The goal is to retain the document’s structure while making edits straightforward and repeatable. This foundation helps you pick tools, apply OCR when necessary, and verify every element after conversion.
Understanding your options
There are several pathways to convert pdf to edit, each suited to different kinds of PDFs. If the file is text-based and not scanned, exporting to a word processor (Word, Google Docs) often preserves most formatting. If the PDF is primarily scanned images, OCR (optical character recognition) is essential to convert images into searchable, editable text. Desktop software like dedicated PDF editors can combine both workflows and keep more complex elements intact, such as tables and vector graphics. Online services provide speed and convenience but may raise security considerations for sensitive documents. Professional workflows sometimes involve splitting the document into sections, editing in a source app, and reassembling. It's important to test multiple approaches on a sample page to compare layout fidelity, font rendering, and image quality. The choice also depends on your target output: editable Word docs, Excel spreadsheets, or re-usable PDF forms.
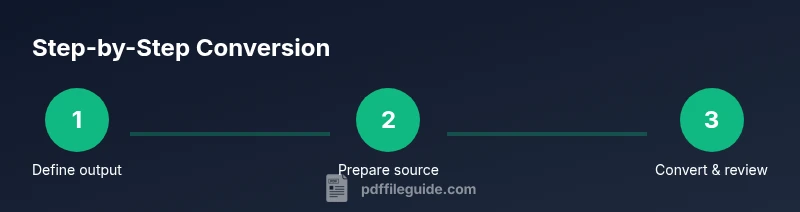
Step-by-step workflow overview
A robust workflow starts by defining the end format and preparing assets, then performing conversion, and finally validating results. Define the destination: Word, Excel, or a new editable PDF. Check the source quality and decide whether OCR is required. Run OCR if needed and then export to the chosen target format. Review the resulting document for layout drift and correct as necessary. Re-create complex elements like forms or charts in the destination app if needed. Perform a final proofread, verify links and images, and save a backup of the original.
Preparing your document for conversion
Start with a clean source. If you have a native PDF, ensure fonts used are embedded or substitute with similar fonts available in your editing tool. If you have scans, scan quality matters—set a resolution of 300 dpi or higher and save as a clear image. Consolidate pages with minimal margins to reduce layout drift. Remove extraneous metadata and ensure that color profiles won’t crash your editor. Gather any missing font files and confirm licensing if you plan to share the editable output publicly. Finally, determine your target output early so you can tailor the conversion settings accordingly.
Using OCR: when and how
OCR is essential for image-based PDFs. Choose an OCR engine with strong language support and layout understanding. Select appropriate recognition languages, enable table detection if your PDF contains tabular data, and opt for 'retains layout' or 'flow text' modes depending on your editor. Run the OCR on a sample page to calibrate accuracy before processing the entire document. After OCR completes, verify word accuracy, punctuation, and hyphenation, since errors commonly occur at line breaks and column borders. For best results, perform OCR on a machine with sufficient processing power and use high-quality scans.
Export targets: Word, Excel, and beyond
Export destinations define the editing experience. Export to Word (.docx) for rich text and styling, to Excel (.xlsx) for data-heavy content, or to PowerPoint for presentation-ready slides. Some tools offer export to plain text or RTF if you need maximum compatibility. When exporting from a PDF editor, choose options that preserve headings, tables, and lists, and enable font embedding if you plan to share the file. After export, open the file in the target application and confirm that fonts, spacing, and images align with the source document. If the layout is off, refine styles or re-run export with adjusted settings.
Handling tricky layouts: tables, columns, and graphics
Tables, multi-column text, and vector graphics often break during conversion. Use table detection features to recreate accurate grids; manually adjust header rows and column widths; and reflow text where necessary. For complex layouts, consider converting only key sections first to verify fidelity before processing the entire document. Graphics may require re-embedding or re-creating vector elements in the destination app to preserve scalability. If your PDF includes forms, you may need to reconstruct fields in the target tool rather than trying to convert them directly.
Preserving formatting: fonts, spacing, and color
Font substitution is a common issue when converting PDFs. Keep a reference list of fonts used in the original and map them to available fonts in your editing tool. Pay attention to line spacing, margins, and indentation; small shifts can alter readability. Color profiles should be checked, especially for documents intended for print. If images include captions or callouts, ensure they remain linked to the correct image. In all cases, maintain a backup and compare the editable output against the original to catch discrepancies early.
Verifying and correcting post-conversion
After conversion, proofread text and verify that numbers, dates, and bullet lists remain accurate. Check hyperlinks and cross-references, re-link images if needed, and run spell-check and grammar checks. Use compare tools to highlight differences between the original and the editable version. If layout drift is significant, consider redoing the conversion with adjusted settings or an alternate tool. For sensitive documents, review redactions and metadata to ensure nothing sensitive remains in the export. PDF File Guide analysis shows that validating output against the source reduces rework and ensures professional quality.
Choosing the right tools: desktop vs online
Desktop PDF editors generally offer more control, offline security, and batch processing for large files. Online tools provide speed and accessibility from any device, but you should assess data sensitivity and privacy policies. Some tools excel at OCR accuracy, while others focus on preserving complex formatting. If you frequently convert PDFs to edit, invest in a reputable desktop editor with robust export options and a reliable OCR module; keep a workflow record for consistency.
Common pitfalls and how to avoid them
- Pitfall: Relying on a single conversion pass. Solution: run OCR, then verify and manually adjust. - Pitfall: Losing fonts during export. Solution: map fonts explicitly and embed fonts when possible. - Pitfall: Poor table fidelity. Solution: re-create tables in the destination app if necessary. - Pitfall: Privacy concerns with online tools. Solution: use offline editors for confidential documents. - Pitfall: Ignoring post-conversion proofreading. Solution: run a detailed read-through and spell check. The PDF File Guide team recommends maintaining a consistent workflow to minimize surprises when converting PDFs to edit.
Tools & Materials
- Desktop PDF editor with export and OCR features(Ensure it can export to Word (.docx) and handle table formatting)
- High-quality scanner or scanner app(If working with physical documents; 300 dpi recommended)
- Word processor (e.g., Microsoft Word or Google Docs)(For editing and finalizing content)
- OCR engine with multi-language support(Enable layout retention and table detection)
- Font mapping reference (source fonts)(List of fonts used in original PDF)
- Backup storage (local or cloud)(Create a clean restore point before edits)
- Quality check checklist(From quick proofread to compare outputs)
- Metadata removal tool (optional)(If privacy is a concern)
Steps
Estimated time: 60-120 minutes
- 1
Define your target format
Decide whether the final editable output will be Word, Excel, or an editable PDF. This choice drives the export settings and OCR approach, keeping the workflow focused and efficient.
Tip: Confirm the end-use to avoid rework later. - 2
Prepare the source document
Assess whether the PDF is native or scanned. Ensure fonts are available, images are clear, and the file is organized by sections to minimize drift during conversion.
Tip: Back up the original before editing begins. - 3
Run OCR when required
If the PDF is image-based, apply OCR with the correct language and table detection. Calibrate on a sample page to optimize accuracy before processing all pages.
Tip: Choose high accuracy and verify results before full-scale processing. - 4
Export to the chosen format
Export to Word, Excel, or another editable format using the editor’s export options. Enable font embedding if available and verify that headings, tables, and lists are preserved.
Tip: Test a short sample page first to adjust settings. - 5
Review and adjust layout
Check for misaligned columns, font substitutions, and image placement. Manually tweak styles to align with the source document’s look and feel.
Tip: Use style sheets to maintain consistency across pages. - 6
Proofread and verify
Run spell-check, verify numbers and dates, and test links. Use comparison tools to spot differences from the original.
Tip: Maintain a changelog of edits for traceability. - 7
Archive and document the workflow
Store the final editable file with a clear version label and keep the original PDF for reference. Document which tools and settings were used for future runs.
Tip: Create a reusable template for similar documents.
Questions & Answers
Can I edit a PDF directly without converting it?
Not generally; PDFs are fixed-layout documents. To edit content, you typically convert to an editable format such as Word or Excel, then re-import or adjust as needed.
PDFs are fixed, so converting to an editable format is usually necessary.
What formats can I export to after conversion?
Common targets include Word, Excel, and PowerPoint; you may also export to an editable PDF depending on the tool.
You can export to Word, Excel, or PowerPoint.
Does OCR always preserve the original layout?
OCR helps convert images to text, but layout fidelity varies; expect adjustments for fonts, spacing, and alignment.
OCR helps, but layouts often need tweaks.
Is online conversion safe for confidential PDFs?
Online tools can expose data; choose offline tools for sensitive documents or review privacy policies before uploading.
Be careful with sensitive PDFs—prefer offline tools.
How long does it take to convert a 10-page document?
Duration depends on source quality and tool; plan for 30-60 minutes plus proofreading.
Plan about 30 to 60 minutes, plus proofreading.
What if the PDF contains forms?
Forms may require recreating fields in the editing tool rather than direct conversion.
You might need to rebuild form fields.
Watch Video
Key Takeaways
- Define the target format early to guide the workflow.
- OCR is essential for image PDFs but requires verification.
- Always proofread and compare with the original for fidelity.
- Choose tools that balance OCR accuracy with layout preservation.
- Document the workflow for repeatable results.