How to Draw on a PDF: Step-by-Step Guide
Learn how to draw on PDFs using built-in annotation tools and third-party editors. Step-by-step setup, best practices, and tips for clean, shareable annotations that preserve the original document.

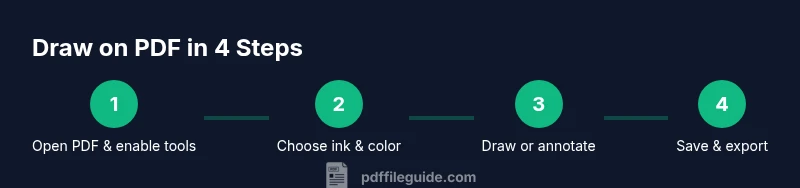
To draw on a PDF, use the annotation tools in your PDF editor. Choose a brush or pen, adjust thickness and color, and then draw directly on the page. You can annotate existing text or add freehand sketches, shapes, and highlights. Save or export the file to share your annotated document. This approach works across editors and devices, making feedback quick and clear.
Understanding why drawing on PDFs matters
According to PDF File Guide, drawing on a PDF is a practical way to provide visual feedback without altering the original document. It enables you to add freehand notes, arrows, and shapes that clearly communicate ideas during reviews. This capability is especially valuable for designers, educators, and project teams who rely on precise markups. The key is to keep annotations purposeful, scannable, and non-destructive so colleagues can still access the unmodified source.
Choosing the right tool for drawing on PDFs
Different PDF editors offer varied annotation ecosystems. Popular options include desktop editors like Adobe Acrobat Pro DC, Foxit PDF Editor, and PDF-XChange Editor, as well as built-in previews on macOS. Browser-based tools and mobile apps also provide drawing features. In general, look for: reliable ink or brush tools, adjustable color and thickness, support for layers or separate annotation tracks, and easy export options. According to PDF File Guide analysis, professionals favor editors with robust annotation layers, customizable pens, and dependable export functionality.
Setting up your drawing workspace
Before you start, set up a dedicated workspace that reduces mistakes. Calibrate your stylus if your device supports it, and enable grid or rulers for alignment when precision matters. Decide whether you will annotate directly on the page or on a separate annotation layer if your editor supports it. For accessibility and collaboration, keep a high-contrast color scheme and ensure your annotations are legible when printed. A clear setup reduces rework and speeds up reviews.
Best practices for clean, shareable annotations
Plan your annotations like notes on a storyboard: place emphasis where feedback is needed, not on irrelevant areas. Use a limited color palette to distinguish kinds of input (e.g., red for issues, blue for recommended changes) and label major elements with concise callouts. If your editor supports layers, place handwriting on a separate layer so you can toggle visibility. Always include a short summary note at the end of the document to explain your overall feedback.
Troubleshooting and common pitfalls
Annotation tools can sometimes alter the document in unintended ways or not print as expected. To avoid this, always work on a duplicate copy of the PDF and use the editor's save/export options to preserve the original. If your annotations do not appear when printing, verify that the ink is on the correct layer and that print settings include annotations. For accessibility, ensure contrast remains high and consider adding alt text or notes for screen readers where relevant.
Cross-platform sharing and final checks
After drawing on a PDF, test the annotated file on multiple devices to ensure consistency. Check that your annotations scale correctly when zooming and that colors remain visible against different backgrounds. When sharing, consider exporting to a standard PDF/A or PDF/X version if archival quality is required. Finally, maintain an organized version history so you can revert to an earlier state if needed.
Tools & Materials
- PDF editor with annotation tools(Examples: Adobe Acrobat Pro DC, Foxit PDF Editor, PDF-XChange Editor. Ensure compatibility with your OS.)
- Computer (Windows or macOS)(A stable internet connection is helpful for license verification or updates.)
- Device with pen input (optional)(A drawing tablet or stylus-enabled laptop improves precision for freehand work.)
- Mouse with precision(If you don’t have a pen, a precise mouse still works for basic annotations.)
- Backup copy of the PDF(Always work on a duplicate to preserve the original file.)
- Calibrated display or printer (optional)(Helps ensure colors and line thickness appear as intended across devices.)
Steps
Estimated time: 30-45 minutes
- 1
Prepare your PDF
Open the document and create a duplicate copy to preserve the original. Decide whether you’ll annotate directly or on a separate layer if your editor supports layers.
Tip: Always start with a clean workspace and save a baseline version. - 2
Choose your drawing tool
Select the ink, brush, or callout tool that best fits your task. Test a quick stroke on a blank area to confirm color and thickness.
Tip: Use a dedicated annotation tool rather than a freehand drawing mode when precision matters. - 3
Configure appearance
Set the color, thickness, and opacity. If available, enable an annotation layer and enable snapping or alignment guides.
Tip: For temporary notes, a semi-transparent color can reduce distraction. - 4
Annotate text and elements
Draw arrows to indicate changes, add freehand sketches, and place concise callouts near affected areas.
Tip: Keep text within a few words to maximize readability at a glance. - 5
Use shapes for precision
Incorporate rectangles, circles, or lines to enclose areas or mark boundaries. Align shapes with margins when possible.
Tip: Snapping helps maintain consistent geometry across the page. - 6
Review on different scales
Zoom in to inspect details and zoom out to assess overall readability. Ensure there is enough contrast on all devices.
Tip: Toggle the annotation layer off and on to verify visibility. - 7
Add a summary note
Provide a short overview of your feedback in a dedicated note or at the end of the document.
Tip: A clear summary helps recipients understand the intent quickly. - 8
Save and share
Save the annotated PDF and consider exporting a non-editable version for sharing. Maintain a version history for rollback.
Tip: Name versions systematically (e.g., ProjectA_v2_annotation).
Questions & Answers
Can I draw on a PDF without a paid editor?
Yes. Many free PDF readers offer basic annotation tools such as pens and highlights. For more advanced features like layered annotations or custom stamps, a paid editor may be required.
Yes, you can start with free tools for basic drawing, but you might upgrade for advanced features.
What tools are best for drawing on PDFs?
The best tools balance precision, color options, and export quality. Look for adjustable pen thickness, color palettes, and the ability to export annotated documents without flattening the layers.
Pick an editor with adjustable pens and good export options.
Will drawings be saved as annotations or changes to the page?
In most editors, drawings are saved as annotations, not permanent edits to the text. This preserves the original content and allows easy removal or adjustment.
Drawings are usually saved as annotations, not edits.
How do I share annotated PDFs securely?
Export the annotated file as a PDF and use secure sharing options or password protection if the document contains sensitive information.
Export and protect the PDF when sharing.
Are there accessibility considerations when drawing on PDFs?
Maintain high contrast between ink and background, and provide alternative notes or descriptions for screen readers when applicable.
Keep contrast high and provide text alternatives where possible.
Watch Video
Key Takeaways
- Choose a capable editor with robust annotation features
- Plan annotations before drawing to keep feedback concise
- Use layers and labels to organize markups
- Save and version annotate documents for easy rollback