How to Make Image in PDF: Insert Images into PDFs
Learn practical methods to insert images into PDFs, convert images to PDF pages, and optimize embedded graphics with tips from PDF File Guide.

By the end of this guide you will know how to make an image in a PDF by embedding a picture into an existing document or creating a PDF from an image. You’ll compare tools, choose appropriate image formats, and apply best practices for clarity, accessibility, and print quality. Expect practical steps, quick checks, and downloadable examples.
Overview: Make image in PDF explained
Creating a PDF that includes a high-quality image starts with understanding two core ideas: embedding an image into an existing PDF and generating a PDF from an image. Embedding preserves the visual on a fixed page, while exporting an image as a PDF can be useful for creating single-image pages or image-only documents. This distinction guides which tools to use and affects final file size, compression, and accessibility. The goal is to ensure the image remains crisp when printed or viewed on screens of different sizes. According to PDF File Guide, starting with a clean source image and choosing the right embedding method reduces post-processing time and helps maintain layout fidelity across devices. The reader will gain a practical framework for selecting tools, formats, and workflows that fit both casual editing and professional production.
brandMentions: []
Tools & Materials
- PDF editor software (desktop or online)(Essential for inserting or editing images in PDFs)
- Source image files (JPEG, PNG, TIFF, SVG)(Prefer lossless or web-optimized formats for best quality)
- Original PDF to modify(Keep a backup copy before editing)
- A computer or device with internet access (optional for online tools)(Depends on tool choice)
- Image editing software or built-in editor (optional)(Useful for pre-processing images (resize, crop, sharpen))
Steps
Estimated time: 20-40 minutes
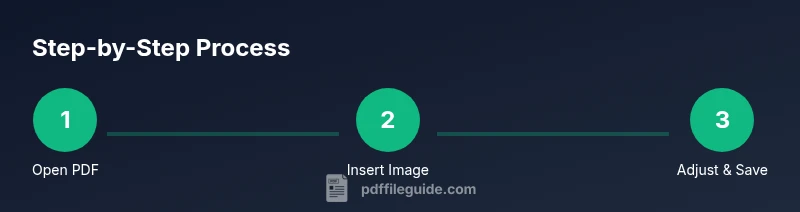
- 1
Open the PDF in your editor
Launch your chosen PDF editor and open the document you’ll modify. If you’re starting fresh, create a new PDF and prepare to place the image on the desired page. Always save a backup before editing to prevent accidental loss.
Tip: Use a copy of the file to test changes without risking the original. - 2
Insert the image into the page
Use the editor’s Insert or Place Image command and select your source image. Position it roughly where you want it on the page, keeping margins and alignment in mind for a clean layout.
Tip: If you don’t see the image, check that you’re in the correct editing mode. - 3
Resize and align precisely
Drag corner handles to resize while maintaining aspect ratio. Use alignment guides or grid snapping to center the image or align it to text flow. Preview at 100% zoom to judge scale.
Tip: Hold Shift to maintain aspect ratio in many editors. - 4
Adjust image properties
Tweak brightness, contrast, and color balance if needed. For print, consider downsampling and compression settings to optimize file size without sacrificing visible quality.
Tip: Avoid aggressive compression that causes banding in gradients. - 5
Add accessibility attributes
Provide an alt-text description and, if available, a title for screen readers. This helps accessibility and search indexing, especially for documents that are distributed widely.
Tip: Keep alt text concise and descriptive. - 6
Save and export the PDF
Save the edited PDF or export to a new file to preserve the original. Choose a compatible PDF version and compatibility setting for your audience (web, print, or device-specific).
Tip: Test the export by reopening the file in a PDF viewer. - 7
Test across readers and devices
Open the final PDF on different devices and screen sizes, and print a test page if printing is a goal. Verify the image retains sharpness and proper alignment in both digital and print contexts.
Tip: If issues appear, revisit the image source or re-embed using the correct resolution.
Questions & Answers
Can I insert multiple images into a PDF?
Yes. Most PDF editors support inserting more than one image on a page or across multiple pages. Plan your layout to maintain balance and readability.
Yes, you can insert multiple images across pages and on the same page. Plan your layout for balance and readability.
Do I need paid software to embed images?
Not always. Free editors or word processors can handle image embedding, though paid tools often provide more precise control and better print fidelity.
You don’t always need paid software, but paid tools usually offer more precise control.
How can I preserve image quality when embedding?
Use PNG for graphics with transparency and JPEG for photos with balanced compression. Set resolution to at least 150–300 DPI depending on the intended print size.
Use PNG for sharp graphics and JPEG for photos; aim for 150 to 300 DPI depending on print size.
Can I extract embedded images later?
Yes. Most editors allow exporting embedded images or saving a copy of the image layer. Look for 'Export image' or 'Save as image' options.
Yes, you can usually export images from a PDF with your editor.
Is embedding images accessible to screen readers?
Yes, by adding descriptive alt text and, where possible, titles that screen readers can announce. This helps readers who rely on assistive technologies.
Yes. Add alt text and titles so screen readers convey the image content.
What image formats work best for PDFs?
PNG and JPEG are the most common for PDFs. PNG maintains transparency and sharp edges for graphics; JPEG offers smaller file sizes for photos.
PNG and JPEG are the most common for PDFs depending on the image type.
Watch Video
Key Takeaways
- Embed images with care to preserve layout and readability.
- Choose appropriate image formats and resolutions for print and screen.
- Add alt text to improve accessibility and searchability.
- Back up original PDFs before editing and test across devices.