How to Make PDF Out of Images: A Complete Step-by-Step Guide
Learn how to make PDF out of images with a thorough, practical guide. Explore desktop and online tools, quality tips, and batch workflows to create polished PDFs from photos and screenshots.

By following the steps below, you’ll learn how to make pdf out of images by arranging visuals, choosing page settings, and exporting to PDF with desktop software or online tools. This quick guide covers the essential steps, from gathering images to final export, plus tips for quality and compression. PDF File Guide’s approach keeps the process straightforward for beginners and pros alike.
Understanding how to make pdf out of images
Creating a PDF from images is a practical way to bundle photos, diagrams, or scanned pages into a single, portable document. The key is to maintain a logical order, select an appropriate page size, and export using a tool that preserves image fidelity. According to PDF File Guide, starting with clean, well-named images reduces confusion later and helps ensure the final PDF reads smoothly across devices. This section lays the foundation for choosing the right tools and preparing your images for a crisp, print-ready or screen-friendly PDF.
Image quality and pre-processing for the best results
Before you convert, pre-process your images to ensure consistency and readability. Uniform resolution is important: for digital sharing, 72–150 ppi is often sufficient, while print-ready PDFs benefit from higher resolution (typically around 300 ppi). Crop out unnecessary borders, adjust brightness and contrast, and convert to a common color space (usually sRGB or CMYK depending on your printing needs). Handling color profiles consistently prevents unexpected shifts when the PDF is viewed on different screens. If you work with mixed formats (JPEG, PNG, TIFF), normalize them to a common size or aspect ratio to avoid gaps or scaling surprises in the final document. PDF File Guide notes that a little pre-processing saves time during export and yields a cleaner final product.
Desktop versus online tools: choosing the right path
Desktop software generally offers more control, higher fidelity, and robust compression options, which makes it ideal for professional outputs. Online tools provide convenience and speed when you’re on the go or dealing with a limited number of images. When evaluating options, consider: whether you need batch processing, if you require watermarking or annotations, and how sensitive your images are to privacy. If you’re handling confidential content, prefer offline methods or trusted, privacy-compliant services. PDF File Guide recommends testing a small batch first to compare quality and file size across tools before committing to a workflow.
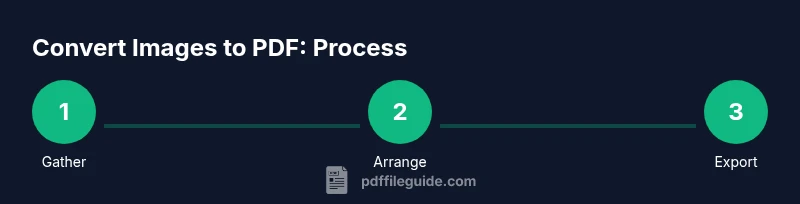
Step-by-step workflow: from images to a single PDF
This section gives a practical sequence you can apply with most tools. Start by gathering your images in the correct reading order, then set your page size, margins, and orientation. Import the images in the chosen order, ensure each image fits the page, and enable any options like “fit to page” or “scale content.” Finally, export or save as PDF, selecting a suitable image compression level and preserving color profiles. Always review the resulting file to confirm pages are in order and no content is cropped or shifted. PDF File Guide emphasizes validating the export on multiple devices to ensure consistency.
Quality and compression considerations for professional results
Balancing file size and image quality is a common challenge. Use lossless or minimal compression for pages with text or fine details; for photographic collections, modest compression can dramatically reduce size with negligible visual impact. When exporting, choose a compatible page size (A4 or Letter commonly) and verify that rotation and margins align with your printing or display needs. Embedding fonts and preserving metadata can improve accessibility and searchability, though they may increase the file size slightly. If you plan to publish online, consider downsampling large images to reduce bandwidth while maintaining readability.
Accessibility and searchability in image-to-PDF workflows
A PDF created from images can be made more accessible by adding OCR text overlays and tagging structure where possible. If your tool supports it, enable OCR after the images are placed to create searchable text layers. Add document properties and metadata like title, author, and subject to help with indexing. For screen reader users, ensure at least a logical reading order is preserved and that any captions are properly associated with their images. PDF File Guide reminds creators that accessibility expands the reach and usability of documents, especially for professionals who share PDFs with clients or colleagues.
Printing, device considerations, and color management
When preparing for print, ensure your PDFs use the correct color profile and include printer-friendly margins. Some printers handle RGB PDFs well, while others require CMYK. If your workflow includes long print runs, perform a small test print to verify color accuracy and page alignment. For digital viewing, ensure your pages render crisply on common devices by keeping image sizes moderate and avoiding excessive upscaling. Consistent image scaling across all pages helps achieve a professional, polished look.
Automation and batch workflows for large image sets
If you routinely convert many images to PDFs, automate the process with a batch workflow. Look for tools that support scripting or drag-and-drop batch operations, and consider naming conventions that preserve order across batches. Document your settings (page size, margins, compression) so the same results are reproducible. For organizations, batch processing saves time and reduces manual errors. PDF File Guide suggests starting with a single batch to validate results before scaling up to larger datasets.
Common mistakes and quick fixes
Avoid common pitfalls like inconsistent image sizes, mixed orientations, and missing margins. Regularly check the final PDF to confirm all pages are present and correctly ordered. If you notice blurry pages, re-check the source images' resolution or adjust the export compression. If color shifts occur, adjust color management settings or re-export with a consistent color profile. Finally, back up your original images before starting any conversion so you can re-run the process if needed.
Final checks and distribution best practices
Before sharing, review the PDF on multiple devices and apps to ensure compatibility. Consider adding a simple cover page, a table of contents for long collections, or page numbers to improve navigability. If you’re sending the file by email, verify the size is within recipient limits or use a secure document-sharing solution. For archival purposes, maintain a master copy with full metadata and a version history.
Tools & Materials
- Images to be included in the PDF(JPEG, PNG, TIFF, or GIF. Ensure they are in the desired reading order.)
- Page size and orientation(Common choices: A4 portrait, Letter landscape. Align with your final use.)
- PDF creation tool (desktop or online)(Examples include built-in print-to-PDF options, dedicated PDF apps, or online converters.)
- Image pre-processing tools(Basic editors for crop, brightness/contrast, and color adjustments.)
- Backup storage(Keep an original copy of all source images in a separate location.)
- Internet connection (for online tools)(Needed if you choose cloud-based conversion services.)
Steps
Estimated time: 20-40 minutes
- 1
Gather and review your images
Collect all images you plan to include and review their quality. Rename files if needed to reflect the reading order, and decide if any images require edits before exporting.
Tip: Work with a copy of the originals to avoid data loss. - 2
Arrange images in the desired order
Sort by event, chronology, or narrative flow. Group similar subjects together to improve readability, and use a consistent naming convention to preserve your chosen order.
Tip: Create a quick checklist to confirm sequence before exporting. - 3
Set page size, orientation, and margins
Choose a page size suitable for your final destination (e.g., A4) and decide portrait or landscape. Apply margins that prevent content from being cut off during printing or binding.
Tip: If you plan to print photos, allow slight margins for binding. - 4
Import images and adjust fit
Import images into your tool in order, and ensure each image fills the page appropriately. Use 'fit to page' or equivalent options to avoid unexpected cropping.
Tip: Check for any stray edges or black borders after import. - 5
Export or save as PDF
Choose PDF as the output format and select an appropriate compression level. Preserve color profiles and embed fonts if needed for accessibility or print quality.
Tip: Prefer lossless or light compression for text-heavy pages. - 6
Review the final PDF
Open the PDF on multiple devices, verify page order, and confirm margins and readability. Check for any blank pages or misaligned content before distributing.
Tip: Keep a copy of the source images in case you need to recreate the PDF.
Questions & Answers
Can I combine different image formats into one PDF?
Yes. Most tools support JPEG, PNG, TIFF, and GIF within a single PDF. Ensure all files are properly oriented and scaled for a consistent look.
Yes, you can combine different image formats into one PDF. Just make sure their orientation and size are consistent for a smooth reading experience.
What page size should I choose for a general purpose PDF?
A4 or Letter are the most versatile for printing and sharing. Pick one and keep it consistent across all pages to avoid unexpected margins or cropping.
A4 or Letter are the best defaults for general use. Keep the same size on every page.
How can I compress a PDF without losing too much quality?
Use moderate compression for photographs and preserve text clarity where needed. Some tools offer separate controls for image quality vs. overall file size.
Use moderate image compression and preserve text clarity. Balance file size and readability.
Is it possible to password-protect the PDF?
Yes. Many tools support password protection and permissions. Choose a strong password and share it securely with intended recipients.
Yes, you can password-protect PDFs. Use a strong password and share it securely.
Can I automate this process for a folder of images?
Yes. Look for batch or command-line features in your tool of choice. Create a repeatable workflow with defined export settings for consistent results.
Yes, you can automate batch conversions with batch features or scripts.
Watch Video
Key Takeaways
- Plan ordering and layout before exporting.
- Choose tools that fit your needs (offline vs online).
- Balance image quality and file size for your audience.
- Validate accessibility with metadata and selectable text when possible.
- Test the final PDF on multiple devices.