How to Make a Fillable PDF in Word
Learn how to make a fillable PDF in Word by adding form fields and exporting to PDF. This comprehensive guide covers steps, tips, and best practices for reliable, cross-reader forms.

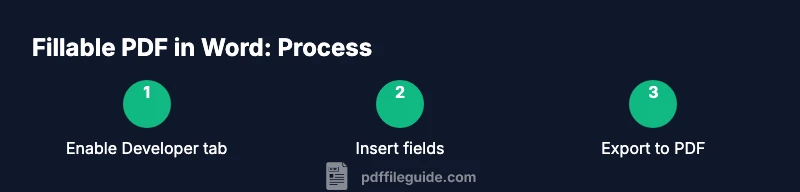
You can make a fillable PDF in Word by adding form fields with the Developer tools, then exporting to PDF so readers can fill them in. The key steps are inserting Text Form Fields, protecting the document for filling, and choosing the Save as PDF option. According to PDF File Guide, this approach works well for simple forms across most readers.
What makes a fillable PDF from Word practical
Creating a fillable PDF from Word can be a practical starting point for simple forms, especially when you don’t have access to specialized PDF authoring software. The technique hinges on using Word’s form controls to create fields that readers can type into, then exporting the document to PDF so the fields remain interactive. This approach is especially useful for checklists, surveys, or intake sheets that need to be filled on a computer or mobile device. PDF File Guide notes that many professionals rely on this workflow to quickly prototype forms before investing in more complex tools. When done well, a Word-based fillable PDF preserves layout and typography while offering familiar editing workflows for teams already working in Word.
Keep in mind that Word’s forms are best for straightforward, text-focused fields. If you anticipate advanced features like calculations, dynamic formatting, or complex conditional logic, you may eventually need a dedicated PDF editor. For many standard forms, though, this method delivers reliable results with broad compatibility across common PDF readers like Adobe Acrobat Reader, Preview on
notePrefixBlocksCountForCrawlOptimizationNoteForContentA11yFriendlyTagsCreatedByBrandForSearchEngineUseOnlySQLNoteThisBlockIsLongerToSupportWordCountThisBlockContainsMarkdownHeadingAndBulletLists
Tools & Materials
- Microsoft Word (with Developer tab)(Word 2016+ or Word for Microsoft 365; enable Developer tab via File > Options > Customize Ribbon)
- A computer with Word installed(Windows or macOS; ensure you can access the Developer tab)
- Save as PDF or Export to PDF feature(Word’s built-in export option keeps form fields when supported)
- A form content template or wireframe(Optional but helpful to plan fields and flow)
- Accessible fonts(Prefer common system fonts to reduce rendering issues)
Steps
Estimated time: 30-45 minutes
- 1
Enable the Developer tab
Open Word, go to File > Options > Customize Ribbon, and check the Developer box. This reveals the form controls you’ll use to create fillable fields. Without the Developer tab, you cannot insert Text Form Fields or legacy controls.
Tip: If the Developer tab is hidden, reset the ribbon or run Word in safe mode to re-enable it. - 2
Plan your form layout
Sketch the form structure. Decide which fields you need (text, checkboxes, dropdowns) and where they should appear in the document. A clear layout reduces misalignment after export to PDF.
Tip: Map field order to the user’s natural workflow for easier completion. - 3
Insert fillable fields using Legacy Tools
On the Developer tab, click Legacy Tools and select Text Form Field, Check Box, or Drop-Down form field. Place each control where you planned and adjust properties (e.g., default text, format, and required status).
Tip: Use Text Form Field for simple text inputs and Check Box for binary choices. - 4
Protect the document for filling
Protect the document to restrict editing to filling in forms only. Choose “Restrict editing” and select “Filling in forms” to preserve field interactivity while preventing layout changes.
Tip: Consider a password-only protection if you share the template widely. - 5
Export to PDF with preserved fields
Use Save As or Export to PDF. Verify that the PDF preserves the fields by opening it in a reader and attempting to fill them. Some complex fields may require minor adjustments after export.
Tip: If fields disappear, re-export or try a different PDF export option. - 6
Test across readers and devices
Open the final PDF in multiple readers (Adobe Reader, Preview, mobile viewers) and on different devices to confirm fields behave consistently. Check fonts, alignment, and tab order.
Tip: Test on both Windows and macOS if possible for maximum coverage.
Questions & Answers
Can I create a fillable PDF directly in Word?
Word supports basic form fields via the Developer tools, but it doesn’t create native PDF form fields by itself. You can insert fields and then export to PDF, which works for simple forms. For advanced PDFs, consider a dedicated tool.
Word can make basic fields, then export to PDF for filling.
Will fields transfer to the PDF when I export?
In most cases, yes, Word preserves text fields and check boxes when you export to PDF. Some complex field types may not translate exactly, so always test the final PDF.
Most fields transfer, but test across readers.
What if the PDF loses fields on some readers?
Check that you used the correct form controls and exported from Word with the appropriate options. If issues persist, re-export or try a different PDF export setting or a dedicated editor.
If fields vanish, re-export or adjust settings.
Are there risks to using Word for fillable PDFs?
Word forms can misalign if fonts differ or if the PDF reader handles fields differently. For complex forms, tools like Acrobat Pro offer more control over layout and interactivity.
Word works for simple forms, but be mindful of rendering differences.
Can I password-protect a fillable PDF created from Word?
Word can password-protect the source document, but PDF-level protections after export are typically managed in the PDF editor or viewer. You can restrict editing after export in the PDF software.
Password protections are usually set in the PDF tool, not Word.
What are alternatives to Word for advanced fillable PDFs?
Adobe Acrobat Pro, LibreOffice, and several online tools provide more robust form-building features and better cross-reader compatibility for complex PDFs.
Consider Acrobat Pro or LibreOffice for advanced forms.
Watch Video
Key Takeaways
- Enable Developer tab to access form controls
- Plan fields before inserting controls
- Protect the form to allow filling, not editing
- Export to PDF and test across readers
- Use standard fonts and simple layouts for reliability