Adobe Acrobat Image to PDF: Complete How-To
Learn how to convert images to PDF using Adobe Acrobat. This educational guide covers supported formats, quality settings, batch conversions, accessibility, and troubleshooting for reliable adobe acrobat image to pdf results.

You will learn how to convert an image to PDF using Adobe Acrobat. This quick guide covers supported image formats, optimal resolution, and how to adjust export settings for quality and accessibility. By the end, you’ll be able to create a polished PDF from a single image or multiple images, with tips for compression and sharing.
Understanding the Adobe Acrobat image to pdf workflow
An adobe acrobat image to pdf workflow centers on turning a static picture into a portable document that preserves layout, color, and text readability. In most professional setups, the image is treated as a page in a multipage PDF, which makes it easier to share, annotate, and archive. The goal is to balance image fidelity with file size and compatibility across devices. When you start from a high-quality source (JPEG, PNG, TIFF), Acrobat’s export options let you control resolution, color space, and compression. For editors specializing in documents, knowing these knobs will help you deliver consistent results across different clients and platforms. This approach is particularly helpful for reports, design proofs, and client deliverables where image clarity matters.
Supported image formats and quality considerations
Adobe Acrobat supports several common image formats for PDF creation, including JPG (JPEG), PNG, and TIFF. Each format has trade-offs between color accuracy, transparency support, and file size. For best results, start with the highest quality source you have and choose an appropriate DPI during export. A typical balance for on-screen viewing is 150–200 dpi; for print, many professionals opt for 300 dpi or higher. Be mindful of color profiles; sRGB is a safe default for web and general use, while Adobe RGB may offer broader color space for print workflows. When you adjust compression and downsampling, you’ll influence how crisp the final image looks on different devices, so test the resulting PDF on both a monitor and a printer if possible.
When to use Acrobat Pro DC vs. Acrobat Reader
Adobe Acrobat Pro DC provides the most robust toolset for image-to-PDF workflows, including direct access to Create PDF from File, batch processing, and advanced optimization options. Acrobat Reader may offer basic viewing and some export capabilities, but it lacks the full feature set required for professional image-to-PDF conversion. If your work involves frequent image-to-PDF tasks, a Pro license not only speeds up this process but also unlocks batch operations, OCR, and enhanced security features. For occasional conversions, you might explore free trial options or evaluate if a single-project license better fits your needs.
Batch conversion and combining images into a single PDF
Converting multiple images into a single multi-page PDF is a common requirement for portfolios, presentations, and documentation sets. In Acrobat, you can use Combine Files into a Single PDF or Create PDF from File with multiple selections. The ability to reorder pages, delete duplicates, and insert gaps lets you curate a logical flow. When arranging multiple images, consider a consistent order (e.g., chronological, topic-based, or by priority) and ensure each image has uniform sizing and margins so the final document reads cleanly.
Quality and resolution considerations when exporting
Resolution directly affects file size and legibility. For screens and online distribution, 150–200 dpi often suffices, while print demands 300 dpi or higher. In Acrobat’s export or optimization settings, you can control downsampling (reducing image resolution) and compression (e.g., JPEG quality). If you anticipate stakeholders printing the PDF, prefer minimal compression and higher dpi; for email sharing, a smaller file size may be more practical. Remember that overly aggressive compression can degrade detail, especially in detailed diagrams or small text.
Accessibility and searchability considerations
A PDF created from an image will not automatically provide searchable text unless OCR is applied. For accessibility, enable OCR after image-to-PDF conversion to convert image text to selectable, searchable content. You should also add descriptive alt text to images so screen readers can convey context to visually impaired users. Maintaining proper document structure—headings, alt attributes, and logical reading order—improves the experience for all readers.
Security and sharing considerations for image PDFs
If you share image-based PDFs containing sensitive information, consider applying basic security measures such as password protection or restricting editing. Acrobat includes options to set permissions, watermarks, and digital signatures as needed. Always verify that the final file preserves the intended audience’s access level, especially when distributing to external clients or collaborators. When possible, replace sensitive visuals with lower-resolution previews for broad sharing while keeping the full-resolution source secure.
Practical workflow tips for consistency across projects
Develop a repeatable workflow: verify source image quality, pick an export profile, perform a quick test render, then batch-process as needed. Keeping a standard naming convention for source files and final PDFs reduces confusion. If you regularly convert images for print, maintain a “print-ready” preset with 300 dpi and an appropriate color space. For web or internal review, use 150–200 dpi and optimize for size. Document these presets so teammates can reproduce results with minimal friction.
Tools & Materials
- Adobe Acrobat Pro DC(Essential for 'Create PDF from File' and batch processing)
- Source image files (JPG, PNG, TIFF)(Use high-quality originals; check resolution before export)
- A computer with adequate RAM and storage(Helpful for large batches; avoid slow workflows)
- OCR capability (optional)(Enable after creation to make text searchable)
- Color profile reference (sRGB recommended)(Ensures color consistency across devices)
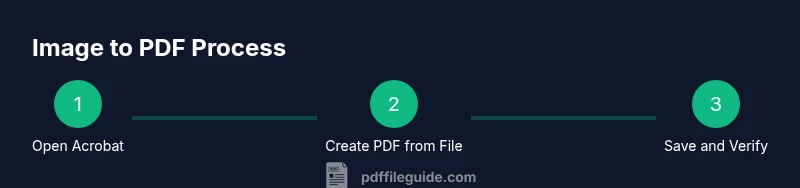
Steps
Estimated time: 5-10 minutes
- 1
Open Adobe Acrobat Pro DC
Launch the application and prepare the workspace for image-to-PDF tasks. This ensures the correct tools are available and reduces disruption when you start the conversion.
Tip: Close unrelated apps to allocate more memory for Acrobat. - 2
Initiate Create PDF from File
From the Tools panel, select Create PDF, then choose From File to begin the conversion workflow for a single image or multiple images.
Tip: If you see a different path, use the search box in Tools to locate 'Create PDF from File'. - 3
Select your image
Browse to the image you want to convert, select it, and click Open. Verify that the preview shows the exact image and that no isolation artifacts are present.
Tip: Preview thumbnails help confirm you picked the right file before proceeding. - 4
Adjust output settings
In the export options, choose resolution (150–300 dpi as appropriate), color space, and compression. Higher DPI improves clarity but increases file size.
Tip: For documents destined for print, favor 300 dpi with minimal compression. - 5
Save the PDF
Choose a destination folder, provide a descriptive file name, and click Save. A clear name helps future retrieval and version control.
Tip: Use a consistent naming convention like topic_date_version.pdf. - 6
Verify and reconcile
Open the saved PDF and scan through the pages to confirm image fidelity, margins, and readability. Run OCR if needed and re-save.
Tip: Check both on-screen and print previews if available.
Questions & Answers
Can I convert multiple images into one PDF?
Yes. Acrobat can combine several images into a single PDF, preserving the order you specify.
Yes, you can combine several images into one PDF by arranging them in the desired order.
Do I need Adobe Acrobat Pro to convert images to PDF?
The Create PDF from File feature is most robust in Acrobat Pro DC; some basic conversion tasks may be possible with other Acrobat variants.
Acrobat Pro DC is typically required for creating PDFs from images, especially for batch processing.
Will the PDF preserve image quality?
Quality depends on the chosen DPI and compression settings during export; higher DPI preserves detail but increases file size.
It depends on the DPI and compression. Higher DPI means crisper results but larger files.
Can I convert from mobile devices?
Yes, Adobe Acrobat mobile apps offer image-to-PDF features, but availability varies by platform and version.
You can convert images on mobile with the Acrobat app, depending on your device and app version.
How can I make the PDF accessible?
After conversion, run OCR and add alternative text to images to support screen readers and better navigation.
Add alt text to images and enable OCR for accessibility.
Does Acrobat add OCR text automatically?
OCR is available as a post-conversion step; enable it after creating the PDF if you need searchable text.
OCR can be run after conversion to produce searchable text.
Watch Video
Key Takeaways
- Define your DPI based on final use
- Use OCR to enable text search in image PDFs
- Batch convert images to a single PDF when needed
- Organize filenames and destinations for repeatable workflows