Convert Picture to PDF: A Practical How-To Guide
Learn how to convert a picture to PDF across devices and tools. This guide covers methods, quality, privacy, and accessibility considerations for professionals and individuals working with PDFs.

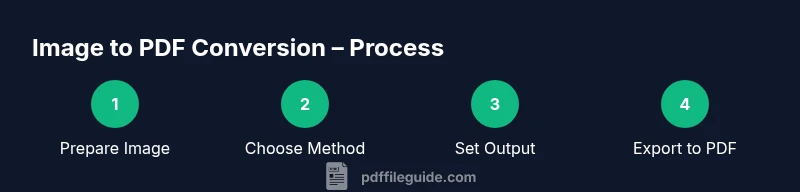
To convert a picture to PDF, pick a method (online tool, desktop app, or built-in OS feature), open or upload the image, adjust orientation and size, then save or export as PDF. This quick guide covers compatibility, quality, and privacy considerations for reliable results. Ensure your device and software are up to date, choose an appropriate resolution, and review the final file before sharing. Steps are explained below in detail.
What does converting a picture to PDF involve?
Converting a picture to PDF is about taking a static image and rendering it as a portable document. The process preserves the visual content while enabling universal viewing, print-ready formatting, and secure sharing. For professionals who work with client deliverables, a PDF version of a photo or diagram can be annotated, archived, and distributed without losing fidelity.
According to PDF File Guide, the standard workflow begins with selecting a suitable image file, choosing a conversion method, and then exporting or printing to PDF. The quality of the final document hinges on image resolution, color profile, and the target use case (screen viewing vs. print). When you start, consider whether you need editable text later (OCR) or simple image embedding.
If you plan to share widely, confirm compatibility with your recipient’s software. Most modern devices can open PDFs without extra software, which reduces friction. This section lays the foundation for practical steps you'll perform with tools on desktop, mobile, or online services.
Why convert to PDF? Benefits and common use cases
Converting pictures to PDF offers several clear advantages. PDFs preserve layout, ensure consistent appearance across devices, and are easy to compress for email or cloud sharing. For professionals, PDFs are ideal for archiving project visuals, client deliverables, and product photos with consistent margins and print-ready settings. PDFs also support password protection and digital signatures, adding a layer of security when sensitive images are involved. In educational settings, PDFs enable easy distribution of diagrams, charts, and scanned pages while maintaining a single portable file.
As you convert, consider your primary goal: is the PDF meant for viewing on screens, printing, or archiving long-term? Each goal guides your choices for resolution, color space, and compression. PDF File Guide analysis shows that aligning these settings with the intended use helps avoid surprises later when the file is printed or opened on different platforms.
Ultimately, converting a picture to PDF helps maintain consistency, protects visual integrity, and simplifies sharing—whether you're digitizing paper sketches, archiving design proofs, or preparing marketing visuals for a client presentation.
Methods to convert picture to PDF: offline, online, and built-in tools
There are three broad paths to convert a picture to PDF: offline desktop software, online services, and built-in operating system features. Offline software, such as full-featured PDF editors, gives the most control over output settings (dpi, color management, and compression). Online tools offer quick results from a browser, but privacy concerns mean you should avoid uploading sensitive images. Built-in OS features (Windows, macOS, iOS, Android) provide fast, no-install options that are decent for everyday tasks.
Offline tools typically let you arrange multiple images in a specific order, apply OCR after conversion, and export to PDF/A for long-term archiving. Online services can merge multiple images into a single PDF and sometimes offer batch processing, but they require trust in the provider and depend on your internet connection. Built-in features usually use a “Print to PDF” or “Save as PDF” option and are convenient for quick, ad-hoc conversions.
Choosing the right method depends on your priorities: privacy (offline), convenience (built-in or online), or project scale (offline with batch processing). If you’re working with non-sensitive visuals and want speed, an online or OS-based method is often sufficient. For sensitive material, prefer offline software to avoid cloud exposure.
Preparing images for conversion: quality, alignment, and file format considerations
Before you convert, ensure your image is prepared for the best possible PDF output. Start with a high-resolution image (preferably 300 dpi for print quality; 150–200 dpi can suffice for screen viewing). Crop or straighten the image if the framing is off, and remove any unwanted margins. Color accuracy matters — check that the color profile (sRGB is a common standard) matches your intended delivery. If you plan to combine several images into one PDF, arrange them in the desired order and ensure consistent orientation across all pages.
If your workflow includes accessibility or searching text within the PDF, consider applying OCR after the conversion. OCR converts readable text in the image into searchable text, which is valuable for documents and diagrams with labels. Note that OCR accuracy depends on image clarity and language complexity. By taking these preparatory steps, you’ll reduce post-conversion edits and improve the end-user experience.
Step-by-step overview before you begin: choosing the right tool and settings
To ensure a smooth conversion process, map out your steps before you start. Decide whether you’ll use a desktop app, a built-in OS feature, or an online service. Establish the target output (print-friendly PDF vs. screen-friendly PDF), and note the number of images to combine if applicable. Consider privacy and whether OCR is required for your final document. Having a plan saves time and minimizes mistakes during conversion.
Practical tips for high-quality PDFs from images
High-quality PDFs start with the image itself and careful output settings. Use lossless or lightly compressed images to minimize degradation. When possible, choose a PDF output profile optimized for your device—print profiles for hard-copy projects and screen profiles for digital distribution. If your PDF will be sent to others for printing, confirm that the file’s color space (RGB vs CMYK) aligns with the printer’s workflow. Smaller PDFs are easier to share, but excessive compression can blur details important for legibility.
Always preview the PDF after conversion. Check page boundaries, image scaling, and any text within the image. If your workflow requires repeated conversions with consistent results, save a preset configuration within your tool to reduce variability over time.
Accessibility considerations for PDFs created from images
PDF accessibility is a critical consideration for inclusive documents. When an image contains text, applying OCR and providing alt text for each image helps screen readers convey content to users with visual impairments. Tagging pages properly and ensuring a logical reading order improves navigation for assistive technologies. If you anticipate readers using screen readers, plan for OCR accuracy and consider embedding searchable text alongside the image.
For long-term accessibility, follow PDF/UA standards where possible. This may involve deeper tagging, reading order verification, and checking that fonts render correctly across platforms. The goal is to make image-derived PDFs usable by all readers, not just visually capable ones.
In summary, accessibility considerations should shape your conversion workflow from the start, not as a post-processing step.
Troubleshooting common issues: blurry images, large file sizes, and compatibility
If a converted PDF looks blurry, the issue is usually image resolution or compression settings. Increase the source image resolution if possible and reduce aggressive compression. Large PDFs can be trolled by many pages of high-resolution images; consider downsampling or using a two-pass approach for printing. Compatibility problems (e.g., fonts not embedding, poor color rendering) often stem from mismatched color spaces or missing font resources.
When a PDF doesn’t display formatting correctly on another device, re-check page size, orientation, and margins. If you merged multiple images, ensure consistent page layout across all pages. If you rely on OCR but notice poor text extraction, try a higher DPI setting or a dedicated OCR pass after conversion. Troubleshooting often comes down to balancing image quality, file size, and accessibility needs.
Tools & Materials
- Computer or mobile device with internet access(Desktop or mobile OS; supports chosen method)
- Image file(s) in common formats (JPG, PNG, TIFF)(Aim for 300 dpi if possible for print quality)
- PDF viewer or printer (built-in or third-party)(Examples include Print to PDF or Save as PDF options)
- OCR option if needed(Useful for making image text searchable)
- Backup storage (external drive or cloud)(Optional but recommended for archiving)
Steps
Estimated time: 15-25 minutes
- 1
Choose your conversion method
Decide whether you’ll use offline software, built-in OS features, or an online tool. Consider privacy needs and the number of images to process. This choice affects settings like DPI, color space, and whether you’ll perform OCR later.
Tip: If dealing with sensitive images, prefer offline tools to avoid uploading data to the internet. - 2
Prepare the image(s) for conversion
Open the image in an editor or viewer and verify orientation, crop, and alignment. Ensure resolution is high enough for intended use (300 dpi for print, 150–200 dpi for on-screen viewing).
Tip: Correct any tilt or framing issues before converting to avoid post-conversion edits. - 3
Set output preferences
Choose the target PDF quality, color space, and page layout. If combining multiple images, arrange their order and consistency of orientation.
Tip: Be mindful of file size—larger DPI means larger PDFs. - 4
Run the conversion
Use the chosen tool to export or print to PDF. Keep an eye on any prompts about embedding fonts or image compression.
Tip: If available, select a PDF/A or accessibility-friendly profile for archival use. - 5
Save and organize the PDF
Name the file clearly and store it in a predictable folder. Create a versioning scheme if you expect to update the image later.
Tip: Use a consistent naming convention like IMG-Project-YYYYMMDD.pdf. - 6
Verify the output
Open the PDF to verify page order, image clarity, and margins. If OCR was added, test text searchability.
Tip: If text is not searchable, run OCR again or adjust DPI. - 7
Consider accessibility and backup
Add alt text to images and confirm reading order for screen readers if accessibility is required. Back up the final file.
Tip: Keep an offline copy for sensitive materials.
Questions & Answers
Can I convert multiple images into a single PDF?
Yes. Most tools allow you to merge several images into a single PDF and arrange their order before exporting.
Yes, you can merge multiple images into one PDF and set the order before exporting.
What quality settings should I choose for print vs. screen viewing?
For print, use higher DPI (300) and an appropriate color profile. For screen viewing, 150–200 DPI is usually sufficient and yields smaller file sizes.
Use higher DPI and color settings for print; lower DPI is fine for screen viewing to keep file sizes smaller.
Can I convert RAW images to PDF?
Yes, but RAW formats often require conversion to a standard image format first (like JPEG or TIFF) to ensure compatibility and predictable output.
Yes, but you may need to convert RAW to JPEG or TIFF first for reliable PDF output.
Is OCR necessary to search text in a PDF created from images?
OCR makes text searchable. If the image includes readable text and you need searchability, enable OCR after converting.
OCR helps you search text in the PDF; enable it if you need searchability.
Are there privacy concerns with online image-to-PDF tools?
Yes. Online tools upload your image to a server, which may pose privacy risks for sensitive content. Prefer offline tools for confidential material.
Yes, online tools can expose your images; use offline options for sensitive content.
How can I reduce a PDF's file size after conversion?
Try downsampling images, compressing content, or saving with font embedding options that balance quality and size.
You can reduce size by lowering image quality slightly or compressing the PDF during export.
Watch Video
Key Takeaways
- Start with offline or built-in tools for privacy
- Prepare high-quality images (high DPI, proper alignment)
- Choose output settings aligned with the final use
- Verify accessibility options if needed
- Keep organized backups of final PDFs