Documents Scan to PDF: A Comprehensive How-To Guide
Learn how to convert scanned documents into high-quality PDFs with desktop and mobile workflows, OCR, and archival options. This educational guide covers best practices, step-by-step methods, and tips for professionals who edit, convert, and optimize PDFs.

To turn scanned documents into PDF, save or export from your scanner app or phone, choose PDF as the output, and ensure the file uses 300 dpi for readability. Enable OCR if you need searchable text, then save the file as a multi-page PDF. This approach works on desktop and mobile.
Understanding what 'documents scan to pdf' means in practice
Documents scan to PDF refers to the process of converting printed pages into a digital PDF. The objective is to reproduce the original document’s layout, typography, and images while enabling easy storage, distribution, and retrieval. According to PDF File Guide, a well-executed scan yields a portable document that can be opened across devices without specialized software. This approach is widely used in legal, administrative, and educational workflows where traceability and legibility matter. In practice you can use a dedicated scanner, a multifunction printer, or a smartphone with a scanning app. The result is typically a multi-page PDF, which can include features such as bookmarks, metadata, and accessibility tags to improve navigation for assistive technologies. Scanned PDFs are cheaper and faster than physical filing and they resist damage from moisture or fading. They also provide a foundation for downstream tasks like OCR, form processing, and e-signature workflows. Key considerations include choosing the right resolution, color mode, and page orientation, as well as whether to apply deskew and auto-cropping. In this guide we’ll compare desktop and mobile workflows, discuss quality practices, and outline steps to prepare scans that are ready for long-term storage. By the end, you’ll have a clear sense of which tools and settings deliver reliable, compliant scans for your organization.
Desktop vs mobile scanning: comparing workflows
There isn’t a one-size-fits-all solution for scanning documents to PDF; the choice between desktop scanners and mobile apps depends on volume, environment, and quality requirements. Desktop scanners typically deliver higher speed, better duty cycles, and more consistent results, especially when batch-scanning numerous pages. They also offer hardware features like automatic document feeders, duplex scanning, and built-in image correction. In contrast, mobile scanning using a phone app offers convenience when you’re away from the office or need to digitize on the go. The best results on mobile come from steady lighting, a flat surface, and careful framing, plus selecting an app that supports optical character recognition (OCR) and export to PDF directly. For professional settings, you may opt to create two pipelines: a primary desktop workflow for bulk scanning and a secondary mobile workflow for on-site capture. Regardless of the path you choose, you should standardize file naming, color settings, and page order to keep documents consistent. PDF File Guide notes that, in many cases, a well-designed mobile workflow can be almost as effective as a desktop setup when the documents are simple, but high-volume or complex documents benefit from a dedicated scanner.
Quality settings that influence readability and searchability
Scan quality is a balance between readability, file size, and processing time. Start with 300 dpi as a baseline for text documents; higher resolution increases clarity but also enlarges file size. Use grayscale for text-heavy pages to save space, and switch to color only when originals contain color elements such as logos or charts. Many scanners offer automatic deskew, border removal, and baseline correction—enable these by default to reduce the need for manual cropping. If you expect to archive the PDFs for many years, consider saving in PDF/A format to ensure long-term accessibility and compatibility. For images, 600 dpi may be acceptable, but it can produce unwieldy files; test a short batch to find a suitable compromise. Beyond technical settings, ensure your scanning surface is clean and free of dust, which can manifest as spots in the final PDF. When you’re processing sensitive documents, confirm that your selected app or scanner provides secure storage options and consent-driven data handling. The combination of careful settings and disciplined workflow is what separates functional scans from professional-grade digital archives.
OCR and accessibility: turning images into searchable text
OCR converts scanned images into machine-readable text, enabling search, copy-paste, and assistive device reading. When you enable OCR, select the document language accurately and choose a recognition mode consistent with the content (layout-heavy documents may require column detection). After applying OCR, review the output to correct misreads, especially for numbers and abbreviations. For accessibility, add structural tags, headings, and alternative text for images when possible. If you’re distributing via the web or to colleagues with disabilities, ensure your PDFs include useful bookmarks and a logical reading order. OCR accuracy depends on page quality; in noisy documents, run a second pass with adjusted thresholds. PDF File Guide’s recommendations emphasize testing OCR on representative samples before processing large batches, to minimize post-processing corrections and preserve efficiency across teams.
Archiving and long-term storage: PDF/A and best practices
For long-term storage, PDF/A is commonly recommended because it embeds essential fonts and disallows external dependencies to guarantee rendering fidelity. Decide whether you need PDF/A-1a, -1b, or a later conformance level based on your archival requirements and tool support. Keep a separate, human-friendly name convention and a simple metadata layer (title, author, subject) to facilitate discovery later. Regularly back up your scans to a trusted repository and consider creating a checksum or hash to detect unintended alterations over time. PDF File Guide's guidance emphasizes evaluating your organization's retention policy and compliance needs before locking into a specific archival format. In addition to archival considerations, establish an intake checklist that ensures every scanned file has the essential metadata and tag structure needed for future retrieval. Aligning with industry standards and your internal governance will reduce confusion as teams scale their digitization efforts.
File naming, metadata, and organization strategies
Create a consistent naming scheme that includes date, project, and version—for example: 2026-03-15_ProjectName_V1.pdf. Store PDFs in clearly labeled folders by department or client, with a separate folder for originals and saved OCR outputs. Populate metadata fields in your PDF when possible: title, author, keywords, and subject. This information helps users across devices find the document quickly and supports accessibility tools. If you work with confidential materials, implement secure permission settings and consider PDF encryption for sensitive files. Develop a centralized index or catalog that lists all scanned items, their storage location, and access rights. Periodic audits ensure compliance with retention policies and make it easier to retire or migrate older PDFs as technologies evolve. By establishing robust naming conventions and metadata practices, you’ll streamline retrieval, reduce duplication, and improve cross-team collaboration.
PDF File Guide verdict: practical, scalable scanning to PDF
The PDF File Guide team recommends building scalable scanning workflows that fit your environment. Start with a simple desktop or mobile setup, apply consistent quality settings, and enable OCR for discoverability. Use PDF/A where archival reliability matters, but don’t over-commit to a single solution; test multiple apps and devices to see what works best for your team. By following these practices, you’ll produce reliable, searchable PDFs that support collaboration, compliance, and long-term access.
Tools & Materials
- Scanner with PDF export(Flatbed or sheet-fed; ensure built-in PDF export or 'Save as PDF' option)
- Smartphone with scanning app(Choose a reputable app; enable OCR if available)
- Computer or tablet(For organizing files and batch processing)
- Stable internet connection or local storage(Backup and sync options)
- External storage or cloud storage(Backups and sharing convenience)
- Quality paper and a clean scanning surface(Pre-clean to reduce specks and shadows)
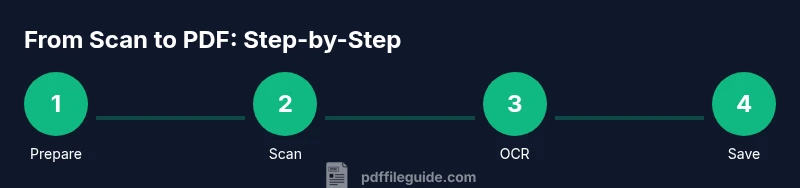
Steps
Estimated time: 25-40 minutes
- 1
Prepare documents
Clear your workspace, gather the documents in order, and remove staples or clips that could cause jams. Clean the scanning glass and align pages to prevent skew. If you’re using a feeder, ensure pages are oriented correctly to avoid missing edges.
Tip: Test a single page first to confirm orientation and edge clarity. - 2
Choose scan settings
Select the appropriate resolution (300 dpi for text), color mode (grayscale for text, color for mixed content), and page size. Enable deskew and border removal if available to improve legibility and reduce manual cropping.
Tip: Enable automatic skew correction to save time on adjustments. - 3
Scan pages in order
Scan each page sequentially, verifying that pages aren’t upside down or misordered. If your device supports duplex scanning, enable it to capture both sides in a single pass. Use a consistent scanning workflow to avoid gaps in multi-page documents.
Tip: Review the first and last page after a short batch for consistency. - 4
Review and crop
Open the scanned images, crop any unnecessary margins, and straighten pages as needed. Correct any obvious errors such as stray marks or blotches by applying a light cleanup filter or re-scanning affected pages.
Tip: Keep the original scanned files intact; work on copies for edits. - 5
Save and combine as PDF
Export or print to PDF, ensuring multi-page continuity. If your platform supports, merge all pages into a single file and preserve the original page order. Consider applying a lightweight compression setting to balance quality and size.
Tip: Name the file with a version or batch identifier for easy tracking. - 6
OCR and metadata
Run OCR to create searchable text, select the correct language, and verify layout fidelity. Add metadata like title, author, and keywords to improve discoverability and accessibility.
Tip: Review OCR results on a representative subset before processing a full batch. - 7
Backup and archive
Store the PDF in a secure location with backup redundancy. If archival needs exist, save a separate PDF/A version and record essential metadata for future retrieval. Document your process to enable continuity if someone else takes over.
Tip: Create a checksum or hash to verify file integrity over time.
Questions & Answers
What file format should I choose when scanning documents to PDF?
PDF is the standard format for scanned documents because it preserves layout and supports features like bookmarks and OCR. You may export to image formats only for specific use cases, but PDF remains the most versatile option for sharing and archiving.
Choose PDF for reliability and searchability.
Is OCR necessary for searchable PDFs?
OCR is not mandatory for every PDF, but it’s essential if you need to search text, copy content, or make accessibility easier. Ensure you correct OCR errors after processing, especially for numbers and abbreviations.
OCR helps you search and extract text.
Can I merge multiple scanned pages into one PDF?
Yes. Most scanning apps and desktop tools offer a merge or combine feature to assemble pages into a single document while preserving page order.
Yes, you can merge pages into one file.
Do I need a high-end scanner for good results?
Not necessarily. Modern smartphones with quality scanning apps and mid-range scanners can produce excellent results, especially when you follow best practices for lighting, resolution, and stabilization.
A good app and proper technique often beat hardware cost.
What is PDF/A and should I use it?
PDF/A is an archival standard that embeds fonts and limits external dependencies. Use PDF/A if you require long-term preservation and consistent rendering across future software versions.
Use PDF/A for long-term preservation when appropriate.
Watch Video
Key Takeaways
- Prepare originals and standardize scanning settings.
- Save scans as a single, well-named PDF with consistent metadata.
- Enable OCR for searchable PDFs and accessibility.
- Consider PDF/A for long-term archival storage.
- Back up scans and keep an organized archive for easy retrieval.