Print PDF as Book: A Complete Step-by-Step Guide
Learn how to print a PDF as a book with proper layout, margins, binding, and finishing options. This guide covers imposition, paper choices, and troubleshooting for professional results.

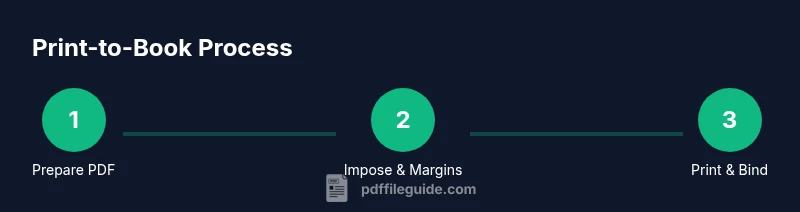
To print a PDF as a book, you’ll prepare a print-ready PDF, choose a book-friendly page size, set duplex printing and margins, and select a binding option. You’ll follow a step-by-step imposition and test print before the final run. This guide covers layout, paper, and finishing options so your PDF becomes a professional, bound book.
Understanding Print PDF as Book: What you’re aiming for
Printing a PDF as a book converts digital pages into a bound physical object. This process requires careful planning of page order, margins, and binding, so that the final product reads naturally and lies flat when opened. For professionals and students, mastering this workflow reduces waste and ensures consistent results. The PDF File Guide team notes that setting clear goals for your book format—from trim size to cover treatment—helps you choose the right tools and partners. In practice, you’ll want a clean, print-ready file and a realistic sense of the binding style you’ll use.
Layout considerations: margins, gutters, and bleed
Book printing relies on precise layout to keep content readable and aesthetically balanced. Margins must accommodate the gutter so that inner margins aren’t obscured by binding. Bleed extends artwork beyond the trim line to avoid white edges after trimming. When you print, verify that the page size in your PDF matches the final trim and that all images are at least 300 DPI to preserve sharpness. If you’re unsure about margins, start with a standard 0.75 in outer margin and a slightly larger inner margin for a typical trade paperback and adjust based on spine width.
Selecting the right paper size and binding options
Common book sizes include compact 5x8 inches, trade 6x9 inches, or A5 for smaller manuals. Your choice affects readability, page count, and binding practicality. Binding options range from saddle-stitch for short runs to perfect binding for softcover books, or case binding for hardcovers. If you’re unsure, consult a local printer for recommended stock and binding based on your page count and desired durability.
Preparing your PDF for book printing: fonts, images, and color
Embed fonts to ensure your document displays correctly on any system. Use subset embedding to minimize file size while maintaining typography. Ensure all images are 300 DPI or higher and in CMYK color space if you plan commercial printing; RGB is often acceptable for home printers but may shift color when printed. Use export settings that preserve vector graphics and avoid rasterizing fonts.
Page order and imposition: creating a true book layout
Imposition rearranges PDF pages so that, after folding or binding, pages appear in the correct order. For simple books, you can use booklet printing settings that auto-impose pages in pairs. For longer projects, plan signatures (groups of pages) and align them with your binding method. Creating a clear table of contents and chapter start pages helps during proofing.
Creating print-ready PDFs from sources: InDesign, Scribus, and more
If you’re starting from a word processor, export to high-quality PDF with the correct page size, margins, and bleed. For professional results, using layout software like InDesign or Scribus gives you precise control over typography, kerning, and image placement. When exporting, choose a press-quality preset and include crop marks and bleed. This reduces the risk of last-minute surprises in printing.
Printing flow: from home printer to professional service
Decide early whether you’ll print at home or use a print service. Home printing is convenient for proofs, but you may encounter limit on binding options and color accuracy. A professional service offers advanced binding, trim accuracy, and consistent batch quality for larger runs. If your book has many pages or requires a durable binding, consider a service that provides imposition and binding.
Troubleshooting common issues: misalignment, bleed, and font substitution
Common issues include misaligned margins, uneven bleed, and font substitution. Start by verifying page size and printer settings. If colors shift, check your color space and ensure CMYK output where required. For font problems, ensure fonts are embedded and not substituted by the printer. Run a small test print to catch problems before the full run.
Finishing touches: cover, binding, and post-processing
The finishing stage defines the professional look of your book. Design a cover that matches your trim size, spine width, and page count. Consider endpapers and a dust jacket for a premium feel. After binding, trim any rough edges and inspect for page alignment, ensuring the book lays flat for comfortable reading. Keep records of the final measurements for future print runs.
Tools & Materials
- Duplex-capable printer(A printer that can print on both sides automatically (or plan for manual duplex) to create book signatures.)
- Sufficient printer paper (final size and weight)(Stock appropriate to your chosen trim size (e.g., 90–110 gsm for light paper; 60–80 lb for heavier stock).)
- Ruler or caliper for margins/bleed(Accurate measurement helps prevent misalignment.)
- PDF editor or layout software (optional)(Tools like InDesign, Scribus, or other editors can help with imposition and precise typography.)
- Imposition tool (optional)(For booklet layouts and signature planning.)
- Binding supplies (glue, thread, coil, or staples)(Select based on binding type (softcover, hardcover, saddle-stitch).)
- Printer settings profile (duplex, color management)(Create a print profile to ensure consistency across runs.)
Steps
Estimated time: 2-4 hours
- 1
Prepare your PDF for book printing
Review the final trim size and ensure all pages are in correct order for binding. Check fonts are embedded and images are high-resolution. Create a version with bleed and crop marks for the printer.
Tip: Embed fonts and keep a separate proof file to compare against the final print. - 2
Set up margins, gutters, and bleed
Establish outer margins, inner gutters, and bleed beyond the trim edge. Use a consistent baseline grid for typography to avoid jagged lines after binding.
Tip: Start with standard margins and adjust after a test print to account for binding thickness. - 3
Plan imposition and page order
Decide if you’ll use simple booklet printing or a more complex imposition plan with signatures. Correctly pair pages so the final fold yields a natural reading order.
Tip: Label signatures clearly in your file to prevent mix-ups during binding. - 4
Configure printer settings and run a test print
Set duplex printing, color management, and paper type in your printer driver. Print a small run of representative pages to inspect margins, images, and font rendering.
Tip: Always review a physical test before committing to a full print run. - 5
Select paper, binding, and cover options
Choose an appropriate paper weight and finish, and pick a binding style that matches your project goal. Consider a cover stock with a durable finish for longevity.
Tip: Order a single sample bundle to evaluate tactile feel and color accuracy. - 6
Finalize print and bind
Once the test is approved, run the full print, then bind according to the chosen method. Inspect every copy for consistency and trim any rough edges.
Tip: Document final spine width and trim to ensure future reprints stay consistent.
Questions & Answers
What does it mean to print a PDF as a book?
Printing as a book means arranging pages for binding so the final product reads like a traditional book. It involves imposition, correct margins, and duplex printing. This is different from simply printing individual pages.
Printing a PDF as a book means arranging pages for binding so they read like a real book.
Should I print at home or use a professional service?
For small proofs, home printing is convenient, but for larger runs or higher binding quality, a professional service offers precision and consistent results. Consider cost, time, and finish when choosing.
For large runs or premium finishing, a professional service is usually better.
What page size should I use for a standard book?
Common sizes are 5x8, 6x9, or A5. Select a final trim size, then add bleed and adjust margins to fit your binding method and page count.
Choose a standard trim size and add bleed.
Do I need to embed fonts in my PDF?
Yes. Embedding fonts prevents layout shifts when printing and ensures consistency across devices and printers. Use subset embedding to keep file sizes reasonable.
Yes—embed fonts to preserve layout.
How can I test print for best results?
Print a representative sample page or signature on the same paper to check margins, image quality, and binding compatibility before the full run.
Always test print a page or two.
Watch Video
Key Takeaways
- Plan trim size, margins, and binding before printing.
- Embed fonts and export a print-ready PDF with bleed.
- Test print a representative subset before final production.
- Choose binding and paper to match the book’s purpose.