Print a PDF as a Book: Step-by-Step Guide
Learn how to print a PDF as a book, with practical steps for prep, binding, paper choices, proofs, and service options. Covers DIY and professional routes for different volumes.

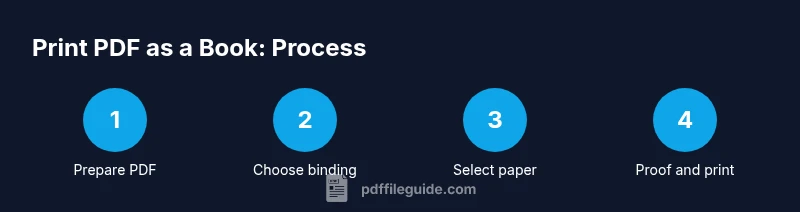
To print a PDF as a book, follow these steps: 1) Prepare the PDF for print with proper bleed, margins, 300 dpi images, and embedded fonts. 2) Choose a binding and printing method (saddle-stitched, perfect binding, or spiral) and decide on paper stock. 3) Order a proof, review for errors, then place the final order.
Why print a PDF as a Book?
Printing a PDF as a physical book offers tangibility, easier sharing, and a lasting keepsake for portfolios or classroom materials. If you’re asking where to print pdf into book, you’re not alone—many professionals seek a reliable, repeatable path. According to PDF File Guide, treating this as a structured project yields consistent results and easier future editions. In practice, success starts with a clear plan: define trim size, bleed, color, and final binding before you place any order. This upfront work helps you avoid costly reprints and ensures pages align cleanly with the cover. A well-prepared PDF also reduces surprises at the printer and makes proofs predictable.
Before you start: essential planning considerations
Before touching a vendor or binding method, map out the basics: your target audience, ideal final size, total page count, and whether you want color or grayscale. Decide if this is a one-off gift, a teaching packet, or a publishable book—each scenario has different constraints on binding, paper, and pricing. Outline a rough budget and timeline, including proofing steps. Remember that the PDF is your source file; organize pages in the correct order and ensure there are no password protections or restricted rights that could block printing.
Tools & Materials
- Printable PDF file prepared for print (bleed, margins, embedded fonts)(Final trim size must be defined; ensure fonts are embedded and images are at 300 dpi.)
- Choice of binding method (saddle stitch, perfect binding, coil/spiral)(Select based on page count and desired durability.)
- Final book size and page count plan(Decide on trim size (e.g., 6x9) and total pages before printing.)
- Printer or access to a print shop(Indicate whether you’ll print in-house or outsource.)
- Paper stock and finish options(Choose weight and finish for interior and cover separately.)
- Proof copies (digital and/or physical)(Use proofs to verify layout, color, and binding before full run.)
Steps
Estimated time: Estimated total time: 1-3 weeks, depending on quantity, proofs, and vendor lead times.
- 1
Prepare your PDF for print
Ensure the document is set to the final trim size, includes bleed, has embedded fonts, and images at 300 dpi. Remove password protection and verify page order matches the intended book sequence. Export a print-ready PDF that matches the printer’s specifications.
Tip: Include crop marks only if your printer requires them; otherwise they can clutter the internal pages. - 2
Choose binding and page size
Decide on the final page dimensions (e.g., 6x9 in) and select a binding method based on volume and use case. Saddle stitch is cost-effective for short runs; perfect binding offers a sleeker, more durable look for longer books.
Tip: If unsure, request samples from vendors to compare bindings side-by-side. - 3
Select paper stock and finish
Pick interior paper weight and finish (uncoated for writing spaces, coated for vivid images). Choose a cover stock that complements the interior and consider lamination or matte finishes for durability and feel.
Tip: Order a single proof with the chosen paper to verify texture and readability. - 4
Get a digital or physical proof
Ask for a digital proof first to catch typography or layout issues. If color accuracy matters, request a physical proof to assess how the inks look on the actual stock and binding.
Tip: Mark any pages with notes for corrections and align these with your final file. - 5
Review proof and finalize adjustments
Check page order, margins, gutter, and cover alignment. Confirm color profiles and ensure no pages are missing. Implement any edits before approving the final run.
Tip: Create a checklist and circulate it to teammates to avoid missed changes. - 6
Place final print order
Provide the printer with the print-ready PDF, the binding choice, stock selections, and any cover artwork. Confirm pricing, lead times, and shipping method before placing the order.
Tip: Ask for a production schedule and a contingency plan for delays. - 7
Receive and inspect final copies
Upon delivery, inspect a sample from the run for trim accuracy, binding integrity, and color consistency. Compare against the proof and your checklist. Return or replace any defective copies if the provider offers guarantees.
Tip: Set aside a few copies for long-term archival storage and distribution planning. - 8
Distribute and maintain your book
Organize the final inventory, label batches for distribution, and store the copies in a cool, dry place. Plan future reprints by maintaining version-controlled PDFs and records of binding preferences.
Tip: Store digital files with version numbers to simplify updates and reprints.
Questions & Answers
Can I print a PDF as a book at home?
Yes, you can, but home setups may limit binding durability and color accuracy. For a professional result, use a print shop or on-demand service and DIY binding only for small, simple projects.
Yes, you can print at home, but for photo-heavy or professional-looking books, a print shop often yields better results. Consider binding quality and paper options when deciding.
What is the difference between saddle stitch and perfect binding?
Saddle stitch staples the spine and is ideal for short runs with fewer pages. Perfect binding uses glue on a broader spine, supporting thicker books with a more durable finish.
Saddle stitch is great for small books with few pages, while perfect binding suits larger, heavier books for a cleaner look.
Do PDFs need to be color or black & white for printing?
Color is best for charts and images but costs more. If the book relies on text, black and white can reduce costs and increase legibility in some print services.
Color depends on content; use black and white to save money when possible, and reserve color for visuals that require it.
How many pages can I print in a saddle-stitched book?
Saddle stitching is most effective for lighter page counts. As pages increase, binding strength and spine integrity can become an issue, so consider alternative bindings for thicker books.
Saddle stitching works best for lighter books; for thicker work, choose a different binding to ensure durability.
What file settings should I use for bleed?
Set bleed to 3 mm (1/8 inch) on all sides and include crop marks if your printer requires them. Ensure all important content stays within safe margins.
Use 3 mm bleed and crop marks if required; keep essential content inside safe margins.
How do I choose paper quality for a PDF book?
Select interior paper based on readability and durability; coated stock for images, uncoated for writing or note-taking. Consider cover stock for a durable, professional finish.
Match paper to use: coated for visuals, uncoated for writing; pick a sturdy cover for longevity.
Watch Video
Key Takeaways
- Define trim size and bleed before printing.
- Choose binding based on page count and use case.
- Prepare print-ready PDFs with embedded fonts and CMYK color when required.
- Order proofs to catch mistakes before full runs.
- Work with reputable print services to balance cost and quality.