How to PDF Scan on iPhone: A Step-by-Step Guide
Learn how to scan documents to PDF on iPhone using Notes, Files, Shortcuts, and optional apps. This educational guide covers built-in methods, best practices, troubleshooting, and security tips for productive mobile document workflows in 2026.

To scan a document as a PDF on iPhone, use built-in tools or a scan app. The Notes app can scan and export as PDF, while the Camera can capture pages for conversion in Files or a PDF app. According to PDF File Guide, these methods keep content searchable and easy to share.
Why PDF scanning on iPhone is a smart workflow
According to PDF File Guide, scanning to PDF on iPhone can streamline document workflows by keeping files organized and easily shareable across devices. This approach is especially valuable for students, professionals, and remote teams who juggle contracts, receipts, or class notes. The portability of an iPhone means you can capture, convert, and distribute in one compact device, reducing paper clutter and improving archive efficiency. Throughout this guide you’ll learn practical techniques, compare built-in tools with third‑party apps, and adopt a repeatable process that saves time on daily tasks.
The built-in options: Notes and Files compared
Notes provides a dedicated Scan Documents feature with automatic edge detection, multi-page handling, and export options to PDF. Files offers storage for PDFs and straightforward sharing, with quick access to saved scans from recent files. Both tools work offline and respect device privacy, which is crucial for sensitive documents. For most routine scans, Notes alone covers the core workflow, while Files acts as a simple repository and export channel. When you need more control, add a third‑party app.
Step-by-step: Scan with Notes and export as PDF
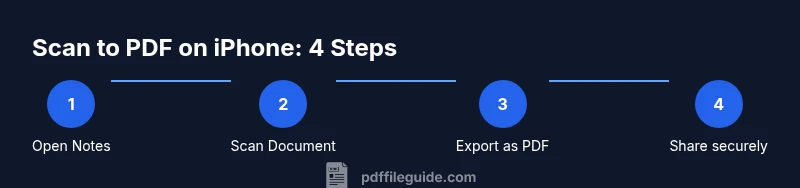
- Open Notes and create a new note. 2) Tap the camera icon and choose Scan Documents. 3) Align the document within the frame and capture, adjusting corners as needed for full-page accuracy. 4) Review the scan, crop if required, and tap Save. 5) Tap Share, select Save to Files or Export as PDF, and choose a destination. 6) Rename the file for quick retrieval and organize it in a project folder. Tip: For multi-page documents, continue adding pages to the same note before exporting.
Step-by-step: Quick captures via Camera and convert to PDF in Files
You can use the iPhone Camera to capture a document and then convert the image to a PDF via the Files app or a compatible editor. Start by taking a clean, well-lit photo with the document fully visible. Open Files, locate the image, and select Create PDF (or use a share/export option that includes PDF). This approach is handy when you don’t want to open Notes. For multiple pages, repeat the process and join them in a single PDF if your app supports it.
Step-by-step: Using Apple Shortcuts for automation (optional)
Shortcuts can automate frequent scans, such as opening Notes, initiating a scan, and exporting to PDF in one tap. Create a simple shortcut that launches Notes, prompts for a page count, and saves the resulting PDF to a designated folder. If you’re new to Shortcuts, begin with a template and gradually tailor actions to your workflow. Automations save time and reduce repetitive taps.
Best practices for high-quality scans
Lighting matters more than you might expect. Use diffuse, even light to minimize shadows and glare. Keep the document flat and parallel to the camera to avoid perspective distortion. For multi-page documents, scan pages in order and verify page sequencing before exporting. If text is faint, adjust exposure or contrast in the app before saving. A steady surface or small tripod can dramatically improve sharpness.
File management: naming, organizing, sharing, and exporting
Adopt a consistent naming convention (Date_Project_Description) to simplify later retrieval. Create folders by client, project, or date, and keep a short, descriptive file name. When sharing, pick the most appropriate method (Message, Email, or cloud link) and consider password-protecting PDFs if the content is sensitive. Periodically prune old scans to maintain an organized archive.
Troubleshooting common issues
If a scan is blurry, rescan with brighter, diffuse lighting and a steadier hand. If edge detection misses part of the page, adjust the document alignment and retake. For multi-page PDFs, ensure all pages were added to the export. If OCR is needed for searchable text, rely on a dedicated app that supports text recognition and confirm the language settings match the document.
Security and privacy considerations when scanning
Be mindful of sensitive information that appears in scans. Disable cloud backups for highly confidential documents if not required, and store locally when possible. Regularly review app permissions and delete scans after they’ve been archived. Keeping your iPhone updated also helps mitigate new privacy risks and ensures compatibility with the latest scanning features.
Tools & Materials
- iPhone with iOS 11+(Ensure you have Notes and Files installed (built-in))
- Notes app (built-in)(Used for scanning and exporting PDFs)
- Files app (built-in)(Store and export scanned PDFs)
- Third-party scanning app (optional)(For OCR or advanced multi-page workups)
- Good lighting and a flat surface(Reduces glare and improves edge detection)
- Stable stand or tripod (optional)(Keeps camera steady for crisp pages)
Steps
Estimated time: 15-30 minutes
- 1
Open Notes and start a scan
Launch Notes, create a new note, tap the camera, and select Scan Documents. Align the document within the frame and capture, adjusting corners as needed to ensure full-page capture.
Tip: Use a clean, flat surface and avoid shadows on the page. - 2
Review and crop the scan
After capturing, review the image for any edges missed or glare. Use the built-in cropping tools to straighten and crop before saving as PDF.
Tip: Enable edge detection by adjusting the corners precisely. - 3
Export as PDF
In the scan, tap Share or Export, choose PDF, and select a save location or cloud drive. If scanning multiple pages, add more pages within the same note before exporting.
Tip: Name the file with date and project for easy retrieval. - 4
Using Files to create PDFs from images
Open Photos or Files, select the image or images, tap Share, and choose Save to Files; if your app supports, convert to PDF. This workflow is useful when you want to assemble a quick multi-page document.
Tip: Use the Create PDF option if available. - 5
Optional: automate with Shortcuts
If you frequently scan, create a Shortcut that opens Notes, initiates a scan, and exports to PDF in one tap. Test the shortcut to ensure it runs without prompts.
Tip: Start with a simple shortcut from the Gallery and customize later. - 6
Organize and rename
Move the exported PDF into a well-structured folder, and rename it to reflect content, client, and date. This reduces search time in the future.
Tip: Maintain consistent naming conventions.
Questions & Answers
Can I scan documents using the iPhone camera without an app?
Yes. You can capture an image with the Camera app and convert it to PDF using Files or a third-party app. For multi-page documents, use Notes’ scan feature for easier page management.
Yes you can scan with the Camera and export as PDF via Files or another app.
Is OCR available when scanning on iPhone?
OCR is not built into Notes. Some third-party apps offer optical character recognition to make scanned text searchable. Check app features before purchase.
OCR isn’t built into Notes; use a dedicated app for searchable text.
Will scanned PDFs be searchable?
Original Notes scans are image-based. OCR-enabled apps or newer iOS features may render text searchable. Verify with the app you choose.
Not every scan is searchable by default; use OCR when needed.
How do I securely share scanned PDFs?
Share via Messages, Mail, or cloud links with proper permissions. For sensitive documents, choose password-protected PDFs when supported by your app.
Share with care; use password protection if available.
What if the scan is blurry or edges aren’t detected?
Improve lighting, hold the device steady, and recapture. Use edge-detection tools and retake until the edge outlines are clean.
If blurry, rescan with better lighting and steadier hands.
Do I need an internet connection to scan and save PDFs?
Many scanning tasks work offline; sharing or cloud backups require internet. Plan accordingly for remote work.
Offline scanning is possible; internet may be needed for sharing.
Watch Video
Key Takeaways
- Use Notes for quick, high-quality scans
- Export to PDF directly from iPhone without extra software
- Organize scans with consistent naming and folders
- Consider Shortcuts to automate repetitive scans
- When privacy matters, minimize cloud exposure