How to Make PDFs on iPhone: A Practical 2026 Guide
Learn how to create, export, and manage PDFs on your iPhone using built-in tools and trusted apps. This comprehensive guide covers Safari, Notes, Files, scanning, editing, and sharing for quick, reliable PDF workflows.

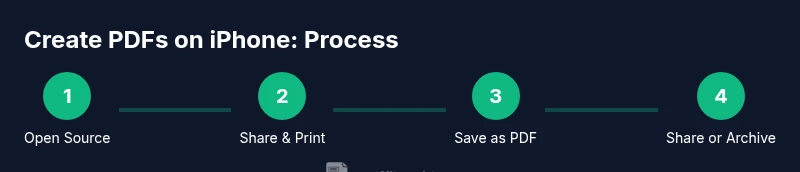
On iPhone, you can create PDFs using built-in tools and trusted apps with no computer needed. Use Share or Print to PDF from any app, then save, organize, and share. This guide covers Safari, Notes, Files, scanning, and lightweight editing for receipts, webpages, and documents. You'll learn step-by-step quickly, even if you’re new to PDFs.
Why making PDFs on iPhone matters
The iPhone offers powerful, portable ways to create and share documents as PDFs. According to PDF File Guide, mobile workflows save time, reduce paper, and simplify collaboration when you're away from a desk. Whether you’re at a client site, traveling, or simply reviewing receipts, exporting content as PDF keeps formatting intact and makes sharing reliable across devices. The built-in tools are designed to be intuitive, so you can start immediately without installing anything. In this section, we’ll explore why PDFs on iPhone are not a workaround but a first-class capability, and how to pick the method that fits your task, whether it’s a quick webpage export or a scanned contract that needs clean compression.
Core methods to create PDFs on iPhone
PDFs on iPhone can be created using several core methods, each optimized for different scenarios. The most universal path is the Share sheet with Print to PDF, which works from most apps including Safari, Mail, and Pages. For quick, lightweight PDFs of notes and documents, the Notes and Files apps offer direct export options. If a document exists only in paper form, the built-in Camera app or Notes can scan and convert it into a PDF. For advanced needs like redacting content, annotating, or batch processing, third-party apps such as PDF editors become valuable. This section outlines when to use which method, and how to switch between native tools and third-party apps without losing quality.
Using the Share sheet and Print to PDF
The simplest way to create a PDF on iPhone is via the Share sheet. Select the document, tap the Share icon, then choose Print or Save to PDF. If you see a Print option, perform a two-finger pinch-out gesture on the print preview to reveal the full PDF, then tap the Share icon again to save or share. This approach preserves layout and font rendering, so the result matches the source material closely. Tip: Some apps expose a direct Export as PDF option in the Share sheet—use that when available for a faster path.
Saving documents from Safari and apps as PDFs
Web pages from Safari can be converted to PDF by using the Share sheet and selecting Print/Save as PDF. Before exporting, you can disable unwanted elements (like ads) in long pages by using Reader View, then export. For documents in other apps, the common thread is the same: locate the Share button, pick Print or Save as PDF, and finalize the destination in Files or iCloud Drive. Keeping a consistent file naming convention helps with later retrieval and archiving.
Using Notes for quick PDFs
Notes is a surprisingly capable tool for turning content into PDFs. Create or open a note, add any content, then use the Share option to Export as PDF. This is particularly handy for meeting notes, receipts, or threaded conversations. If you need additional structure, you can mark sections with headings in the note before exporting. Note that images and handwriting may render differently depending on the device and app version.
Scanning documents with the Camera app
iPhone’s Camera app can scan documents that are saved as PDFs, either directly or via Notes. Open Camera, switch to the Document scanner mode (or use Notes’ scan feature), capture the document, then choose Save as PDF or Share to export. For best results, position the document on a well-lit surface and keep the camera steady while scanning. Pro tip: If the scan includes a lot of white space, you can crop and adjust to optimize readability.
Third-party apps for advanced PDF editing
If you need more control over layout, fonts, or multi-page merging, consider a dedicated PDF app. Apps like PDF editors provide features such as annotation, password protection, forms, and batch processing. Start with a trusted option from the App Store, then compare export quality and editing ease. Remember to review privacy policies before uploading sensitive documents.
Editing and annotating PDFs on iPhone
Native tools allow basic annotation and highlighting, while third-party editors support more advanced tasks like form filling and redaction. After exporting, you can annotate using built-in markup tools in Files, Notes, or iBooks, or open the file in a PDF editor for deeper edits. For accessibility, ensure that text is selectable and not embedded as an image, so screen readers can interpret content.
Organizing, renaming, and sharing PDFs
Once you have PDFs, organization matters. Use the Files app to create folders, rename files with consistent naming conventions, and add tags for quick retrieval. Share PDFs via Mail, Messages, AirDrop, or cloud services. If you frequently export similar documents, consider setting up automation or templates to speed up the process in the future.
Tips for best quality and accessibility
To maximize quality, export at the highest resolution available and avoid compressing aggressively. Use accessible text and meaningful file names to aid screen readers and users with visual impairments. Prefer vector-based content when possible, and ensure color contrast remains strong in any embedded images. If you export scanned content, choose a high DPI and use dithering options sparingly for readability.
Troubleshooting common issues on iPhone
If a PDF export looks distorted, retry with a different app or update your iOS to the latest version, as export engines improve over time. If the file size is large, use the Files app to compress or split the document into smaller parts. When PDFs won’t open, check your default PDF viewer settings and install a compatible reader from the App Store. Ensure you have enough storage space for large exports.
Best practices for privacy and long-term access
Always review privacy settings before exporting sensitive content, especially when using cloud storage. For important documents, enable password protection and restrict sharing to trusted recipients. Regularly back up PDFs to multiple locations, and maintain an organized archive with a consistent naming convention and metadata. The PDF File Guide team recommends a routine review of stored documents to keep versions current and accessible.
Tools & Materials
- iPhone (any model)(Ensure iOS is up to date for best export features. Newer models offer smoother scanning and annotation.)
- Notes app(Used to export notes and some documents as PDF; supports basic editing.)
- Files app(Central hub for saving, organizing, and sharing PDFs.)
- Safari or any app with a Share sheet(Source content; used to export to PDF via Print/Save as PDF.)
- Camera app (document scanning)(Scan documents and export as PDF via Notes or Files.)
- Third-party PDF editor (optional)(For advanced editing, annotations, or form filling.)
Steps
Estimated time: 15-25 minutes
- 1
Open Source Document
Open the document you want to export in its originating app and locate the Share button. This is the entry point for exporting to PDF across most iPhone apps.
Tip: If you don’t see a Share button, tap the app’s menu (often represented by a three-dot or arrow icon). - 2
Access the Share Menu
Tap Share to reveal the system share sheet where you’ll find Print, Save to PDF, and other export options.
Tip: Some apps show Export as PDF directly; use that when available for a faster path. - 3
Create the PDF via Print/Save
If you see Print, tap it; on the print preview, use a two-finger pinch-out to reveal the full PDF, then tap the Share icon again or Save to PDF.
Tip: Ensure the page range is correct to avoid exporting unnecessary pages. - 4
Choose a Destination
Select Save to Files or Save to iCloud Drive, then pick a folder for your PDF.
Tip: Create a dedicated folder like PDFs/Receipts to keep files organized. - 5
Name and Save
Enter a descriptive name and confirm the save location. This creates a retrievable PDF you can share later.
Tip: Use a consistent naming convention (date_subject_version). - 6
Export from Notes or Safari (Optional)
If exporting from Notes, choose Share → Create PDF; for Safari, use Share → Print to PDF and save. This path is handy for quick captures.
Tip: Keep track of the source URL or note for context. - 7
Annotate or Edit (If Needed)
Open the PDF in a viewer that supports annotations if you need highlights, comments, or signatures.
Tip: Use built-in tools to avoid introducing extra formatting in the final document. - 8
Share or Archive
Distribute the PDF via Mail, Messages, AirDrop, or cloud services, or move it into a project folder for archival.
Tip: Consider setting an access level or password for sensitive PDFs when sharing.
Questions & Answers
Can I export PDFs from any iPhone app using the Share sheet?
Most apps that support file sharing expose a Share button that can be used to export to PDF via Print or Save as PDF. Some apps offer a direct Export as PDF option for convenience.
Yes, in most apps you can use the Share button to export a PDF via the Print flow or a direct Export option.
Is there a difference between exporting via Print to PDF and Save to Files?
Print to PDF creates a visual representation of the content, while Save to Files simply saves the PDF to a chosen location. The end result PDFs are typically the same, but the path you choose may affect options like archiving and sharing.
Print to PDF converts the content into a PDF and lets you save it, while Save to Files just stores the PDF where you pick.
How can I export webpages as PDFs from iPhone Safari?
Open the page, use the Share button, select Print, then perform the pinch-out gesture on the preview to reveal the PDF. Save or share from the resulting PDF view.
In Safari, share the page, pick Print, zoom the preview to bring up the PDF, then save or share.
Can I password-protect a PDF on iPhone?
Yes, you can password-protect PDFs using certain third-party PDF editors. Native iPhone tools don’t offer built-in password protection in every export, so use a trusted editor if security is required.
You can password-protect PDFs with certain apps; check the editor’s security options.
What should I do if a PDF export is blurry or unreadable?
Ensure you’re exporting at the highest sensible resolution, avoid compressing too aggressively, and choose a viewer that preserves font rendering. If needed, re-export after adjusting source quality.
If a PDF looks blurry, export at higher quality and avoid tight compression, then view it in a reliable reader.
Are there best practices for organizing PDFs on iPhone?
Create a clear folder structure in Files, use descriptive file names with dates, and add tags if available. Regularly back up PDFs to multiple locations to prevent data loss.
Organize PDFs with folders and good names, and back them up regularly.
Watch Video
Key Takeaways
- Use the Share/Print flow to create PDFs without a computer
- Notes and Files provide quick, native export paths
- Scan documents with the Camera app for reliable PDFs
- Organize PDFs with consistent naming and folders
- Privacy: password-protect sensitive PDFs before sharing