How Can You Compress a PDF File: A Practical Guide
Learn how to efficiently compress a PDF file without sacrificing essential content. This guide covers lossless vs lossy methods, image optimization, metadata removal, tool comparisons, and a step-by-step workflow for desktop and online options.

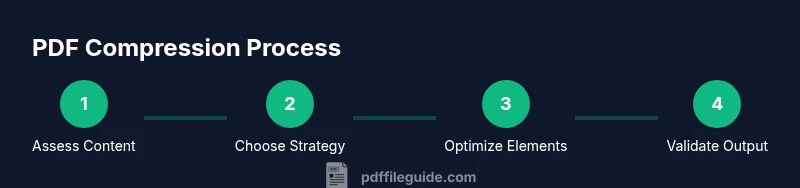
To compress a PDF, you typically reduce image quality, discard unnecessary elements, and optimize embedded fonts. Start by deciding whether you must preserve accessibility, metadata, or interactive form fields. Then apply a compression workflow using desktop software or reputable online tools: downscale images, compress images further, remove unused objects, subset fonts, and save with a compact compatibility setting. Always verify readability and integrity after edits.
Why compress PDFs matters
For individuals and professionals who edit, convert, and optimize PDF files, compression is a practical step to improve sharing efficiency, save storage, and speed up document distribution. The primary goal is to reduce file size while preserving readability and essential structure. Different content types—text, vector graphics, and high-resolution images—respond differently to compression, so a nuanced approach is necessary. The best outcomes come from understanding what elements most contribute to size in your specific file and applying targeted optimizations rather than blanket downsampling. In practice, compression is a balance: smaller size can come at the cost of some detail, but with careful choices you can retain legibility and layout. According to PDF File Guide, the ideal workflow combines content evaluation, selective downsampling, and verification across devices. This section will outline the factors that drive size and how to control them.
Core concepts: lossless vs lossy compression
PDF compression can be either lossless or lossy. Lossless methods shrink a file without sacrificing any original data, preserving every detail. Lossy approaches reduce file size by discarding or approximating data, which can noticeably impact image quality or color depth. Choosing between lossless and lossy depends on use cases: legal documents, contracts, or archival records benefit from lossless compression, while presentations or reports with many images can tolerate mild lossy compression if it delivers a smaller file without harming readability. The key is to test a representative sample of pages after applying lossless or lossy settings to ensure the output remains suitable for its intended audience, especially when printed or viewed on different devices.
Image quality vs file size: making trade-offs
Images are often the biggest drivers of PDF size. Reducing image resolution (DPI), changing image formats, or applying aggressive compression can dramatically lower file size. However, excessive downsampling can blur text and logos. The best practice is to tailor image settings to the document’s content: text-heavy pages may tolerate modest downsampling, while image-rich pages may require preserving zoomed readability for critical visuals. If the document is primarily text, you can often achieve substantial reductions with minimal perceptual impact. For multi-page PDFs, consider applying selective compression—high-res images in a few pages, lower quality elsewhere.
When to compress: use cases for email, sharing, and archiving
Compression is especially useful when you need to share documents via email, upload to websites, or fit into bandwidth-constrained environments. Archived documents stored long-term may benefit from moderate compression coupled with font subsetting to maintain readability on future systems. Conversely, for PDFs containing scans or high-detail graphics, you may want to strike a careful balance: keep essential image clarity on critical pages while compressing ancillary pages more aggressively. Always test the final file on common devices and PDF readers before wide distribution.
Image optimization basics: DPI, color, and format choices
Optimizing images involves a few practical levers. If your PDF contains scanned images, setting a reasonable DPI target conserves space while keeping legibility. Consider grayscale or color reductions where appropriate; reducing color depth can save space without noticeable quality loss for text-heavy documents. Image formats matter too: JPEG compression is common for photographs, while PNG or JBIG2 can be better for line art and text. When possible, choose formats that support effective compression while preserving required clarity.
Removing metadata, fonts, and unused elements
Metadata, thumbnails, attachments, and embedded fonts can bloat PDFs. Stripping non-essential metadata helps reduce size, while font subsetting ensures only the used glyphs are embedded, reducing font file sizes. Remove unused attachments or form field data that aren’t required for the intended audience. Remember that removing accessibility tags, bookmarks, or interactive elements may impact usability, so decide what is essential for your audience and document purpose.
Desktop tools overview: pros and cons
Desktop tools, including widely used readers and editors, offer robust control over compression settings. They allow batch processing, precise downsampling, and selective element removal while keeping your data on your device. The trade-off is that some interfaces can be complex, and advanced options may require paid licenses. If you prioritize privacy and full control, desktop workflows are typically preferable for sensitive PDFs. PDF File Guide recommends testing a few high-usage documents locally before scaling to larger jobs.
Online tools and privacy considerations
Online compressors provide quick results without software installation, making them convenient for one-off tasks or travelwork. However, uploading sensitive or proprietary PDFs can raise privacy concerns, and quality control may be less predictable. When using online tools, choose reputable services with clear privacy policies, encryption in transit, and options to downsample selectively. Always review the output for fidelity to the original, especially for documents with fine typography or legal text.
Step-by-step practical workflow: end-to-end
Breaking down compression into a repeatable workflow helps ensure consistency across documents. First, inspect the PDF to identify heavy pages and potential culprits (images, attachments, embedded fonts). Second, set image downsampling for large images and apply mild lossy compression where acceptable. Third, remove non-essential metadata and unused objects. Fourth, subset fonts and ensure accessibility elements remain intact if required. Fifth, save with optimized settings and test on multiple devices. Finally, compare the pre- and post-compression sizes and verify readability.
Validation: readability, accessibility, and testing
After compression, verify that the document remains readable on different devices and readers. Open the file on a phone, tablet, and desktop to confirm text clarity, image legibility, and page layout. Ensure any essential accessibility features are preserved if the document targets assistive technologies. If you relied on any lossy compression, re-check critical pages for legibility, zoomed-in text, and signature or seal integrity. Document your compression settings for future reuse.
Common mistakes and how to avoid them
A common error is applying universal settings that are too aggressive for image-heavy PDFs. Another pitfall is removing essential metadata or bookmarks that users rely on. Skipping a test on multiple devices can leave you surprised by rendering differences. Finally, compressing a PDF that is already compact can yield diminishing returns; evaluate whether a prior step, like removing redundant elements, would offer more benefit than further compression.
Authority sources and further reading
For authoritative guidance on PDF formats and compression principles, consult the following resources:
- https://pdfa.org/ (PDF/A and PDF standards)
- https://www.iso.org/ (ISO 32000 family and PDF standards)
- https://www.adobe.com/ (Official guidance on Acrobat and PDF optimization)
Tools & Materials
- Computer (PC or Mac) with internet access(Ensure your device has enough storage to handle both original and compressed files.)
- PDF editing software(Examples: Adobe Acrobat, Foxit PDF Editor, or Preview on macOS.)
- High-quality source PDF(Keep a backup of the original before compression.)
- Image editing or compression tools(Helpful for re-optimizing embedded images before reinserting.)
- Access to a reputable online compressor(Use with caution for sensitive documents; review privacy policies.)
Steps
Estimated time: 30-45 minutes
- 1
Identify compression goals
Begin by defining what you must preserve: readability, accessibility, hyperlinks, and interactive fields. Decide whether you can sacrifice image quality or metadata for size reductions. Establish a baseline by noting the original file size and critical sections that cannot be altered.
Tip: Document your goals so you don’t overshoot on compression. - 2
Assess the content type
Check if the PDF is text-heavy, image-heavy, or a scan. Text-heavy files often compress well with metadata removal and font subsetting, while image-heavy files benefit from targeted image downsampling and format choices.
Tip: Use a page-level skim to identify pages with large images. - 3
Choose a compression approach
Decide between lossless and lossy methods based on your goals. Start with lossless changes (remove metadata, downsample selectively) and consider mild lossy options only if readability remains intact.
Tip: Always test a small sample page first. - 4
Optimize images
Downsample large images to an appropriate DPI, convert color depth where possible, and choose efficient formats for different content. Avoid indiscriminate downsizing on text-heavy pages that require clear rendering.
Tip: Preview a page after image changes to confirm legibility. - 5
Remove non-essential elements
Delete unnecessary attachments, embedded fonts, thumbnails, and metadata. Subset fonts so only used glyphs remain embedded, reducing font file sizes.
Tip: Keep essential fonts if the document needs precise typography. - 6
Preserve accessibility where needed
If the document is intended for assistive technologies, retain or reconstruct tags, reading order, and alternative text where applicable.
Tip: Accessibility should guide your compression choices, not be an afterthought. - 7
Save with optimized settings
Choose an output profile designed for compact files and enable selective downsampling. Save a new version to compare with the original.
Tip: Name the file clearly to reflect its compressed status. - 8
Validate the output
Open the compressed PDF on multiple devices and readers. Check that text is crisp, images are legible, and links or forms still work if present.
Tip: Document any deviations between original and compressed versions. - 9
Archive and document your process
Store the original and saved settings so you can repeat the workflow for future PDFs. Consider creating a template for similar documents.
Tip: Templates save time and ensure consistency.
Questions & Answers
What is PDF compression?
PDF compression reduces the file size by optimizing images, removing unnecessary data, and streamlining embedded objects. It can be lossless or lossy depending on the methods used.
PDF compression reduces file size by optimizing content and removing non-essential data, which can be lossless or lossy depending on settings.
Is PDF compression lossless or lossy?
Compression can be lossless, preserving all data, or lossy, trading some data for smaller size. The choice depends on content type and required fidelity.
Compression can be lossless or lossy depending on the settings and the document’s needs.
Can you compress scanned PDFs effectively?
Scanned PDFs often contain embedded images. They compress best when images are downsampled and text is preserved via OCR or retained as text if already searchable.
Scanned PDFs can be compressed by downsampling images and optimizing embedded resources, while preserving text where possible.
Will compression affect searchability or accessibility?
Compression may affect searchability if text is rasterized or metadata is removed. Preserve text layers, fonts, and accessibility tagging when those features are important.
If you need search or accessibility, keep text as text and maintain tagging while compressing.
Are online tools safe for sensitive PDFs?
Online tools can pose privacy risks. Use trusted services, review privacy policies, enable encryption in transit, and avoid uploading confidential content.
Be cautious with sensitive PDFs and prefer offline tools when possible.
Watch Video
Key Takeaways
- Define compression goals before starting
- Prioritize content type to guide downsampling
- Test on multiple devices for readability
- Preserve accessibility if required
- Keep originals and document the workflow