How to Make a PDF Smaller: A Step-by-Step Guide
Learn practical, step-by-step methods to reduce PDF file size without sacrificing readability. From image downsampling to removing metadata, this guide explains best practices for professionals who edit, convert, and optimize PDFs for faster sharing and storage.

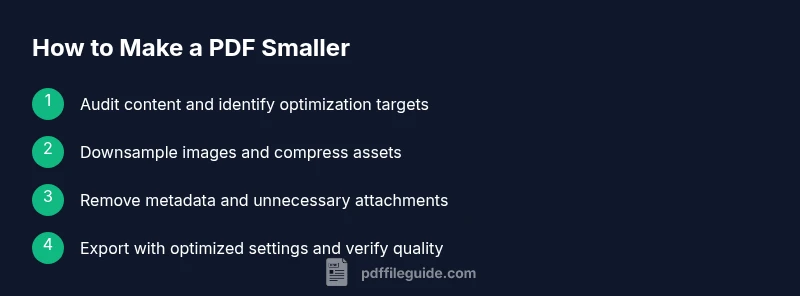
Master how to make a PDF smaller by applying practical, proven techniques. Start with a quick audit of embedded assets, then downsample images, remove unused metadata, and export with optimized compression settings. This step-by-step approach helps editors, converters, and professionals balance file size with readability and retention.
Why learning how to make a pdf smaller matters for professionals
When you learn how to make a pdf smaller, you unlock faster sharing, easier collaboration, and lower bandwidth costs for recipients. For editors, marketers, and engineers, compact PDFs streamline workflows and reduce storage pressures. According to PDF File Guide, optimizing PDFs starts with a clear goal: retain readability while trimming nonessential content. A disciplined approach helps avoid over-compression that degrades clarity. This section lays the groundwork for practical optimization without sacrificing essential data or accessibility.
Core techniques to reduce PDF size
Reducing a PDF’s size is a balance between preserving legibility and removing excess data. Core techniques include image downsampling, selective font embedding, metadata and attachment trimming, removing hidden layers, and exporting with compressed settings. This section maps out how these strategies work together to produce a smaller file while keeping the document useful for review, printing, and digital distribution. PDF File Guide emphasizes starting with the simplest gains—like metadata removal—and then moving to more nuanced steps such as font management and image handling.
Pre-check: audit the document for optimization opportunities
Before you compress, inspect the document to identify big culprits. Check image-heavy pages, embedded fonts, and any unused attachments. Use your editor’s reports to determine which objects are most responsible for the size. This audit helps you decide where to focus effort, so you don’t over-compress items that matter for readability or accessibility. A careful pre-check reduces guesswork and speeds up the optimization process.
Image downsampling and compression: preserving readability
Images often dominate PDF size. The goal is to reduce footprint without sacrificing clarity. Prioritize downsampling for large photos and keep screenshots crisp for UI elements. When possible, replace lossless image formats with lossy equivalents that maintain acceptable quality. This section explains practical thresholds, how to verify readability on screen and print, and how to test different compression levels within your tool to strike the right balance.
Removing metadata, attachments, and hidden content
Metadata, hidden layers, and embedded attachments add bulk with little value for most readers. Removing these elements can yield meaningful gains. Learn which metadata are safe to delete, how to strip attachments you don’t need, and how to preserve essential information like document properties. Remember to back up the original file in case you need to restore any content later.
Font management: embedded fonts and subset vs full
Fonts often contribute a surprising portion of a PDF’s size. Embedding fonts ensures consistent rendering but can bloat files. Subsetting—embedding only the glyphs actually used—often provides a good compromise. This section covers how to decide between full embedding and subsetting based on your document’s fonts, distribution needs, and accessibility considerations. It also explains how to test text searchability after changes.
Export settings across tools: Acrobat, Free tools, and online options
Different tools offer different compression presets. In Acrobat, use “Reduced Size” or “Optimized” settings and test with a representative print and on-screen view. Free tools and online services can be convenient but may introduce privacy concerns or inconsistent results. This section compares common options, warns about potential quality losses, and provides a practical workflow for choosing the right export settings for your industry and audience.
A practical workflow: end-to-end with examples
This section walks through a concrete, end-to-end workflow you can follow to compress a typical report or manual. Start with a backup, perform a targeted audit, apply image downsampling, trim metadata, and export with optimized settings. The example includes decision checkpoints, quality checks, and a method for verifying that the final file remains fit for distribution, sharing, or archival.
Troubleshooting and common pitfalls
Even experienced editors encounter challenges. Common pitfalls include over-aggressive image downsampling, excessive font subsetting that impairs searchability, and failing to check accessibility after compression. This section offers practical remedies, guidance on testing across devices, and a reminder to validate that critical content, navigation, and search features remain intact after optimization.
taxonomy
Tools & Materials
- PDF editor with optimization features(Examples: Adobe Acrobat Pro, Foxit PhantomPDF, PDF-XChange Editor.)
- Original backup copy of the PDF(Always keep an unmodified version.)
- Image optimization tool (optional)(Batch processors can help downsample multiple images at once.)
- Web browser or online compression tool (optional)(Use with caution for sensitive documents.)
Steps
Estimated time: 20-40 minutes
- 1
Back up and prep the file
Create a backup copy and note the document’s purpose. Check for accessibility requirements and confirm that the content won’t be visually degraded by optimization. This initial step sets the guardrails for the rest of the process.
Tip: Always work on a copy to prevent data loss. - 2
Open with an optimization-enabled tool
Launch your PDF editor and load the file. Open the optimization or PDF reduction settings to view available presets. This gives you a baseline before making adjustments.
Tip: If your tool offers a quick optimization preset, test it on a representative page. - 3
Downsample large images
Identify high-resolution images and apply downsampling. Prioritize readability for on-screen viewing and ensure printer output remains acceptable. Compare page previews after each change.
Tip: Do not oversimplify complex graphics; preserve essential detail. - 4
Remove metadata and unnecessary attachments
Clear nonessential metadata, bookmarks, and embedded attachments that inflate size. Leave crucial metadata like author or title if it aids searchability.
Tip: If unsure, export a version with metadata removed and a version with metadata kept for comparison. - 5
Subset or adjust embedded fonts
Evaluate whether fonts are embedded. If needed, subset to only the glyphs used in the document to reduce size while preserving readability.
Tip: Always test search and copy-paste after font changes. - 6
Choose optimized export settings
Export using a suitable optimization profile (e.g., Reduced Size, Optimized) and select balanced image compression. Run a quick check to ensure elements render correctly.
Tip: Avoid extreme compression on images that appear blocky or blurry. - 7
Verify quality and file size
Compare the original and new sizes, review a few pages for visual integrity, and confirm links and forms still work. Ensure accessibility features remain intact if needed.
Tip: Document the final size and settings used for future reference.
Questions & Answers
What is the best way to reduce a PDF size without losing quality?
Start with a targeted audit, downsample large images, remove nonessential metadata, and export with optimized settings. Test readability on multiple devices to ensure quality remains acceptable.
Begin with an audit, then downsample images and export using optimized settings to balance size and quality.
Can I compress PDFs for free online without risking privacy?
Free online tools can compress PDFs quickly, but they may process your files on external servers. For sensitive documents, use a trusted offline tool or software with local processing.
Online options exist, but for sensitive files, prefer offline tools that process data locally.
Will downsampling degrade readability?
Downsampling reduces image resolution. If done carefully, text and diagrams stay readable on screen, with print quality preserved for most uses.
Downsampling can affect clarity if overdone; test on screen and print.
Does removing metadata affect accessibility?
Removing metadata does not typically affect accessibility, but keep essential accessibility data like document structure if required for your audience.
Metadata removal usually doesn’t affect accessibility features if you’re careful with document structure.
Which export settings matter most when exporting PDFs?
Focus on image compression level, font embedding, and removing unnecessary objects. These have the biggest impact on file size while maintaining readability.
Key settings are image quality, font embedding, and object removal.
Is it safe to compress PDFs that contain forms?
Yes, but test form fields after compression to ensure they still work and that any interactive elements render correctly.
You can compress form PDFs, but verify fields work afterwards.
Key Takeaways
- Back up before you compress
- Prioritize image and metadata optimization first
- Subsetting fonts can dramatically reduce size
- Always verify accessibility and form function after changes