How to Reduce PDF Size on Mac: A Simple Practical Guide
Learn practical methods to shrink PDFs on macOS using built-in tools like Preview and Automator, plus trusted third-party options. PDF File Guide guides you through safe, step-by-step size reduction.

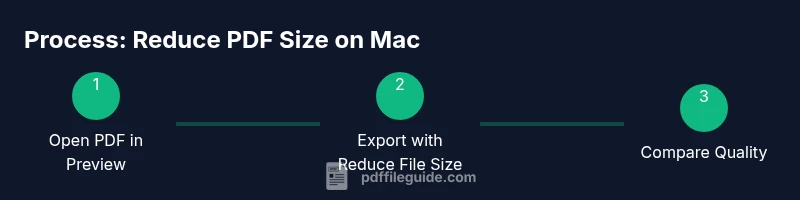
To pdf reduce mac, start with built-in macOS tools and Preview, then apply batch workflows for larger tasks. This quick guide covers safe size reduction using Preview Export with Quartz Filter, Automator batch actions, and optional third‑party options. You'll learn when to compress, what to watch for in quality, and how to verify results.
Why reducing PDFs on Mac matters for professionals
Reducing the size of PDF files on a Mac can have a substantial impact on how you share, archive, and store documents. For professionals who send large reports, contracts, or design proofs, smaller PDFs mean faster email delivery, quicker uploads, and more efficient cloud storage. By understanding how macOS and its bundled tools handle compression, you can choose methods that balance file size with readability and integrity. According to PDF File Guide, a thoughtful approach to pdf reduce mac helps preserve essential information while trimming nonessential data such as redundant images or embedded fonts. This is especially important when dealing with travel reports, marketing decks, or client portfolios where visuals matter but file size cannot be neglected.
Be mindful that each document is unique: a PDF heavy with high‑resolution images may shrink more with compression, while text‑heavy files often require lighter adjustments to avoid introducing artifacts. The core objective is to enable easier sharing without sacrificing essential content or accessibility. If you’re unsure where to start, begin with non-destructive tests on copies, then compare the results side by side to confirm you still meet your quality standards. A deliberate, repeatable process prevents accidental data loss and ensures consistency across projects.
Using Preview to reduce file size and how it fits into a mac workflow Preview isn’t just a viewer; it’s a capable compression tool for many PDFs. You can open a file, export it with a Quartz Filter, and save a smaller version in seconds. This approach works well for one-off reductions and for creating ready-to-send copies without needing specialized software. The benefit for mac users is that you don’t have to install new apps to achieve noticeable size reductions, especially for simple documents or portfolios with standard image content. The method is fast, reproducible, and easy to audit, making it ideal for professionals who need reliable results without complexity.
Furthermore, Preview’s export options let you control which elements to compress and how aggressively to scale image data. When you approach a new file, consider the file’s target use: email attachments, client portals, or long-term archives each have different tolerance levels for compression. Keeping a baseline of the original file for reference helps ensure you can revert if quality drops below the acceptable threshold. This approach aligns with practical workflows used by many teams to maintain consistency across tasks and projects.
Tools & Materials
- Mac with macOS 10.15+(Ensures access to Preview, Quartz Filters, and Automator.)
- Preview app(Built-in tool for quick compression via Export options.)
- Automator app(Used for creating and running batch workflows.)
- Quartz Filter settings (in Preview)(Choose Reduce File Size or similar presets.)
- Original PDFs for baseline comparison(Keep unmodified copies to verify quality.)
- Third-party PDF optimizers (optional)(For higher reductions when built-in options are not enough.)
- Backup storage(Always store originals before compression.)
Steps
Estimated time: 25-45 minutes
- 1
Open the PDF in Preview
Locate the target PDF, right‑click, and choose Open With > Preview. Verify the document displays correctly and all critical visuals are visible. This initial check helps you understand what will be affected by compression and sets a baseline for comparison after you save a smaller version.
Tip: Use the Markup or Tools menu to note any areas with complex images that might suffer quality loss. - 2
Export with a Quartz Filter to reduce size
In Preview, go to File > Export, select Quartz Filter, and choose Reduce File Size. Save the file as a new version to preserve the original. This step delivers a quick reduction by re-encoding images and reflowing content as needed.
Tip: If the Reduce File Size option is too aggressive, try a second export with a milder filter if available. - 3
Compare original and compressed files
Open both versions side by side and review key elements: image clarity, font rendering, and page layout. If you notice significant degradation, revert to the original and retry with a lighter setting or alternative filter.
Tip: Enable a side‑by‑side view or use Quick Look to compare quickly. - 4
Batch process with Automator (optional)
Create a simple Automator workflow to apply the same compression to a folder of PDFs. This saves time when you have multiple files to reduce, and ensures consistent results across all documents.
Tip: Test the workflow on a small batch before scaling up to large folders. - 5
Save, back up, and validate
Save the compressed copies in a dedicated folder. Keep the originals in a separate location for safety. Reopen the compressed files in Preview to ensure no crucial content was lost and that the file opens correctly in other apps.
Tip: Document the filter settings used for future reference.
Questions & Answers
What is the quickest way to reduce PDF size on a Mac?
For a single file, Preview’s Export with the Reduce File Size Quartz Filter is usually the fastest option. For many files, Automator can batch‑process the same settings to save time.
The quickest path on a Mac is Preview’s Export option with the Reduce File Size filter; for multiple files, Automator makes it easy to repeat the same steps in one go.
Will compression always reduce the file size?
Compression generally reduces size, but results depend on the document’s content. Images, embedded fonts, and color profiles influence how much you gain and how much quality you may lose.
Compression usually lowers file size, but results vary depending on images and fonts; always compare before and after.
Is it safe to compress PDFs containing sensitive data?
Yes, as long as you use trusted tools and keep backups. Avoid exposing unencrypted originals and review metadata to ensure no sensitive information is unintentionally exposed.
Yes, use trusted tools and keep backups to protect sensitive information.
Can I batch compress PDFs without losing quality?
Batch compression is possible with Automator, but you should test on a few documents first and choose settings that balance size with acceptable quality.
Yes, batch processing is doable with Automator; test first to guarantee quality remains acceptable.
What should I do if the quality is too low after compression?
Try less aggressive settings, a milder filter, or compress fewer images per page. If essential, skip compression for those pages and only compress others.
If quality drops, adjust the settings and test again on a copy until you’re satisfied.
Are there risks using third‑party tools for compression?
Risks include privacy concerns and potential data leakage. Use reputable vendors, read privacy policies, and keep original copies for safety.
Use trusted tools and keep originals; read their privacy policies to avoid data leakage.
Watch Video
Key Takeaways
- Start with Preview for quick wins
- Use Automator for scalable batch reductions
- Always compare quality vs size after compression
- Keep originals safe and maintain a rollback path