How to Reduce PDF Size for Free: A Practical Guide
Learn free, practical methods to shrink PDF file sizes without sacrificing essential content. This guide covers image compression, font optimization, metadata removal, and test steps to ensure quality remains acceptable for sharing, storage, and web use.

You can achieve pdf size reduce free using built-in tools and no-cost software. This guide walks you through removing extraneous elements, compressing images, and optimizing fonts and metadata without paying. You’ll learn a practical, step-by-step workflow to shrink PDFs while preserving essential quality. PDF File Guide shows how professionals and individuals can share, store, and upload lighter PDFs—without cost.
Why reducing PDF size matters
In today’s digital workflow, the size of a PDF often determines how quickly you can share, store, and access documents. Smaller files load faster, upload reliably on slower networks, and take up less space on devices and servers. For professionals who circulate proposals, reports, or research, a lean PDF reduces bandwidth requirements and helps teams operate more efficiently. For students and freelancers, smaller PDFs speed up submission processes and make archiving easier.
As you work toward a smaller file, the goal isn’t to strip away essential information. It’s about trimming what isn’t strictly needed for the document’s purpose while preserving readability, layout integrity, and interactive features. In practice, a modest reduction often yields a meaningful balance between quality and size.
According to PDF File Guide, adopting a free, methodical approach to pdf size reduce free can help you stay productive without expensive software. The team notes that many everyday PDFs can be shrunk by applying a handful of straightforward techniques—without sacrificing core content. This article outlines a clear, repeatable process you can apply to invoices, manuals, eBooks, and study notes, regardless of technical experience.
Free techniques to shrink PDF size
There are several no-cost techniques that reliably reduce PDF sizes when used together. Start with the low-hanging fruit and layer more advanced optimizations as needed.
- Remove unnecessary elements: Start by eliminating embedded attachments, obsolete forms, and hidden data that aren’t required for your use case. These elements bloat the file without adding value for most readers.
- Compress and optimize images: Large images dramatically increase file size. Replace high-resolution images with appropriately sized JPEGs, downsample color images, and convert unnecessarily complex image formats when possible.
- Subset and optimize fonts: Embedding entire fonts can enlarge a PDF. If you must embed fonts, subset them so only the characters used in the document are included.
- Remove metadata and hidden data: Clear out creation metadata, author information, and prior revision history that aren’t needed for the end user.
- Flatten forms and annotations: If interactivity isn’t required, flatten form fields and annotations to reduce data overhead while preserving appearance.
- Use linearization for web use: If the document will be viewed online, enabling linearization (also called web optimization) can improve initial load time for browsers.
- Compare before and after: Always compare the compressed file to the original to confirm that critical visuals and data remain intact.
A balanced approach commonly achieves significant gains without compromising readability, especially for image-heavy PDFs. The following sections expand on how to implement each technique in practical, free tools.
Free tools and how to use them
Free tools come in two flavors: online services and desktop applications. Both can reduce PDF sizes, but each has trade-offs related to privacy, file size, and control over output quality.
- Online compression tools: These are quick and accessible from any device with a web browser. Use trustworthy services, especially for sensitive documents. Upload your PDF, choose a compression level (often labeled basic, balanced, or strong), and download the result. Always review the output to ensure that images and text remain legible.
- Desktop editors and readers: Free PDF editors often include a save-as-optimized option or a dedicated “reduce file size” feature. This approach keeps your data on your device and can provide more control over image quality and font embedding.
- Free command-line utilities: Tools like Ghostscript offer powerful compression controls once you know the basics. They require some familiarity with command-line syntax but frequently yield top-tier size reductions with careful parameter selection.
Tips for tool selection:
- Prioritize privacy for sensitive documents; start with desktop or offline options.
- Check whether the tool allows font subset embedding to maximize gains without breaking display.
- Test multiple outputs if available; different tools can produce noticeably different results for the same input.
Regardless of your chosen method, always back up the original PDF before making any changes. PDF File Guide emphasizes practicing on copies to avoid accidental data loss.
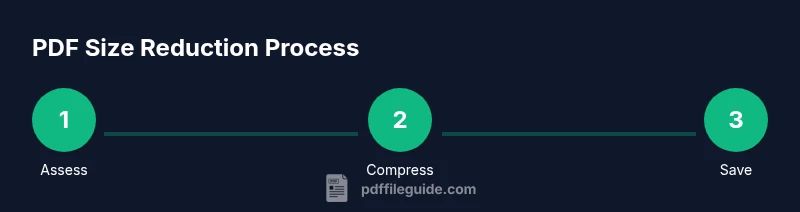
Step-by-step workflow overview
To provide a structured path, here is a high-level workflow you can apply with free tools. Treat this as a blueprint you’ll implement in the detailed Step-by-Step section:
- Assess the document: identify heavy sections, high-res imagery, and embedded fonts.
- Remove nonessential elements: attachments, forms, metadata, and hidden content.
- Resize and compress images: replace or downsample large images to your target display size.
- Subset and optimize fonts: embed only used characters or avoid embedding fonts where not required.
- Flatten and finalize: if interactive features aren’t needed, flatten layers and forms, then linearize for web delivery.
- Save and verify: save as a new optimized file and compare to the original for visual fidelity and data integrity.
The exact steps and options vary by tool, but the core decisions remain consistent across platforms. In the STEP-BY-STEP block, you will see concrete actions with time estimates and tips for each stage.
Step-by-step: hands-on actions (example workflow)
- Open your PDF in a free editor and examine heavy elements
- Description: Start by scanning the document for large images, embedded fonts, and metadata that can be trimmed without impacting readability.
- Tip: Work on a copy of the file to preserve the original.
- Remove nonessential items (attachments, forms, metadata)
- Description: Delete obsolete attachments, unused form fields, and metadata that do not affect content.
- Tip: If you’re unsure whether a piece is essential, leave it out and test later.
- Compress images and downsample where appropriate
- Description: Downsample or replace high-resolution images with lower-resolution equivalents suitable for on-screen viewing or printing.
- Tip: After compression, visually compare a few pages to ensure readability remains acceptable.
- Subset embedded fonts and simplify graphics
- Description: If fonts are embedded, limit to the necessary glyphs and remove extraneous font data. Simplify complex vector graphics where possible.
- Tip: Subsetting fonts may affect accessibility in some readers; verify by testing assistive technologies.
- Flatten, optimize, and test
- Description: Flatten forms and annotations if interactivity isn’t required; enable web optimization if the file will be delivered online.
- Tip: Save a final version and run a quick check across devices to confirm layout consistency.
- Save as optimized and compare
- Description: Save under a new name with an explicit indication of optimization, then compare the file size and visual fidelity to the original.
- Tip: If quality is too degraded, revert and adjust settings incrementally.
FAQs and common pitfalls (quick notes)
- What’s more impactful: images or fonts? Images commonly contribute the most to file size; fonts can add significant weight if embedded in full.
- Is it safe to compress metadata? Yes, for most workflows, but be aware that some metadata can be used for accessibility and search indexing.
- Can I keep accessibility after compression? Yes, but ensure text remains selectable and structure is preserved; test with a screen reader.
Tools & Materials
- Free online PDF compression tool(Use a reputable site; avoid uploading sensitive documents.)
- Desktop PDF editor with optimization features(Choose options like 'save as reduced size' or 'optimize images'.)
- Ghostscript or equivalent command-line tool(Useful for advanced users who want precise control over compression settings.)
- Original PDF file(Back up before editing; work on a copy.)
- Web browser or offline reader(Use for quick previews after compression.)
Steps
Estimated time: Estimated total time: 25-40 minutes
- 1
Assess the document for heaviness
Open the PDF and take note of the largest images, embedded fonts, and whether metadata or attachments are present. This helps you prioritize which elements to target first and sets a baseline for size reduction.
Tip: Document a rough baseline by noting file size and a few sample pages for quality checks. - 2
Remove nonessential elements
Delete or hide attachments, obsolete forms, and unnecessary metadata. These elements add size without contributing to the end-user experience.
Tip: Keep a backup of the original before removing any content. - 3
Compress images and downsample appropriately
Optimize image data by replacing high-resolution images with appropriate lower-resolution equivalents and compressed formats suitable for viewing rather than print-only quality.
Tip: Always verify visual quality on a few representative pages after compression. - 4
Subset fonts and simplify graphics
Embed only the fonts and glyphs actually used in the document to reduce size. Simplify or flatten complex vector graphics where possible.
Tip: Check that text remains readable and accessible after font subsetting. - 5
Flatten interactivity and enable web optimization
If interactivity isn’t required, flatten forms and annotations. Enable linearization for faster web viewing if needed.
Tip: Test file performance in a browser to ensure smooth loading. - 6
Save as a new optimized file and verify
Save the output with a clear name indicating optimization. Compare the new size and visually review multiple pages to confirm fidelity.
Tip: Retain a copy of the original in case you need to revert.
Questions & Answers
What elements typically contribute most to a PDF's size?
Images and embedded fonts are usually the main contributors. Reducing image resolution, downsampling, and embedding only necessary glyphs can dramatically decrease file size while preserving readability.
Images and fonts usually drive size. Reducing resolution and embedding only needed fonts helps a lot.
Will compressing a PDF degrade quality?
Some compression may reduce image sharpness or color fidelity. The goal is to balance file size with acceptable readability; test a few pages and adjust settings as needed.
Compression can affect quality; test the results and adjust until acceptable.
Are free tools safe for sensitive documents?
Desktop editors and reputable online tools can be safe, but always back up, review privacy policies, and avoid uploading extremely confidential files to public services.
Use desktop tools for sensitive files, and review privacy policies before uploading.
Can I preserve accessibility after compression?
Yes, if you keep the document structure intact and avoid removing text from the content order. Use tools that preserve tagging and reading order, then test with assistive tech.
Accessibility can be preserved with careful settings; test with a screen reader.
What should I do if the file is still large after compression?
Try alternative approaches: optimize further by reducing image quality, removing more metadata, or using a different tool to compare results. Sometimes splitting the document into parts helps.
If still large, adjust further or split the file into smaller parts for sharing.
Watch Video
Key Takeaways
- Apply a free, repeatable workflow to shrink PDFs
- Prioritize image and font optimizations for the biggest gains
- Back up originals before editing to avoid data loss
- Test across devices to verify readability and layout
- Use offline tools for sensitive documents to protect privacy