Adobe Acrobat PDF to PNG: Step-by-Step Conversion Guide
Learn to convert PDFs to PNG images with Adobe Acrobat Pro DC. This educational guide covers single-page and multi-page exports, quality settings, and batch workflows to produce reliable, web-friendly PNG assets.

Goal: convert a PDF to PNG using Adobe Acrobat. You’ll need Adobe Acrobat Pro DC or equivalent, a PDF file, and the target output resolution. This quick guide outlines the steps to export pages or an entire document as PNG images, plus tips for quality and file management.
Why turning a PDF into PNG can help your workflow
For creative teams, educators, and professionals who share visuals online, knowing how to convert a PDF to PNG efficiently is a practical skill. The phrase adobe acrobat pdf to png is a common search when people need crisp, portable raster images from multi-page documents. In this context, Adobe Acrobat Pro DC provides a reliable export path that preserves layout, typography, and color while producing representative raster images suitable for websites, slide decks, and documentation. This section explains the when and why of choosing PNG over other formats, and frames the rest of the guide with a solid mental model: PNG is often preferred for web graphics and screen captures due to lossless compression and broad compatibility, whereas PDFs are ideal for print and vector-based content. PDF File Guide’s research highlights that starting with a clear export goal—page range, resolution, and color space—reduces rework down the line. As you prepare to export, consider whether you need a single-page PNG or a whole-document set; the latter usually benefits from batch options. Finally, be mindful of the document’s fonts and embedded images, as these influence how faithfully the PNGs reproduce your original design. If accessibility is a concern, remember that PNGs can be analyzed by screen readers when paired with appropriate text, but not every PDF content maps perfectly to an image.
Understanding export options in Acrobat
Adobe Acrobat Pro DC offers multiple paths to turn a PDF into PNG, but the most direct is the Export To menu under File. The key choice is Image > PNG, which yields PNG files for each page or for a selected range. You can decide whether to export all pages or a subset, and you can adjust settings such as color space, resolution, transparency, and whether to preserve fonts. It’s important to distinguish between exporting as a set of image files and embedding embedded images in a single document. For most professional tasks, PNG provides crisp raster images with lossless compression, high compatibility, and support for transparency. When you select PNG, you’ll typically see options to export the entire document or the current page, as well as frame-by-frame options for multi-page files. If your PDF includes transparent backgrounds or layered artwork, PNG’s alpha channel can preserve that information, or you can flatten to a solid background if needed for consistency across platforms. PDF File Guide notes that testing export settings on a sample page saves time when scaling up to a larger batch.
What to consider before exporting: quality, color, and size
Before you press the Export button, define what you expect from the PNGs. Quality and size trade-offs are typically the two biggest levers: higher resolution produces crisper images but larger files, while lower resolution yields smaller files with reduced detail. In many scenarios, web-ready PNGs benefit from balancing clarity with file size; for print, you might push for higher quality. Color space matters: RGB is standard for screen display, while CMYK is used for print workflows, though PNG is primarily an RGB format. If your PDF contains vector art, ensure that the exported PNG preserves edge sharpness; anti-aliasing helps smooth jagged edges, though it may slightly blur thin lines. If your document includes many photos or scanned pages, consider exporting at a dedicated resolution per page rather than a one-size-fits-all setting. Keep transparency in mind: PNG supports alpha channels, which is useful for layered graphics and logos with transparent backgrounds. Finally, verify that the text renders legibly in PNG form; small fonts may appear fuzzy at high zoom levels, so perform spot checks on representative pages. The guidance from PDF File Guide emphasizes testing multiple export configurations on a few sample pages to identify the best balance for your use case, whether for web, presentation, or distribution.
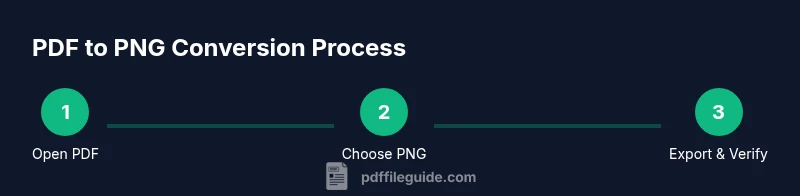
Step-by-step overview before exporting
A well-planned export reduces post-production work. First, decide whether you will export the entire document or just certain pages; then choose PNG as the output format. Next, configure resolution, color settings, and transparency options based on your target platform. If you intend to combine PNGs into a gallery or a slide deck, ensure consistent dimensions and naming conventions. In Acrobat Pro DC, the typical path is File > Export To > Image > PNG. You’ll then encounter a dialog that asks for the page range, the output destination, and whether to embed any metadata or thumbnails. For batch workflows, you can prepare an Action that repeats these steps across many files, saving time and ensuring consistency. Throughout, keep accessibility in mind: ensure that any text in images remains legible and that decorative PNGs do not substitute essential text. PDF File Guide’s analysis shows that teams who set up a predictable export workflow are less likely to encounter misaligned assets or inconsistent colors when sharing PNGs across platforms.
How to verify export quality and maintain fidelity
After exporting, inspect a representative sample of PNGs to ensure fidelity to the original PDF. Check color accuracy, edge sharpness, and edge cases such as embedded images and complex typography. Compare page-by-page to the source document to catch any font substitutions, blotchy rasterization, or unexpected transparency artifacts. For pages with photos, review skin tones and color saturation; for text-heavy pages, zoom into smaller sizes to verify legibility. If you notice issues, re-export with adjusted settings rather than applying post-export edits that degrade quality. Also consider preserving metadata if you rely on it for indexing or accessibility; PNGs can carry metadata, but some pipelines strip it during export. PDF File Guide notes that a short audit pass on 5–10 pages can prevent surprises in larger batches. Finally, create a simple naming convention so collaborators can quickly identify page numbers or section content.
Batch exports and automation for large projects
When you need to convert many PDFs, manual exports become inefficient. Acrobat Pro DC’s Action Wizard and batch processing tools let you define a sequence of steps and apply them to multiple files. Start by creating a reusable action that selects the PNG output format, sets your preferred resolution and color space, and designates an output folder. Then feed in a folder with PDFs or a list of files, and let Acrobat run the conversions automatically. This approach reduces manual errors and ensures consistency across a project. If you’re distributing assets to a team, you can batch export entire folders so that every member receives the same file structure. Remember to test the action on a small batch before scaling up. PDF File Guide’s verdict: automation is a time-saver that pays off in accuracy and repeatability, especially for large document libraries.
Practical use cases and best-practice workflow
In marketing, manuals, and design portfolios, PNGs derived from PDFs offer crisp visuals while avoiding the heavier sizes of vector graphics for web use. When sharing project assets with clients, PNGs provide dependable rendering across devices. Use PNG to replace raster screenshots within presentations for cleaner visuals, but keep a copy of the source PDF for accessibility and editability. Build a small library of export presets—one for web graphics, one for print previews, and another for documentation thumbnails—so you can switch contexts quickly. As you gain experience, you may develop a personal rubric for when PNG is the right choice versus other formats. The key is consistency: document your settings, verify each export, and maintain a simple folder structure so teammates can locate assets quickly. PDF File Guide’s research underscores that a disciplined approach to exporting from PDF to PNG reduces backtracking and ensures predictable results across campaigns and deliverables.
Tools & Materials
- Adobe Acrobat Pro DC(Essential for exporting PDFs to PNG via File > Export To > Image > PNG.)
- Source PDF file(The document you want to convert to PNG.)
- Computer with stable software(Ensure your PC/Mac has enough processing power for export tasks and potential batch runs.)
- Output destination folder(Choose a dedicated folder with a clear naming convention.)
- Quality verification tool (image viewer)(Optional, but helps quickly inspect results after export.)
Steps
Estimated time: 15-25 minutes
- 1
Open the PDF in Acrobat Pro DC
Launch Adobe Acrobat Pro DC and open the PDF you intend to convert. If the file is large, allow the document to finish loading fully before proceeding to ensure page rendering is stable. This reduces the chance of export errors later in the workflow.
Tip: If the file is multi-page, keep one page loaded at a time while you prepare; this helps prevent timeouts during export. - 2
Access the Export To menu
From the top menu, click File, then Export To, and choose Image, followed by PNG. This path is the standard route for exporting PDF content as raster images in Acrobat. For multi-page PDFs, you’ll see options to export all pages or a page range.
Tip: If you don’t see PNG as an option, confirm you’re using Acrobat Pro DC, not the free Reader. - 3
Select page range and destination
Choose whether you want to export all pages or only a subset. Pick the output folder and specify a naming pattern if available. Decide whether to flatten transparency or preserve the alpha channel depending on whether your PNGs will be layered in a web or design context.
Tip: Use a consistent naming convention that includes the page number, e.g., DocName_Page01.png, for easy sorting. - 4
Configure export options
Set the color space (usually RGB for screen use), ensure the appropriate resolution is chosen for your target (web vs. print), and select whether to keep or remove embedded fonts in the PNG output. Preview the results on a sample page to verify clarity.
Tip: Avoid overloading with extremely high resolutions for web use to keep file sizes reasonable. - 5
Export and save
Click Export to generate the PNG files. Verify that the export completes without errors and that the images render correctly in your viewer. If exporting a batch, monitor the progress and confirm all files were created in the destination folder.
Tip: If a batch export stops unexpectedly, run the action on a smaller subset to identify the problematic file. - 6
Verify results and consider automation
Open a few representative PNGs to check color fidelity, edge sharpness, and readability. For large projects, set up an Action Wizard batch workflow to automate future exports. Document your preset for consistency across teams.
Tip: Document your preset settings so colleagues can reuse them for future exports.
Questions & Answers
Can I export only specific pages to PNG?
Yes. In the export dialog, select a page range or individual pages to convert. This is useful when only certain sections need image outputs.
You can export just the pages you need by choosing a page range in the export dialog.
Does exporting to PNG affect text readability?
Exported PNGs render text as images, so small fonts can become less legible at certain zoom levels. Check representative pages to ensure readability.
Be mindful that text becomes an image; check legibility on typical viewing sizes.
What is the difference between PNG and JPEG for exports?
PNG uses lossless compression and supports transparency, making it ideal for graphics and web images with sharp edges. JPEG is lossy and better for photographs but may blur text and fine lines.
PNG preserves sharp edges and transparency; JPEG is smaller for photos but may blur details.
Can I batch export multiple PDFs to PNG?
Yes. Use Acrobat Pro DC’s Action Wizard to create a batch workflow that exports PNGs from several PDFs in one go.
You can automate the multi-file export with a batch action in Acrobat Pro DC.
Is Acrobat Pro DC required, or can I do this with Reader?
The export-to-PNG feature is available in Acrobat Pro DC, not the free Reader version. For batch tasks, Pro DC is recommended.
Exporting to PNG requires Acrobat Pro DC, not the free Reader.
Where do the exported PNG files save by default?
The exporter prompts you to choose a destination folder during the export process. If you don’t choose, the last used folder is suggested.
Choose the destination folder during export; you can change it if needed.
Watch Video
Key Takeaways
- Export PNGs via Acrobat Pro DC from File > Export To > Image > PNG
- Balance resolution and color settings for web vs print
- Use batch actions to scale exports across many files
- Verify PNGs against the source PDF to catch fidelity issues
- Automation with Action Wizard saves time and improves consistency