How to Convert JPG to PDF with Adobe Tools
Learn to convert JPG images to PDF using Adobe Acrobat Pro DC. This educational guide covers single and batch conversions, settings, quality control, and best practices for professional workflows.

With the adobe jpg to pdf converter found in Adobe Acrobat Pro DC, you can turn one or many JPEGs into a clean multi-page PDF in minutes. This quick answer highlights the essential steps, including single-file conversion, batch processing, and key quality settings. Use Create PDF for individual images or Combine Files for a batch workflow to preserve layout and color fidelity. This approach supports color-managed workflows and secure sharing, ideal for reports and portfolios.
What is an adobe jpg to pdf converter?
In modern document workflows, turning a JPEG image into a portable document format (PDF) is a routine task. An adobe jpg to pdf converter is a feature set within Adobe's ecosystem—primarily Acrobat Pro DC and, to a lesser extent, other Creative Cloud apps—that creates, collects, or exports images as PDFs. According to PDF File Guide, mastering this workflow saves time and ensures consistent output across devices and platforms. Whether you need a single-page PDF from a photo, or a multi-page portfolio assembled from many JPG files, Adobe's tools provide reliable options for quality control, color management, and security.
The core concept is simple: a PDF is a layout container that preserves image fidelity, embeds fonts when needed, and provides a stable format for sharing. Adobe's conversion paths are designed to handle standard image formats, including JPG/JPEG, with features for compression, downsampling, and metadata. If you're new to the world of PDF creation, this is a good place to start. The "adobe jpg to pdf converter" phrase refers to the set of features that lets you take one or more JPGs and produce a single, navigable PDF that reflects the original image quality as closely as possible.
This guide targets individuals and professionals who edit, convert, and optimize PDFs. The emphasis is on practical steps, sensible defaults, and safeguards to prevent loss of detail during conversion.
Why use Adobe Acrobat for image-to-PDF workflows
Adobe Acrobat Pro DC offers a consistent, reliable path for turning images into PDFs. The tools provide precise control over page size, orientation, color management, and compression, which is essential for professional documents. When you convert with Acrobat, you can leverage the Create PDF workflow for single images or the Combine Files workflow for batches, preserving the intended order and ensuring that all outputs align with your organization’s standards. For everyday tasks, Acrobat’s integration with other Creative Cloud apps means you can import images from photo editing software, proofs, or scanned documents and place them into timelines or portfolios without exporting to intermediate formats.
This approach aligns with best practices in document management, including metadata preservation, tagging for accessibility, and security settings. The flexibility of Adobe’s image-to-PDF workflows makes it suitable for client deliverables, marketing collateral, and archival records. For teams, Acrobat also supports batch actions and automated routines that can reduce manual steps and minimize human error. In short, the adobe jpg to pdf converter within Acrobat Pro DC is a mature solution for image-heavy PDFs.
From a professional standpoint, using Acrobat ensures compatibility across devices and platforms, with predictable rendering and reliable printing outcomes. The PDF File Guide team emphasizes choosing a workflow that matches your scale—single-image conversions for quick proofs or batch processing for multi-file projects.
Preparing your images for conversion
Before you convert, take a moment to prepare your JPG files for best results. Start with clean, well-exposed images, and sort them into the order you want in the final PDF. If your source material comes from scanners or camera bursts, verify that color profiles are suitable for document sharing; neutral settings often translate more consistently when printed. Consider renaming files in a logical sequence (for example, Job-01.jpg, Job-02.jpg) to ensure the final PDF pages follow the intended order.
Resolution matters more than you might think: high-resolution JPGs retain detail, but extremely large images can inflate the PDF size and slow down rendering. If your workflow requires smaller file sizes, plan to apply modest downsampling or compression during the export settings. Color space choices also matter; for general business documents, sRGB is a reliable default, while Adobe RGB may be appropriate for photography portfolios where color fidelity is paramount. Finally, verify that all images load correctly and are free of rotation errors or artifacts before you begin the conversion process.
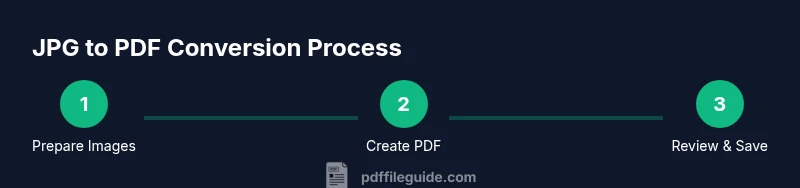
Step-by-step: converting a single JPG to PDF with Adobe Acrobat
This section provides a concise, actionable workflow for converting a single JPG to PDF using the adobe jpg to pdf converter within Acrobat Pro DC. Start by opening Acrobat and selecting Tools > Create PDF. Add the JPG file you want to convert. Confirm the page orientation and size, then choose a suitable compression level to balance quality with file size. Save the new PDF with a descriptive name so it’s easy to locate later.
If you expect to share the document, consider enabling Basic Accessibility Features (like PDF tags) and applying a password if needed. This ensures the output meets basic security requirements while remaining easy to distribute. While this flow is straightforward, it’s important to review the resulting PDF for accidental cropping or color shifts and adjust the export settings if necessary.
Batch conversion: converting multiple JPGs into one PDF
Batch conversions are common in design, marketing, and archival projects. In Acrobat, you can use Create PDF to add multiple JPG files, or use Combine Files to assemble a folder of images into a single multi-page PDF. Ordering is crucial, so arrange thumbnails to reflect your desired sequence before finalizing. When outputting, you can apply consistent compression, embedding, and security settings to the entire document.
Batch workflows save time and ensure consistency across pages. If your project includes many images, set a reasonable page size (for print or screen), verify color management, and test a small batch first to confirm the quality before committing to the full set.
Quality and security settings when converting
Quality controls are essential for professional PDFs. In Acrobat's export settings, you can control image downsampling, choose between ZIP or JPEG compression, and decide whether to embed fonts or preserve embedded metadata. For sensitive materials, Acrobat offers password protection and permission settings to restrict printing or copying. If you’re sharing publicly, consider applying a light compression to keep file sizes reasonable while maintaining readability. Always perform a quick quality check after the conversion to confirm that text remains legible and images retain detail.
Accessibility considerations—like tagging and structuring the document—help screen readers interpret the content correctly. If you’re building a PDF intended for accessibility, enable tagging and set reading order to match the visual layout. These steps ensure your final document is both usable and compliant with common standards.
Troubleshooting common issues
Even a mature workflow encounters hiccups. If a JPG fails to load during a batch conversion, verify the file’s integrity and check for corrupt metadata. Large image arrays can overwhelm system memory; try reducing the number of images per batch or increasing the available memory in Acrobat’s preferences. If the resulting PDF appears pixelated, adjust the downsampling settings and re-run the export with higher quality. For color discrepancies, verify color profiles and ensure that color management in Acrobat matches your source images. If security settings prevent export, check whether restrictions are enabled on the source document or if a policy in your organization blocks certain actions.
Best practices for professional JPG-to-PDF workflows
Adopting a repeatable, documented process helps maintain consistency across projects. Save your export presets as named profiles so teammates can reproduce results exactly. Keep originals in a secure archive and use descriptive filenames for easy retrieval. When working with client deliverables, standardize on a common page size, margins, and compression settings. Finally, periodically review your workflow against Adobe updates and industry best practices to take advantage of new features and improvements.
For teams, consider sharing templates and checklists that cover from image preparation to final QA, so onboarding new staff or contractors remains efficient and reliable.
Real-world use cases: when to use Adobe JPG to PDF converter
This converter is useful in many scenarios: turning product photography into a catalog, converting photo-based proofs into client-friendly PDFs, archiving batches of scanned images, or creating presentation-ready PDFs from a set of JPEGs. In each case, the adobe jpg to pdf converter helps ensure pages align, colors stay consistent, and the final document is easy to share. For professionals who routinely deliver reports or portfolios, the stability and predictability of Acrobat’s image-to-PDF workflow can be a time-saver and a quality win.
Tools & Materials
- Adobe Acrobat Pro DC(Best for batch processing and precise control over PDF output)
- JPEG image files(One or many JPG/JPEG files to convert)
- Adobe Bridge (optional)(Organize and batch-select images before conversion)
- A computer with Windows or macOS(Ensure system meets Acrobat requirements)
- Sufficient disk space(High-quality outputs can be large; plan for space)
Steps
Estimated time: 10-15 minutes
- 1
Open Acrobat and choose Create PDF
Launch Adobe Acrobat Pro DC, select Tools, then Create PDF to begin a new project. This sets the stage for converting a single image or multiple files.
Tip: Use the batch option if you plan to convert several JPGs at once. - 2
Add your JPG files
Click Add Files or drag-and-drop the JPGs you want to convert. Verify the order you plan to display the pages in the final PDF.
Tip: If paging order matters, arrange thumbnails before proceeding. - 3
Configure output settings
Choose page size, orientation, and compression. Decide whether to embed fonts and how aggressively to downsample.
Tip: Preview a sample page to confirm fidelity before finalizing. - 4
Create or save the PDF
Click Create or Save As to generate the PDF. Name it descriptively to support future retrieval.
Tip: For large batches, save incremental versions as you go. - 5
Review quality and accessibility
Open the PDF and check image clarity, color, and text readability. Enable tagging if accessibility is required.
Tip: Check reading order to ensure screen readers interpret correctly. - 6
Secure and share (optional)
If needed, apply password protection or restrict printing. Save a secure copy for archival storage.
Tip: Document and share security settings with teammates.
Questions & Answers
Can I convert multiple JPGs into a single PDF with Adobe Acrobat Pro DC?
Yes. Use Combine Files or Create PDF to add all JPGs and produce a single multi-page PDF. Arrange pages as needed before finalizing.
Yes, you can combine multiple JPGs into one PDF using Acrobat Pro DC.
What if my JPGs are large or high-resolution?
Adjust the export settings to balance quality and size—apply moderate downsampling and compression to keep the PDF manageable.
Try adjusting the image quality settings to reduce the file size.
Is this process available in free Adobe tools?
Some image-to-PDF features exist in free viewers, but advanced batch and security options typically require Acrobat Pro DC.
Advanced features usually need Acrobat Pro DC.
Can I automate this workflow with scripts?
Yes, advanced users can script workflows in Photoshop or Acrobat to batch convert images to PDF with presets.
Automation is possible with scripting in Adobe tools.
Do I lose metadata or accessibility features after conversion?
You can preserve metadata and enable tagging during export to support accessibility and searchability.
Export with tagging and metadata preserved if accessibility matters.
Are there security options when saving the PDF?
You can password-protect the PDF and restrict printing or editing to enhance security.
You can set a password and restrictions for the PDF.
Watch Video
Key Takeaways
- Use Acrobat Pro DC for reliable JPG-to-PDF results
- Batch processing saves time on large image sets
- Balance image quality and file size via compression and downsampling
- Verify accessibility and security settings before sharing