How to Convert Image to PDF on iPhone
Learn how to convert image to PDF in iPhone using built-in tools and trusted apps. This guide covers practical methods, tips, and best practices for clean, shareable PDFs.

You can convert an image to a PDF on iPhone in minutes using built-in apps. Start with the Photos or Files app to export, then choose Save as PDF from the share sheet, or print to PDF and save via the printer option. This quick path covers the standard method and reliable alternatives.
Why mobile PDF conversion matters
In the modern mobile workflow, converting an image to a PDF on iPhone is a practical skill for professionals and students alike. A PDF preserves layout, fonts, and image quality, ensuring your content looks the same on any device. The PDF File Guide team notes that mobile PDF workflows reduce friction, helping you archive receipts, contracts, or whiteboard images quickly and securely. By mastering native iPhone features, you can create clean, shareable PDFs without exposing your data to third-party services. This section lays the groundwork for selecting the right path: a quick single-image PDF or a multi-page document created from several photos.
How mobile PDF workflows differ across apps
There are several ways to turn an image into a PDF on an iPhone, and they differ in convenience, control, and quality. Built-in options offer speed and privacy because they don’t require uploading content to third-party services. Third-party apps may add features like automatic image enhancement, batch processing, or password protection. In this guide, we compare the most reliable approaches: using Photos and Files with the iOS Print to PDF method, versus using dedicated PDF apps that can integrate with cloud storage. For many users, the quickest route is to use the iPhone’s native tools, but there are legitimate reasons to explore apps from Apple’s ecosystem or trusted vendors when you need additional controls.
What you can do with the Photos app and the built-in Share sheet
Photos is often the fastest route for a single image. The native Share sheet provides access to Print, Save to Files, and direct sharing. When you choose Print, the system transforms the image into a PDF preview via the printer driver, which you can then save or share. This approach preserves the image’s original resolution and allows you to adjust basic settings like orientation before finalizing the PDF. For professionals who capture client-facing material, this method minimizes exposure to external services, since the entire process occurs on-device.
Method A: Convert an Image to PDF on iPhone Using Photos — a stepwise narrative
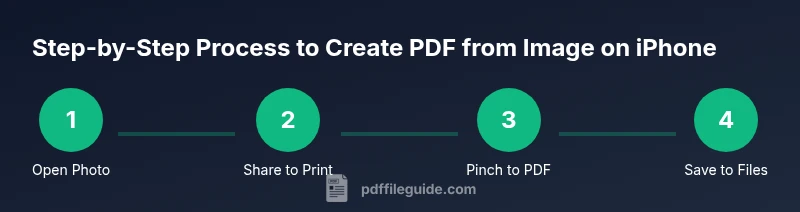
Open the Photos app and locate the image you want to convert. Tap the image to view it full screen, then tap the Share icon in the lower-left corner. In the share sheet, select Print. The image will render in a printer-friendly preview. Perform a two-finger pinch on the preview to reveal a PDF. Tap the Share icon again in the PDF view, then choose Save to Files or Send a copy to another app. Name the file and select a location. This on-device approach keeps the content private while delivering a high-quality PDF.
Method B: Save as PDF directly from the Files app
Open the Files app and navigate to the image you want to convert. Tap the image to preview, then tap the Share icon. Scroll to Print, then perform a pinch-out gesture to access the PDF preview. Tap the Share icon in the PDF view, choose Save to Files and select a folder, or choose Copy to another app. This method is useful when you’ve already organized your assets in Files and want a direct path to PDF without leaving the app.
Creating a multi-page PDF from several images
You can assemble a multi-page PDF by selecting multiple images and using the Print-to-PDF flow. In Photos, select several images, tap Share, then Print. On the printer preview, pinch out to reveal a multi-page PDF. Save to Files or share as needed. This approach is ideal for receipts, trip itineraries, or a small portfolio where order and pagination matter.
Quality, orientation, color, and resolution considerations
For the best results, verify that each image is oriented correctly before combining into a PDF. If an image is sideways, rotate it within the preview before saving. Consider converting color images to grayscale for smaller file sizes when color isn’t essential, and adjust the DPI by re-capturing the image at a higher resolution before conversion. Remember that PDFs retain the source image quality, so starting with a clear photo yields a cleaner final document.
Accessibility and privacy considerations
PDFs produced on iPhone can preserve text selection and searchable content if the source image contains legible text. This is beneficial for accessibility and archiving. Privacy matters, too: the on-device workflow minimizes cloud exposure, but if you save or share the PDF through cloud services, ensure you choose trusted apps and folders with appropriate permissions. Consider password-protecting PDFs created with third-party apps if sensitive content is involved.
Troubleshooting common issues when converting to PDF on iPhone
If you don’t see Save as PDF in the Print flow, make sure you’re using a supported iOS version and the image is viewable in the native Photos or Files app. If the PDF exports with poor quality, re-capture the image at higher resolution, or crop and enhance the image before conversion. If the resulting PDF is too large, compress it using a dedicated app or adjust the image size prior to conversion. Lastly, verify that you’re not attempting to export protected content without the proper permissions.
Best practices and quick-reference checklist
- Always work on a duplicate of the original image to preserve the source.
- Preview orientation and edges in the PDF before saving.
- Use on-device workflows for sensitive material when possible.
- For multi-page PDFs, sort images in the intended order prior to conversion.
- If you need additional features (password protection, OCR, or batch processing), consider a reputable third-party app.
Authority sources
- https://support.apple.com
- https://www.adobe.com
- https://www.nist.gov
Next steps: further resources from PDF File Guide
For deeper insights into mobile PDF workflows, check our guides on PDF creation, editing, and secure sharing. PDF File Guide’s tutorials cover best practices for image-to-PDF conversions, optimization for mobile viewing, and keeping files organized across devices.
Tools & Materials
- iPhone with current iOS version(Ensure you have the latest security updates and the built-in Photos/Files apps available.)
- Photos app(Used for the image-based PDF workflows and the Print-to-PDF path.)
- Files app(Useful for saving or sharing PDFs directly from the Files environment.)
- Printer or Print-to-PDF capability(Not required if you only Save to Files as PDF.)
- Third-party PDF app (optional)(Use for password protection, OCR, or batch processing.)
Steps
Estimated time: 15-25 minutes
- 1
Open the image in Photos
Find the image you want to convert and tap it to view full-screen. This prepares the file for the Share flow.
Tip: If you’re converting a batch, start from the album view and select the images first. - 2
Open the Share menu
Tap the Share icon to reveal the options you’ll use to convert to PDF, including Print and Save to Files.
Tip: The Share icon location varies by model, but it’s usually in the bottom bar. - 3
Choose Print
From the share sheet, select Print to initiate the printer preview that will morph into a PDF when you perform the next step.
Tip: If you don’t see Print, swipe the row to reveal more options. - 4
Create a PDF via pinch-out
In the Print preview, use a two-finger pinch to open the PDF view. This converts the image into a PDF document.
Tip: Ensure the image fits the page before pinching out for best results. - 5
Share or Save the PDF
Tap the Share icon in the PDF view to save to Files, email, or another app as needed.
Tip: Choose a clear file name and an organized folder to simplify retrieval later. - 6
Name and store the final file
In the Save dialog, provide a descriptive file name and select a destination in Files or iCloud Drive.
Tip: A good name includes date and subject for easy future search.
Questions & Answers
Can I convert multiple images into one PDF on iPhone?
Yes. Select multiple images and use the Print-to-PDF method to create a single multi-page PDF. Ordering matters, so arrange images before starting.
Yes—select several photos, use Print to generate a multi-page PDF, and save it where you want.
Do I need internet access to create a PDF on iPhone?
No. The built-in Print-to-PDF workflow runs entirely on-device, so you don’t need an internet connection.
No internet required for the built-in method; it happens offline on your iPhone.
Can I password-protect a PDF created on iPhone?
Password protection is typically available in third-party PDF apps. The built-in workflow does not offer password protection by itself.
Password protection is usually available in dedicated apps; built-in iPhone tools don’t add a password by default.
What image formats can I convert to PDF on iPhone?
Common image formats like JPEG, PNG, HEIC, and TIFF can be converted to PDF using the methods described, as long as they display correctly in Photos or Files.
JPEGs and PNGs are commonly supported, along with HEIC, via the standard iPhone workflows.
Is the PDF output editable after creation?
The PDF created from images is generally not editable as text unless you use an OCR-enabled app to extract text post-creation.
Most PDFs from photos are image-based; use OCR apps if you need editable text.
What should I do if the PDF is blurry or cropped oddly?
Re-take the image with better lighting, ensure the subject is in focus, and crop before converting to improve clarity.
If the PDF looks blurry, re-capture with better lighting and focus, then convert again.
Watch Video
Key Takeaways
- Master on-device PDF creation to protect privacy
- Use Print-to-PDF for quick single-page documents
- Combine multiple images into a single multi-page PDF with care
- Choose Save to Files for organized storage and easy sharing
- Consider third-party apps for extra features when needed