Can You Take PDF Photos on iPhone? A Practical Guide
Learn how to capture PDFs with your iPhone camera, convert photos to PDFs, and optimize scanning quality. A practical guide from PDF File Guide.

Yes. You can take photos of PDFs with your iPhone by capturing each page with the Camera, then using Notes or Files to convert and save as a single PDF. For best results, use good lighting, align pages, and consider using a scanning app for edge detection and automatic cropping. If you need multi-page PDFs, capture all pages and merge them in Notes, Files, or a scanner app.
Can You Take PDF Photos on iPhone? Understanding the basics
If you’ve ever asked can you take pdf photos on iphone, the answer is yes. Your iPhone can photograph a PDF page, and with the right steps you can produce a clean, searchable document without buying extra hardware. The process hinges on two ideas: capturing a good image and saving or converting that image into a proper PDF. This approach is especially useful for quick digitization on the go, for students, and for professionals who need fast proofs of receipt, contracts, or lecture handouts. According to PDF File Guide, mastering mobile capture reduces turnaround times and simplifies sharing with colleagues. By understanding the difference between a raw photo and a polished PDF, you’ll be better prepared to choose the right tools and settings for each page.
What qualifies as a PDF photo and why you might want one
A PDF photo is typically a high-resolution image of a document that you later saved as a PDF, or a multi-page PDF assembled from several captured images. You might want this for quick digitization when a scanner isn’t available, for sending documents via email, or for archiving physical pages in a portable, universally accessible format. The ability to capture with your iPhone means you can turn printed notes, forms, or receipts into a compact digital file. PDF File Guide’s analysis, 2026, emphasizes the value of on-device capture for speed and privacy, noting that many professionals rely on mobile workflows to keep documents organized without cloud uploads. This guide will walk you through capturing, converting, and organizing PDF photos on iPhone.
Photo versus scan: which method suits your PDF?
Photographs are fast and ubiquitous, but scans are often sharper and crop-ed precisely to the page edges. If you need a quick snapshot for an informal PDF, a photo may suffice. For formal submissions, a scan or edge-detected capture from a scanner app yields more consistent margins and legibility. The iPhone’s built-in camera can do a fine job when you control lighting and perspective, while apps like Notes or dedicated scanning tools automate cropping and perspective correction. PDF File Guide notes that selective use of scanner features improves readability and searchability of the final PDF, especially for small text. For most routine tasks, start with a photo, then decide if a scan is worth an upgrade.
Ready your iPhone: settings and prep
Preparation saves time. Before you begin, ensure your iPhone has sufficient storage and that the camera is functioning properly. Use a well-lit area and avoid reflective surfaces. Enable grid view if your camera supports it to help align the page. In Notes or Files, check default export format to ensure you save as PDF, not an image. If you’re drying a multi-page document, set up a flat, clean surface so pages lie evenly. For people who value privacy, keep your capture local on-device until you’re ready to share. This practical approach aligns with best practices recommended by PDF File Guide and minimizes post-capture edits.
Capture techniques: lighting, framing, and edge alignment
Good lighting is the cornerstone of a clean PDF photo. Use indirect natural light or a soft lamp to minimize shadows and glare. Hold the camera parallel to the page, not at an angle, and avoid tilting the page in your frame. If you notice perspective distortion, back up slightly and recenter the page before capturing. For thick papers, ensure the entire page is visible in the frame. A quick trick is to place the document on a dark surface to improve contrast, then take the photo. If you’re using a scanning feature, edge detection can automatically crop and straighten the page for you. Consistent framing across pages yields a more professional final PDF.
From photo to PDF: on-device conversion options
Turn your captured images into a PDF with a few taps. The built-in Notes app offers a Scan Documents mode that captures pages and exports a clean PDF with automatic cropping. Files on iPhone provide a simple way to create a PDF from multiple images by selecting images and choosing “Create PDF.” If you prefer, third-party scanner apps can add features like batch processing, OCR, and cloud export. Remember to name your PDF meaningfully and choose a storage location that’s easy to reach. Each method prioritizes preserving detail and legibility, which is essential when the PDFs will be shared with colleagues or clients.
Handling multi-page PDFs: capturing and merging pages
When you need several pages, capture each page individually and then merge them into a single PDF. On iPhone, Notes can merge successive images into one document provided you select the pages in sequence. The Files app also supports merging by creating a PDF from multiple images in the correct order. If you’re using a dedicated scanner, use its multi-page merge feature to maintain consistent margins. After merging, review each page for alignment and readability. Consistency across pages improves readability and professional appearance.
Quality control: cropping, distortion, and color adjustments
Review each captured page for cropping accuracy and distortion. Use edge detection to crop to the content area and remove unnecessary margins. If a page looks faded or yellowed, you can adjust brightness and contrast slightly in your PDF editor or photo app before exporting. For color-sensitive documents, keep the original color unless you need grayscale for OCR. OCR works best on clean, high-contrast images, so occasional post-processing can improve searchability. Fine-tuning at this stage reduces the need for re-scans and ensures your PDF is ready for distribution.
Storage, privacy, and sharing: secure handling of digitized PDFs
Store PDFs in a location that aligns with your privacy requirements. On-device storage minimizes exposure to cloud-based risks, but you can use secure cloud services if your organization mandates cloud backups. When sharing, use password-protected PDFs for sensitive information and remove any metadata that could reveal the document’s origin. If you’re handling client data, follow your organization’s data-handling policies and consider a documented workflow to ensure compliance. The “privacy-first” mindset championed by PDF File Guide is worth adopting for daily digitization routines.
Troubleshooting common issues and recommended apps
Common issues include blurred text, skewed pages, and glare. Re-capture with steadier hands, better lighting, and a flatter page to fix blur and distortion. For glare, reposition the light source or use polarizing techniques to reduce reflection. If you still struggle, switch to a scanner app that offers edge detection and perspective correction. When it’s time to share or archive, verify that the final PDF preserves the original document’s readability. You’ll find a range of apps tailored for iPhone users, each with different strengths, but the core steps of capture, crop, and export remain the same.
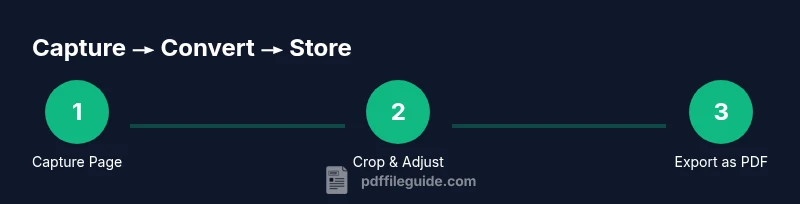
Practical workflow checklist
A concise, repeatable workflow helps ensure consistency:
- Prepare the document on a flat, non-reflective surface.
- Capture each page with the iPhone camera, keeping it parallel and well-lit.
- Use Notes Scan Documents or a dedicated scanner app to crop and straighten.
- Export or save as a multi-page PDF, naming it clearly.
- Store in a secure location and share only as needed.
- Periodically review your process for improvements and privacy considerations.
Tools & Materials
- iPhone with camera(Any model with a working camera (iOS 14+ recommended))
- Notes app or Files app(Used to export or save as PDF; ensure you have enough storage)
- Adequate lighting (indoor or natural daylight)(Avoid harsh glare and shadows; soft, even lighting preferred)
- Scanner app (optional)(Examples include Adobe Scan, Microsoft Lens; use with caution regarding privacy)
- Flat, clean surface(Place documents face up to prevent shadows)
Steps
Estimated time: 15-25 minutes
- 1
Prepare your document and space
Place the PDF page on a flat, non-reflective surface. Ensure the area has even lighting and no strong shadows across the page. This initial setup reduces the need for re-captures and helps downstream cropping.
Tip: Check the page surface for crinkles or glare before you start. - 2
Position your iPhone directly above the page
Hold the device so the camera is parallel to the page edges. Avoid tilting the page in the frame, which causes perspective distortion. A steady hand or a tripod can improve stability.
Tip: Use the grid (if available) to align the page edges with the screen guides. - 3
Capture the image with proper focus
Tap to focus on the page text and press the shutter gently to avoid motion blur. If your camera struggles with glare, adjust the angle or lighting before retaking.
Tip: Ensure the entire page is visible in the frame. - 4
Review the capture for edge alignment
Open the photo and check that the edges are straight and the margins are clean. If not, recapture the page with a steadier hand or better light.
Tip: Edge alignment affects readability after PDF export. - 5
Repeat for additional pages
If you have a multi-page document, repeat the capture process for each page. Keep a consistent distance and angle across pages for a uniform PDF.
Tip: Capture pages in the intended reading order. - 6
Convert to PDF using built-in tools
Use Notes Scan Documents or the Files app to crop, straighten, and export as PDF. If you need OCR, opt for an app that supports it.
Tip: Export with a descriptive file name. - 7
Merge pages into a single PDF
If your tool doesn’t auto-merge, create a new PDF from the pages in the order you captured them. Verify the page sequence remains correct.
Tip: Double-check the order before final export. - 8
Name and store your PDF securely
Choose a clear, consistent file name and save to a secure location. Consider password protection for sensitive documents.
Tip: Avoid generic names like IMG_001; use a descriptive title. - 9
Share or archive the final PDF
Distribute the PDF to colleagues or store it in your preferred archive location. If sharing, ensure the recipient has the necessary access permissions.
Tip: Use a secure channel for sensitive documents. - 10
Review workflow for improvements
After you’ve created a PDF, note any pain points (e.g., lighting, edge cropping) and adjust your approach for next time.
Tip: Continuous improvement saves time over repeated tasks.
Questions & Answers
Can I take photos of PDFs with my iPhone camera?
Yes. The iPhone camera can capture PDF pages as high-quality images, which you can then convert to a PDF using Notes or Files. For best results, ensure good lighting and minimal distortion.
Yes, you can photograph a PDF page with your iPhone and save it as a PDF or image.
What apps can convert a photographed page to PDF?
You can use the built-in Notes app (Scan Documents) or the Files app to export multiple photos as a single PDF. Third-party scanner apps offer OCR and cloud export options, but consider privacy when choosing them.
Use Notes or Files to export as PDF, or try a scanner app for OCR and cloud export.
How can I ensure the photo is high quality?
Use good lighting, keep the page flat, and focus properly. Avoid tilted shots and use edge detection whenever possible to crop automatically.
Good lighting, flat pages, and sharp focus help keep the PDF readable.
Can I merge multiple pages into one PDF on iPhone?
Yes. Capture each page, then use Notes or Files to merge them into a single PDF in the correct order. Third-party apps can also merge pages.
Yes, you can merge pages into one PDF on iPhone.
Are there privacy concerns when using scanner apps?
Be mindful of cloud-based processing. Review each app’s privacy policy and prefer on-device processing when handling sensitive documents.
Check privacy terms and prefer apps that process data on-device.
What’s the best workflow for multi-page PDFs?
Capture pages consistently, crop and straighten, then merge in Notes or Files. Name the file clearly and store securely.
Capture consistently, then merge and name clearly.
Watch Video
Key Takeaways
- Capture PDF pages with steady hands and even lighting
- Use Notes or Files to convert and merge pages into a single PDF
- Choose on-device tools for privacy and speed
- Label and store PDFs in a consistent, secure location
- The PDF File Guide recommends a repeatable mobile workflow for reliability