How to Turn a Screenshot into PDF: A Step-by-Step Guide
Learn practical, step-by-step methods to turn a screenshot into a PDF. This guide covers built-in OS options, online/offline tools, quality tips, and troubleshooting for common issues.

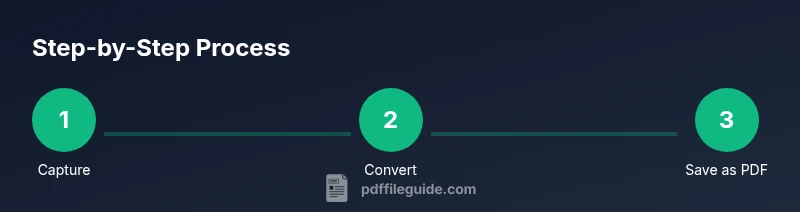
Turn a screenshot into a PDF using built-in print-to-PDF options, browser-based converters, or dedicated apps. This step-by-step guide explains when to choose each method, how to preserve image quality, and how to assemble multi-page PDFs. According to PDF File Guide, starting with a simple print-to-PDF option is often the fastest path for a single image, with solid results for most workflows.
Why turning a screenshot into a PDF streamlines documentation
In professional workflows, capturing on-screen content and saving it as a PDF creates a stable, portable record. PDFs preserve layout, fonts, and colors, making it ideal for receipts, error messages, design previews, and protocol references. This approach helps teams share precise visuals without depending on image viewers that may alter appearance. According to PDF File Guide, converting screenshots to PDFs reduces back-and-forth and ensures a consistent archive for audits, training, and client communications. It also supports annotations, comments, and bookmarking for faster review cycles, which is particularly valuable for project management and compliance teams. By converting to PDF, you gain universal compatibility and tighter control over how your screenshot is viewed and distributed.
Quick comparison of methods: built-in, online, and desktop apps
There are three broad pathways to turn a screenshot into PDF:
- Built-in print-to-PDF on your device (fast and private, but sometimes with fewer formatting options).
- Desktop apps or offline software (more features like page order, compression control, and OCR).
- Online tools (convenient across devices but raise privacy considerations).
For most routine screenshots, the built-in print-to-PDF option provides speed and reliability. If you need multi-page assemblies, richer editing, or OCR, desktop apps or reputable offline tools offer greater control. PDF File Guide cautions that online services should be used only for non-sensitive content and with trusted providers. When privacy matters, prioritize offline workflows to avoid exposing screenshots to external servers. The right choice depends on your device, the content, and whether you require accessibility enhancements or post-processing.
Method A: Print to PDF on Windows
Windows includes a native path to convert images to PDF without installing third-party software. Start with a fresh capture, then leverage the built-in print-to-PDF driver.
Steps:
- Open the screenshot in a basic image viewer or editor (e.g., Photos or Paint). 2) Open the Print dialog (Ctrl+P) and select "Microsoft Print to PDF" as the printer. 3) Adjust orientation, margins, and scale to fit. 4) Click Print and choose a destination and filename. 5) Review the resulting PDF for clarity and page breaks.
Tip: If your screenshot is large, consider resizing to 1920x1080 or similar before printing to balance file size and quality. This approach is fast for single images and respects your device’s native color handling.
Method B: Print to PDF on macOS and iOS
macOS and iOS provide streamlined paths to PDF without extra software. On macOS, you can convert directly from Preview or any app that supports Print. On iOS, the Share or Print options can export to PDF through a pinch-out gesture on the print preview.
Steps for macOS:
- Open the screenshot in Preview. 2) Go to File > Print, or press Command+P. 3) In the bottom-left corner, click the PDF button and choose Save as PDF. 4) Name the file, choose a location, and save. 5) Open the PDF to verify legibility and page breaks.
Steps for iOS:
- Open the screenshot and tap Share. 2) Tap Print. 3) Use the pinch-out gesture on the preview to reveal the PDF view. 4) Tap the Share icon again to Save to Files or Copy to another app. 5) Name and save, then review.
Method C: Desktop apps and offline tools for more control
If you need advanced options—such as combining multiple images into a single PDF, resizing, compression control, OCR, or bookmarks—offline tools and desktop apps excel. Popular options include free editors and reputable paid software that supports batch processing and precise page routing. When selecting a tool, look for lossless export options, color management settings, and accessibility features like OCR and tagging. PDF File Guide emphasizes verifying settings before saving to avoid hidden compression that degrades readability. Offline tools also reduce privacy concerns when handling sensitive content.
Combining multiple screenshots into a single PDF
To assemble a set of screenshots into one document, you can either: a) print each image to PDF and merge the resulting pages with a PDF editor, or b) use a tool that accepts multiple inputs and outputs a single PDF. Reorder pages to reflect your narrative or workflow, insert page breaks, and apply a consistent page size. In many editors, you can drag and drop images into the correct sequence, then export once. This approach is ideal for receipts, logs, or step-by-step guides where a single file provides context.
Maintaining quality: resolution, compression, and color space
Image quality in the PDF depends on the source resolution and how the tool handles compression. When dealing with screenshots, aim for high resolution (the original screenshot resolution is best) and avoid excessive upscaling. Use settings that preserve sharp text, crisp edges, and true color. If your tool offers DPI control, select 150–300 DPI as a balance between readability and file size. For color-critical content, disable heavy compression and choose lossless or near-lossless options. Always preview the exported PDF at 100% zoom to confirm legibility.
Accessibility and searchability considerations
A PDF derived from screenshots is typically image-based, which limits text search unless OCR is applied. If accessibility is important, ensure you run OCR on the PDF and add accessible tags for screen readers. When possible, add a brief alt-text description to each page or create a separate text layer that describes the image content. If you plan to publish the PDF for wider consumption, test with an assistive tech, and confirm that the document maintains logical reading order after any reflow or reordering.
Privacy, security, and best practices for online tools
Online conversion tools offer convenience, but they introduce privacy risks for sensitive content. If you must use an online service, choose reputable providers with strong privacy policies, enable any available client-side processing, and avoid uploading confidential screenshots. For sensitive work, prefer offline methods or trusted enterprise tools that process data locally. Always review the tool’s terms and ensure compliance with your organization’s data governance policies. As noted by PDF File Guide, offline workflows are generally preferable for confidential material.
Handling large PDFs and file management
As you create PDFs from multiple screenshots, plan your file organization. Use clear, consistent naming that includes the project, date, and version. Consider compressing only after assessing readability and searchability. For long-term archives, evaluate whether PDF/A or tagged PDFs support your regulatory or accessibility requirements. Maintain a predictable folder structure and keep a backup of originals in source formats. This discipline reduces confusion during audits or handoffs.
Quick-start workflow checklist for turning screenshots into PDFs
- Capture high-quality screenshots at native resolution.
- Choose a method that suits your privacy needs (print-to-PDF for quick tasks, offline tools for control).
- If combining pages, arrange content in logical order before export.
- Verify readability at 100% zoom and test searchability if OCR is used.
- Name files clearly and store them in an organized folder structure.
- Review security settings when sharing PDFs with others.
Next steps and practical examples
Apply these techniques to real-life tasks like archiving a project briefing, compiling a set of error messages for support, or creating a customer-ready document from a series of screenshots. Practice with a small set of pages first to dial in quality and layout preferences. If you want more visual guidance, the video tutorial linked below demonstrates the exact steps on Windows, macOS, and mobile devices.
Tools & Materials
- Computer or mobile device with screenshot(Have the screenshot ready on the device you’ll use to convert.)
- Web browser or conversion apps(Needed for online tools or offline software.)
- PDF viewer/editor(Aids review, annotation, merging, or OCR if needed.)
- Printer or Save as PDF option(OS-level or app-based PDF output.)
- Sufficient storage(Keep originals and resulting PDFs safely stored.)
- Security-conscious environment(Use offline tools for sensitive content.)
Steps
Estimated time: 45-60 minutes
- 1
Capture the screenshot
Ensure the screenshot clearly shows the content you need. If multiple regions are relevant, capture them separately. Save at the device’s default resolution to preserve quality.
Tip: Use cropping before exporting to keep the image focused. - 2
Decide on the method
Choose between a quick print-to-PDF path or a feature-rich desktop app if you need edits or OCR. Privacy and file size considerations should guide the choice.
Tip: For sensitive content, prefer offline methods. - 3
Open the destination app
Open the image in a viewer or editor or prepare your browser if using an online tool. The goal is to access the Print dialog or export options.
Tip: Keep the original file unmodified in a separate folder. - 4
Use Print-to-PDF or export as PDF
Trigger the Print dialog and select Save as PDF or choose a PDF export option from the menu. Check orientation and margins for best fit.
Tip: Preview the PDF before finalizing. - 5
Name and save the PDF
Use a descriptive, consistent naming convention (e.g., project-date-content.pdf) and select a logical folder.
Tip: Include version or date when creating multiple revisions. - 6
If combining several screenshots
Add all pages to a single document in the desired order. Reorder pages if needed using a PDF editor or Preview.
Tip: Align page sizes to avoid unexpected blank pages. - 7
Review the output
Open the PDF and verify text legibility, page breaks, and image sharpness at 100% zoom.
Tip: Check that links or form fields (if present) function correctly. - 8
Add accessibility touches
If required, run OCR to create a text layer and add tags for screen readers.
Tip: Ensure the reading order matches page layout. - 9
Secure and share
If sharing, consider password protection or encrypted channels for sensitive information.
Tip: Only share with authorized recipients.
Questions & Answers
Can I turn multiple screenshots into a single PDF?
Yes. You can merge pages in a PDF editor or print-to-PDF after arranging the images in order. This keeps related content together for easier sharing.
Yes. You can combine multiple screenshots into one PDF by arranging pages and exporting.
What is the easiest method for Windows?
Use the built-in Print to PDF option from a viewer or editor. This is fast and avoids third-party software. Verify page orientation and margins before saving.
On Windows, the quickest method is to print to PDF from the screenshot app.
How do I save a screenshot as PDF on macOS without third-party apps?
Open the screenshot in Preview or use the Print dialog to Save as PDF. This keeps the process simple and doesn't require extra software.
Mac users can save as PDF directly from the Print dialog.
Are online tools safe for confidential content?
Online tools pose privacy risks. If content is sensitive, use offline methods or trusted providers and review their privacy policies before uploading.
Be cautious about privacy when using online converters.
What about mobile devices?
On iOS and Android, use the share or print options to export as PDF, or save via a mobile PDF app. This provides a quick path from screenshot to document.
Mobile devices offer Print or share-based PDF export.
Why is image quality sometimes poor after conversion?
Quality drops when aggressive compression or scaling occurs. Use higher resolution sources, avoid excessive resizing, and choose lossless settings when possible.
Compression and resizing can reduce clarity; adjust settings.
Watch Video
Key Takeaways
- Choose the method that matches your device and privacy needs.
- Preserve image quality by selecting appropriate resolution and avoiding aggressive compression.
- Avoid online tools for sensitive screenshots; prefer offline methods when possible.
- The PDF File Guide's verdict favors built-in print-to-PDF for quick wins and reliable results.