How to Convert JPG to PDF: A Complete Step-by-Step Guide
Learn practical, privacy-conscious methods to convert JPG files to PDF, with offline and online options, quality tips, and step-by-step workflows for Windows, macOS, and batch conversions.

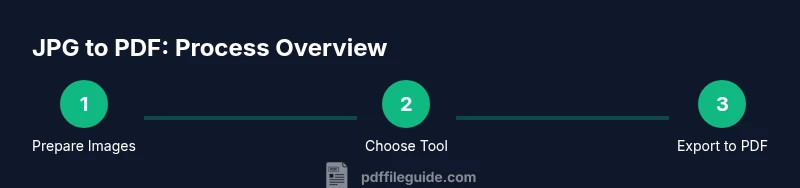
Converting a JPG file to PDF is a common, quick workflow for sharing and printing images as a single document. You can use built-in tools on Windows or macOS, or offline/online converters depending on privacy needs. The key is selecting the right method to preserve image quality, order pages correctly, and save as a single, portable PDF.
What you gain by converting JPG to PDF
Converting JPG to PDF consolidates multiple images into a single, portable document. This reduces sharing friction and ensures that recipients see the exact visual sequence you intend. PDFs preserve layout and fonts regardless of the device or operating system, which is especially helpful for reports, client deliverables, and project briefs that rely on precise image presentation. For many professionals working with scanned receipts, charts, or product photos, a single PDF file is easier to archive than dozens of JPGs. The jpg file to pdf workflow also enables you to control page size, orientation, and color management in one place, making it easier to print or annotate. A well-composed PDF can be password-protected, include bookmarks, and be optimized for different delivery channels, from email to cloud storage. When you choose a method, consider whether you’ll need multiple pages, whether you want searchable text (OCR), and how important it is to preserve original resolution. In short, converting JPGs to PDF streamlines distribution and standardizes viewing conditions across platforms, which is why many editors, marketers, and admins rely on this simple conversion step in daily work.
Formats and quality: JPG vs PDF
A JPG is a raster image with compression that can degrade sharpness if compressed aggressively. A PDF can embed raster images at a chosen resolution and can also archive multiple pages, each with its own compression and color settings. When you convert, you’re balancing image fidelity against file size. For document-grade results, target a DPI between 150 and 300 for printed outputs, and use sRGB color space to ensure colors appear consistent across screens and printers. If you plan to edit later, keep a lossless or minimally compressed source image and export the PDF at a higher fidelity. If you only need the image for on-screen viewing, a lower DPI may suffice to reduce file size. Some tools allow you to preserve metadata, such as the original capture date, camera settings, and color profile; others will strip metadata. Be mindful of color management, sharpening, and interpolation settings, as these choices affect how the final PDF renders on different devices. Ultimately, your choice of DPI, compression, and color space will influence readability, printing quality, and storage requirements.
Methods at a glance: offline vs online tools
Offline methods keep your data on your device and are generally safer for sensitive images. Examples include using Windows 10/11 Print to PDF or macOS Preview; both can create multi-page PDFs from single or multiple JPGs without uploading files to the cloud. Online tools offer convenience when you’re away from your computer, but they introduce privacy risks, especially for confidential images like invoices or personal photos. If you do use online converters, choose reputable providers, read privacy policies, and consider removing data after export. Also, some online services support batch processing and reordering, which can save time when turning a folder of JPGs into a single document. Regardless of the route you pick, verify the resulting PDF by opening it in a viewer, checking each page’s orientation, margins, and any cropping that may have occurred during export. The right balance between speed, privacy, and quality depends on your context.
Batch conversion and page ordering
Batch conversion is a common need when you have many JPGs you want to turn into a single document. Start by organizing files in the intended order and renaming them with a numeric prefix (01, 02, 03) so that the system preserves the sequence automatically. When possible, use a tool that supports multi-page export from a folder, or collect the images into a single folder and select all before exporting. In some apps, you can drag-and-drop images into a preview pane to arrange pages; others require sequential export. After exporting, open the PDF and review every page to confirm order and orientation. If a mismatch occurs, recreate the PDF with corrected order or adjust the source file order before re-exporting. This approach saves time and ensures consistency when compiling catalogs, portfolios, or project dossiers.
Windows: Print to PDF and other built-in options
Windows provides accessible, no-install options to convert JPGs to PDF. Start by locating the image(s) in File Explorer, right-click and choose Print, then select Microsoft Print to PDF as the printer. Set the paper size and photo layout to One Image per Page or Fit to Page depending on your needs, then click Print and choose a destination for the PDF. If you’re combining several JPGs, arrange them in the correct order in the Explorer preview and repeat the export for a single, multi-page document. For batch conversions, Windows 10/11 users can also leverage the built-in Photos app or the Print to PDF feature from the print dialog. Always review the resulting file to ensure integrity and legibility, and consider enabling background printing to speed up the process for large batches.
macOS: Preview and export as PDF
macOS users can leverage Preview for a clean, offline JPG to PDF workflow. Open the first image in Preview, then use the Command key to select additional images in the sidebar and drag them into a single Preview window to assemble a multi-page document. Go to File > Print, or press Command+P, and choose Save as PDF in the bottom-left corner of the print dialog. Name the file, choose a destination, and confirm page size and orientation before saving. If you need to reorder pages after saving, reopen the PDF in Preview, enable thumbnail view, and rearrange pages by dragging thumbnails. This method keeps your data on your device and works well for portfolios and client deliverables that require a consistent presentation.
Google Drive and other online services
Online services can be a quick option when you have internet access and want to avoid installing software. Upload JPGs to your Google Drive, right-click, and choose Open with > Google Docs, then export as PDF. Alternatively, many services offer a direct JPG-to-PDF conversion in one step. If you value privacy, think twice before uploading sensitive documents; online tools may retain or process files on external servers. After conversion, download the PDF to your device and review it carefully for layout, margins, and image sharpness. If you see degradation, try a higher DPI setting or use an offline tool for a more faithful rendering.
Accessibility and quality checks after conversion
Even though JPG is an image format, you can improve accessibility in the resulting PDF by adding OCR text or providing an alternative text layer if the PDF will be read aloud or indexed by search engines. Tools such as OCR software or built-in OCR features in PDF editors can create a text layer that matches the visible content. Check that bookmarks or a simple table of contents reflect the page order, especially for multi-page JPG collections like slides or reports. Verify that color contrast, margins, and legibility meet your needs by printing a test copy or viewing on multiple devices. Finally, consider reducing file size through compression settings only after confirming that essential detail remains intact in print and on screen. The goal is a readable, archivable document that maintains visual fidelity across platforms.
Authority and best practices
To reinforce best practices, this guide cites trusted sources about PDF handling and conversion. For technical guidance on PDF features and accessibility, you can consult official documentation and major publications. Refer to the following sources for deeper understanding and advanced techniques: • Adobe PDF open parameters and related specifications • Google Drive help on converting images to PDF • PDF Association resources on portable document formats
Troubleshooting common issues
Sometimes, a single JPG may export as an oversized image, or the resulting PDF may have black margins, cropped edges, or misalignment. If you encounter this, check your export settings for page size, orientation, and margins; ensure the source images are in the intended order; and consider alternate methods (offline tools) that preserve more of the original image area. If color looks off, verify the color profile used during export (sRGB is a common standard) and re-export with adjusted settings. For multiple pages, confirm that only the intended images were included and that no stray files were bundled into the PDF.
Tools & Materials
- Computer or mobile device(With internet access or offline tools available)
- JPG image files(Organize in desired order and clarity)
- Web browser or PDF-capable app(For offline: Windows Print to PDF or macOS Preview; For online: cloud storage with PDF export)
- PDF viewer/editor (optional)(Helpful for verifying or editing the final PDF)
- Stable internet (optional for online tools)(Not required for offline methods)
Steps
Estimated time: 15-25 minutes
- 1
Prepare and organize JPGs
Gather all JPG files you want to include and arrange them in the exact order you want them to appear in the final PDF. If necessary, rename files with numeric prefixes to enforce the sequence.
Tip: Renaming with prefixes like 01, 02, 03 helps automatic ordering in many tools. - 2
Open the chosen conversion method
Open the first image in the selected app (Windows Photos, macOS Preview, or a cloud-based service). If using a batch method, ensure all desired images are selected and ready for export.
Tip: For batch workflows, keep all images in a single folder to simplify selection. - 3
Choose PDF export option
In the tool’s menu, select the option to export or print to PDF. Verify that the destination, page size, and orientation match your needs before proceeding.
Tip: Check that the export preserves your chosen page size and margins. - 4
Arrange pages and export
If your tool supports multi-page export, ensure pages are in the correct order and export to a single PDF file. If not, export each image to a temporary multi-page PDF or use an editor to combine pages.
Tip: Review the final PDF for correct page order and minimal cropping. - 5
Verify the final PDF
Open the resulting file to confirm all pages are present, legible, and correctly oriented. If any issue is found, re-export with adjusted settings or reorder source images and try again.
Tip: Always test on the device/platform where the file will be used.
Questions & Answers
What is the simplest way to convert a JPG to PDF?
The quickest approach is to use built-in tools: Windows Print to PDF or macOS Preview. Open the image, choose Print or Export as PDF, and save. This requires no extra software and works well for a single image.
Use your operating system’s built-in print-to-PDF or export-to-PDF feature for a fast, no-install solution.
Can I merge several JPGs into one PDF?
Yes. Use a multi-page export capability or arrange images in a viewer and export all together as a single PDF. This is ideal for slides, catalogs, or photo albums.
You can combine multiple images into one PDF by exporting all selected images at once.
Will the image quality be reduced during conversion?
Quality depends on the target DPI and compression settings. For printing, aim for 150-300 DPI; for on-screen viewing, 72-150 DPI may suffice. Some online tools may compress more aggressively, so choose offline options if quality matters.
Quality depends on DPI and compression; pick higher DPI for print and verify results.
Is it safe to use online JPG-to-PDF converters?
Online converters can expose data to third parties. Use offline methods for confidential content, and if you use online tools, read the privacy policy and delete data after export.
Online tools carry privacy risks, so prefer offline methods for sensitive files.
How do I preserve color and DPI settings after conversion?
Select an appropriate DPI (usually 150-300 for print) and ensure color space is set to sRGB or the project's standard. Some tools let you preview output before exporting to verify accuracy.
Set the DPI and color settings before exporting to keep colors and sharpness consistent.
Can I edit a PDF after converting JPGs?
Yes, with a PDF editor you can reorder pages, annotate, or add text. If you need editable text, consider OCR-enabled tools to create a text layer.
You can edit after export using a PDF editor or OCR-enabled tool for text layers.
Watch Video
Key Takeaways
- Plan page order before exporting.
- Choose offline methods for sensitive content.
- Check DPI and color settings to balance quality and size.
- Verify the final PDF for readability and layout.